Homemade Pasta: Fresh & Flavorful Creations – Your Ultimate Guide to Making Pasta from Scratch!
- Sailnovo Pasta Maker Machine, 180 Roller Pasta Maker, 9 Adjustable Thickness Settings 2-in-1 Noodles Maker with Rollers and Cutter, Perfect for Spaghetti, Fettuccini, Lasagna or Dumpling Skin Silver
- MARCATO Made in Italy Atlas 150 Classic Manual Pasta Maker Machine, Chrome Steel. Makes Lasagna, Fettuccine & Tagliolini .
- Nuvantee Pasta Maker with 7 Adjustable Thickness Settings – 2 in 1 Noodle Maker with Rollers and Cutter, Make Spaghetti, Fettuccini, Lasagna, & More
There’s something uniquely satisfying about a bowl of freshly made pasta. The aroma, the tender texture, the way it perfectly cradles your favorite sauce – it’s an experience far beyond anything a box from the supermarket can offer. If you’ve ever thought about making homemade pasta but felt intimidated, fear not! This guide will walk you through every step, transforming flour and eggs into fresh, flavorful creations that will impress everyone at your table. Get ready to embark on a delicious culinary adventure!
Why Make Your Own Fresh Pasta?
Beyond the incredible taste and texture, there are many reasons to fall in love with making pasta from scratch:
- Superior Flavor: Fresh pasta has a richer, more nuanced flavor than dried varieties.
- Perfect Texture: It’s wonderfully tender and absorbs sauces beautifully.
- Customization: You control the ingredients, shape, and even the thickness.
- Therapeutic Process: Kneading and rolling can be incredibly relaxing and rewarding.
- Impress Your Guests: Nothing says “culinary expertise” like a platter of homemade pasta!
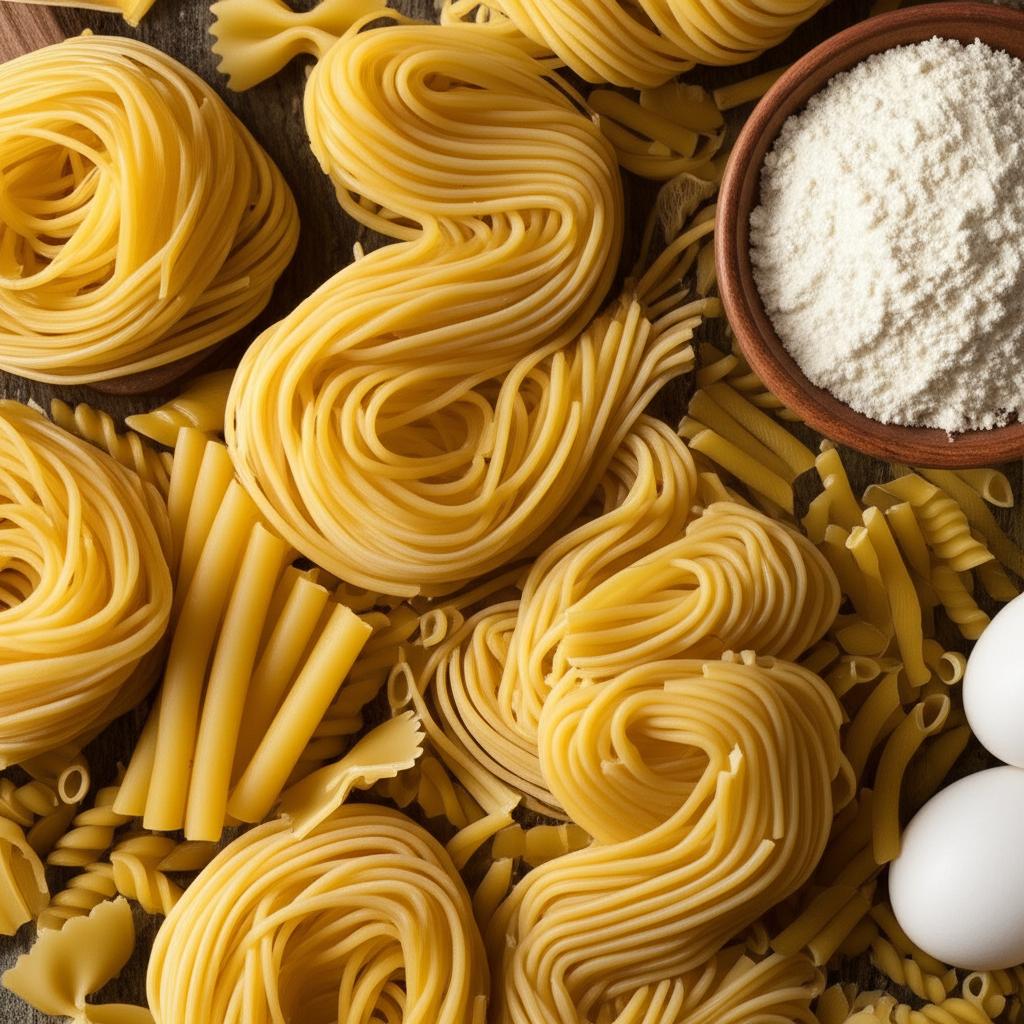
What You’ll Need: Simple Ingredients, Big Flavor
One of the most beautiful aspects of homemade pasta is its simplicity. You only need a few basic ingredients:
- All-Purpose Flour (or ’00’ Flour): While standard all-purpose flour works wonderfully, ’00’ flour is a finely milled Italian flour that creates an incredibly silky and tender pasta. Experiment with both!
- Large Eggs: Eggs provide richness, color, and structure to your pasta. Fresh, good-quality eggs make a difference.
- A Pinch of Salt: Enhances the flavor of the pasta itself.
- Optional: A Drizzle of Olive Oil: Some recipes include a teaspoon or two for added elasticity and a little richness.
Essential Equipment (No Fancy Gadgets Required!)
You don’t need a professional kitchen to make amazing pasta. Here’s what’s helpful:
- Large Mixing Bowl or a Clean, Spacious Work Surface: For mixing and kneading your dough.
- Fork or Dough Scraper: To initially mix the wet and dry ingredients.
- Rolling Pin or Pasta Machine: A rolling pin is perfectly traditional and effective. A manual or electric pasta machine makes rolling consistently thin sheets much easier and faster.
- Sharp Knife or Pasta Cutter Attachment: For shaping your pasta.
- Baking Sheets and/or a Pasta Drying Rack: To dry and store your freshly cut pasta.
- Clean Kitchen Towel or Plastic Wrap: For resting the dough.
Step-by-Step Guide: Making Your Fresh Pasta Dough
This classic egg pasta recipe is the foundation for almost any shape you desire.
Step 1: Create the Flour Volcano
- On your clean work surface (or in a large bowl), mound your flour (typically 2 cups for 2-3 servings).
- Using your fingers or the bottom of a bowl, create a well in the center of the flour, like a volcano crater. Make sure the walls are sturdy enough to hold the liquid.
Step 2: Add Eggs and Mix
- Crack your eggs into the center of the well (usually 2 large eggs per cup of flour, or 4 large eggs for 2 cups of flour). Add the pinch of salt and optional olive oil.
- Using a fork, gently whisk the eggs in the center, gradually incorporating small amounts of flour from the inner walls of the well.
- Continue mixing until a thick, shaggy dough forms. It will likely look like a sticky mess – that’s perfectly normal!
- If mixing in a bowl, use your hands to bring the dough together.
Step 3: Kneading to Perfection
This is arguably the most important step for developing the gluten structure that gives pasta its chew and elasticity.
- Once the dough is mostly together, scrape it onto your clean work surface.
- Begin kneading the dough. Use the heel of your hand to push the dough away from you, then fold it back over itself, turn it slightly, and repeat.
- Knead for 10-15 minutes. It will feel stiff at first, but as you knead, it will become smooth, elastic, and springy. The surface should look uniform and feel like a firm, bouncy ball. It shouldn’t stick to your hands or the surface.
- If the dough feels too dry and crumbly, add a tiny bit of water (½ teaspoon at a time). If it’s too sticky, add a tiny bit of flour. Go slow with additions!
Step 4: The All-Important Rest
- Form the kneaded dough into a ball.
- Wrap it tightly in plastic wrap or place it in a bowl covered with a damp kitchen towel.
- Let the dough rest at room temperature for at least 30 minutes (or up to an hour). This allows the gluten to relax, making the dough much easier to roll thinly without snapping back. Do not skip this step!
Step-by-Step Guide: Rolling and Cutting Your Pasta
Now for the fun part – transforming that beautiful dough into pasta!
Step 5: Prepare to Roll
- Lightly dust your work surface and rolling pin (or pasta machine) with flour.
- Unwrap your dough. If it’s a large batch, divide it into 2-4 manageable portions, keeping the unused portions covered so they don’t dry out.
- Flatten one portion of dough into a rough rectangle.
Step 6: Rolling the Dough (Choose Your Method!)
Method A: Rolling by Hand (Traditional Charm)
- Using a rolling pin, start from the center and roll outwards, turning the dough frequently to keep it round or rectangular.
- Dust with flour as needed to prevent sticking, but don’t overdo it.
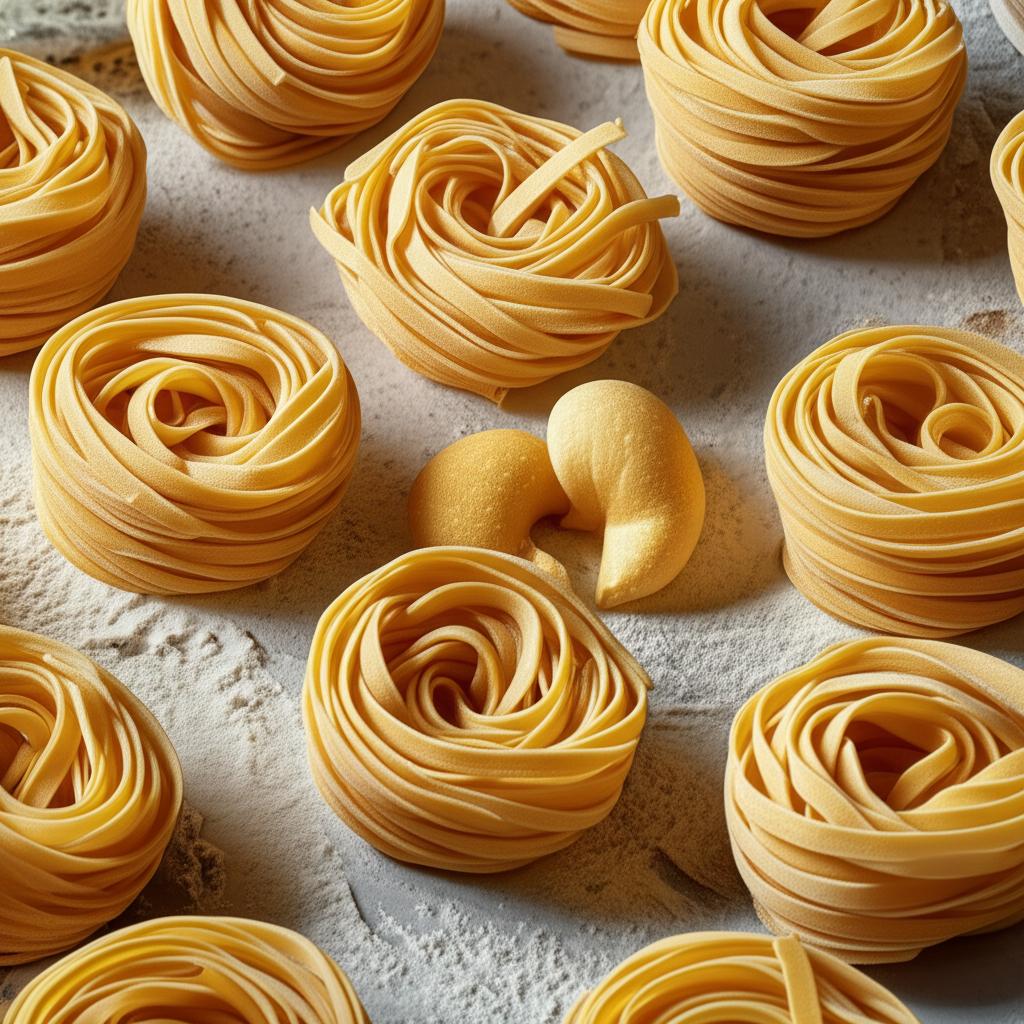
- Roll until the dough is paper-thin – almost transparent! You should be able to see your hand through it. This takes practice but is incredibly rewarding.
Method B: Rolling with a Pasta Machine (Efficiency!)
- Set your pasta machine to its widest setting (usually ‘0’ or ‘1’).
- Feed the flattened dough through the rollers.
- Fold the dough in thirds (like a letter) and feed it through the widest setting again. Repeat this 2-3 times until the dough strip is smooth and uniform. This conditions the dough.
- Gradually decrease the thickness setting, passing the dough through each setting once or twice, until you reach your desired thickness. For most shapes, setting 6 or 7 (out of 9 for many machines) is ideal. The dough should be thin enough to be slightly translucent.
- Lay the thin pasta sheets on a lightly floured surface or a clean kitchen towel.
Step 7: Cutting Your Pasta
Once your sheets are rolled, it’s time to cut them into your desired shape! Lightly dust the rolled sheets with flour before cutting to prevent sticking.
- Fettuccine or Tagliatelle: Gently fold the thin pasta sheet into thirds or roll it loosely into a log. Using a sharp knife, slice the dough into strips about ¼ to ½ inch wide. Unfurl the strands immediately and toss them gently with a little flour to prevent sticking.
- Lasagne Sheets: Cut your long, thin pasta sheets into rectangles of your desired size.
- Pappardelle: Cut wider strips, about ¾ to 1 inch wide.
- Ravioli, Tortellini, Farfalle: These shapes require specific cutting or folding techniques, but all start with a thin pasta sheet!
Step 8: Drying Your Fresh Pasta
Once cut, fresh pasta needs to dry slightly before cooking or storing. This prevents it from sticking together.
- Lightly dust the cut pasta with a little extra flour and gently toss it.
- Spread the pasta in a single layer on a lightly floured baking sheet, a clean kitchen towel, or hang it on a pasta drying rack.
- Let it dry for 15-30 minutes at room temperature. It should feel slightly firm to the touch, not sticky.
- For longer storage (more than a day), you’ll need to completely dry the pasta (several hours to overnight, depending on humidity) until it’s brittle, then store in an airtight container. Alternatively, fresh pasta can be frozen immediately after cutting for up to a month.
Step-by-Step Guide: Cooking Your Fresh Pasta
Fresh pasta cooks much faster than dried!
Step 9: Boil, Boil, Boil!
- Bring a large pot of generously salted water to a rolling boil. Remember the Italian saying: “Salt the water like the sea.” This seasons the pasta from the inside out.
Step 10: Cook Quickly!
- Add your fresh pasta to the boiling water. If you have a lot, cook it in batches to avoid overcrowding the pot, which can lower the water temperature and make the pasta gummy.
- Fresh pasta cooks very quickly! Depending on its thickness, it will be al dente (tender with a slight bite) in 1-4 minutes. Start tasting after 60-90 seconds.
Step 11: Drain and Sauce
- Do not rinse your pasta! The starches clinging to the pasta help the sauce adhere.
- Using tongs or a spider strainer, transfer the pasta directly into your warmed sauce. Alternatively, drain well in a colander.
- Reserve a cup of the pasta cooking water before draining. This starchy water can be added to your sauce to help emulsify it and create a silky consistency.
- Toss the pasta with the sauce, allowing it to coat every strand. Serve immediately!
Top Tips for Pasta-Making Success
- Quality Ingredients: While simple, the better your flour and eggs, the better your pasta will taste.
- Don’t Skimp on Kneading: This is the workout for your dough. Proper kneading builds gluten, resulting in resilient, chewy pasta.
- Trust the Rest: The resting period is crucial for relaxing the gluten, making the dough easier to roll and less prone to tearing.
- Dust, Dust, Dust (But Don’t Overdo It): A light dusting of flour prevents sticking during rolling and cutting. Too much flour will dry out your dough.
- Roll Thinly: For most pasta shapes, thin is in! It ensures a tender bite and proper cooking.
- Practice Makes Perfect: Your first batch might not be flawless, and that’s okay! Each time you make pasta, you’ll learn and improve.
Common Pasta-Making Mistakes to Avoid
- Too Much Flour (or Too Little Water): Leads to a dry, crumbly dough that’s difficult to knead and roll. Add liquid in tiny increments if needed.
- Not Kneading Enough: Results in a weak, soft, or overly chewy pasta that lacks structure and can fall apart when cooked.
- Skipping the Rest: Your dough will be very elastic and spring back continually, making it incredibly frustrating to roll thinly.
- Rolling Too Thick: The cooked pasta will be gummy and heavy. Remember: paper-thin is the goal.
- Overcrowding the Pot: When too much pasta is added to too little water, the temperature drops, and the pasta releases excess starch, leading to sticky, clumpy results.
Serving Your Homemade Masterpiece
Once you’ve made your fresh pasta, the serving possibilities are endless!
- Simple Butter & Parmesan: Let the pasta’s fresh flavor shine.
- Classic Marinara or Pesto: Timeless and delicious.
- Hearty Ragu or Bolognese: Fresh pasta truly elevates a rich meat sauce.
- Agli e Olio: Garlic and olive oil, a quick and flavorful option.
Making homemade pasta is more than just cooking; it’s an experience. It connects you to culinary traditions, allows for creative expression, and culminates in a meal that is truly a labor of love. So, roll up your sleeves, embrace the flour, and get ready to enjoy the unparalleled taste of fresh & flavorful creations from your very own kitchen. Happy pasta making!
- Sailnovo Pasta Maker Machine, 180 Roller Pasta Maker, 9 Adjustable Thickness Settings 2-in-1 Noodles Maker with Rollers and Cutter, Perfect for Spaghetti, Fettuccini, Lasagna or Dumpling Skin Silver
- MARCATO Made in Italy Atlas 150 Classic Manual Pasta Maker Machine, Chrome Steel. Makes Lasagna, Fettuccine & Tagliolini .
- Nuvantee Pasta Maker with 7 Adjustable Thickness Settings – 2 in 1 Noodle Maker with Rollers and Cutter, Make Spaghetti, Fettuccini, Lasagna, & More
FAQ
Q. Why bother making pasta at home instead of buying it from a store?
A. Fresh homemade pasta offers a remarkably superior flavor and texture compared to most store-bought dried varieties. It has a delightful chewiness and a rich, fresh taste that truly elevates any dish. Making it yourself also allows for complete control over ingredients, customization of flavors, and the immense satisfaction of creating something delicious from scratch.
Q. What are the essential ingredients for making basic egg pasta?
A. For a classic, versatile egg pasta, you’ll primarily need good quality flour (either ’00’ flour or all-purpose flour works well), fresh large eggs, and a small pinch of salt. Some recipes might call for a tiny amount of water or olive oil to adjust the dough’s consistency based on humidity and egg size.
Q. Is a pasta machine absolutely necessary to make homemade pasta?
A. While a pasta machine (manual or electric) significantly simplifies the rolling and cutting process, ensuring uniform thickness and consistency, it is not strictly necessary. You can achieve excellent results using just a sturdy rolling pin and a sharp knife. Be prepared for a bit more physical effort and practice to get thin, even sheets.
Q. How long does it typically take to make homemade pasta from start to finish?
A. The hands-on time for mixing, kneading, and initial dough preparation is usually about 15-20 minutes. The dough then requires a crucial resting period of at least 30 minutes (up to an hour) to allow the gluten to relax, making it easier to roll. Rolling and cutting the pasta can take another 20-40 minutes depending on your experience and equipment. So, budget approximately 1 to 2 hours for the entire process.
Q. What’s the best way to store fresh homemade pasta?
A. Fresh pasta can be stored in a few ways:
* Refrigerated: Lightly dust the pasta with flour, form it into small nests, and store in an airtight container in the refrigerator for 1-2 days.
* Frozen: Dust well with flour, arrange the pasta in a single layer on a baking sheet, and freeze for 15-30 minutes until firm. Then transfer to a freezer-safe bag or container for up to 1 month. Cook directly from frozen in boiling water.
* Dried: For longer storage, hang the pasta on a drying rack or lay it on floured baking sheets until it becomes completely brittle (this can take 12-24 hours depending on humidity). Once fully dry, store it in an airtight container at room temperature for several weeks.
Q. My pasta dough is either too sticky or too dry. What should I do?
A. Dough consistency is key and can be influenced by flour type, egg size, and humidity.
* If your dough is too sticky: This indicates too much liquid. Gradually add very small amounts (a teaspoon at a time) of flour, kneading thoroughly after each addition until the dough is smooth, pliable, and no longer sticks to your hands.
* If your dough is too dry or crumbly: This means not enough liquid. Add water or a few drops of olive oil, again, a tiny amount at a time, kneading until the dough comes together into a cohesive, elastic ball. Be patient and adjust gradually.
Q. Can I experiment with different types of flour or add flavors to my homemade pasta?
A. Absolutely! While ’00’ flour and all-purpose flour are standard, you can definitely experiment. Semolina flour (from durum wheat) is excellent for a chewier texture, particularly good for shapes like orecchiette or cavatelli. Whole wheat flour can be used for a nuttier flavor and added fiber, though it might result in a denser texture. For flavored pasta, you can incorporate ingredients like spinach puree for green pasta, beet puree for red, squid ink for black, or even herbs and spices mixed directly into the dough.