The Perfect Pizza: From Dough to Delicious – Your Ultimate Homemade Guide
- HANS GRILL PIZZA STONE | Rectangular Pizza Stone For Oven Baking & BBQ Grilling With Free Wooden Peel | Extra Large 15 x 12″ Inch Durable Cordierite Cooking Stone.
- Unicook Pizza Stone, Heavy Duty Cordierite Pizza Pan for Oven and Grill, Thermal Shock Resistant Baking Stone for Bread, 15 X 12 Inch Rectangular, 6.6 lbs
- Cuisinart 3 Piece Pizza Grilling Pack, 13” Round Pizza Stone for Grill with Cutter and Foldable Stainless Steel Peel, Complete Set to Build Your Own Pizzas at Home
There’s something truly magical about a homemade pizza. The aroma filling your kitchen, the satisfying crunch of a perfectly baked crust, and the freedom to pile on your favorite toppings – it’s an experience that store-bought simply can’t match. But achieving that “perfect pizza” can feel like a culinary quest.
Fear not, fellow food adventurers! This comprehensive guide will take you on a delicious journey, from crafting the ideal dough to pulling a golden, bubbling masterpiece from your oven. Get ready to transform simple ingredients into an extraordinary meal, all with a friendly, helpful hand every step of the way.
1. The Foundation: Perfect Pizza Dough
The dough is the heart and soul of your pizza. Get this right, and you’re halfway to perfection. It needs to be pliable, flavorful, and capable of achieving that delightful chew.
What You’ll Need (Simple Ingredients for Amazing Results):
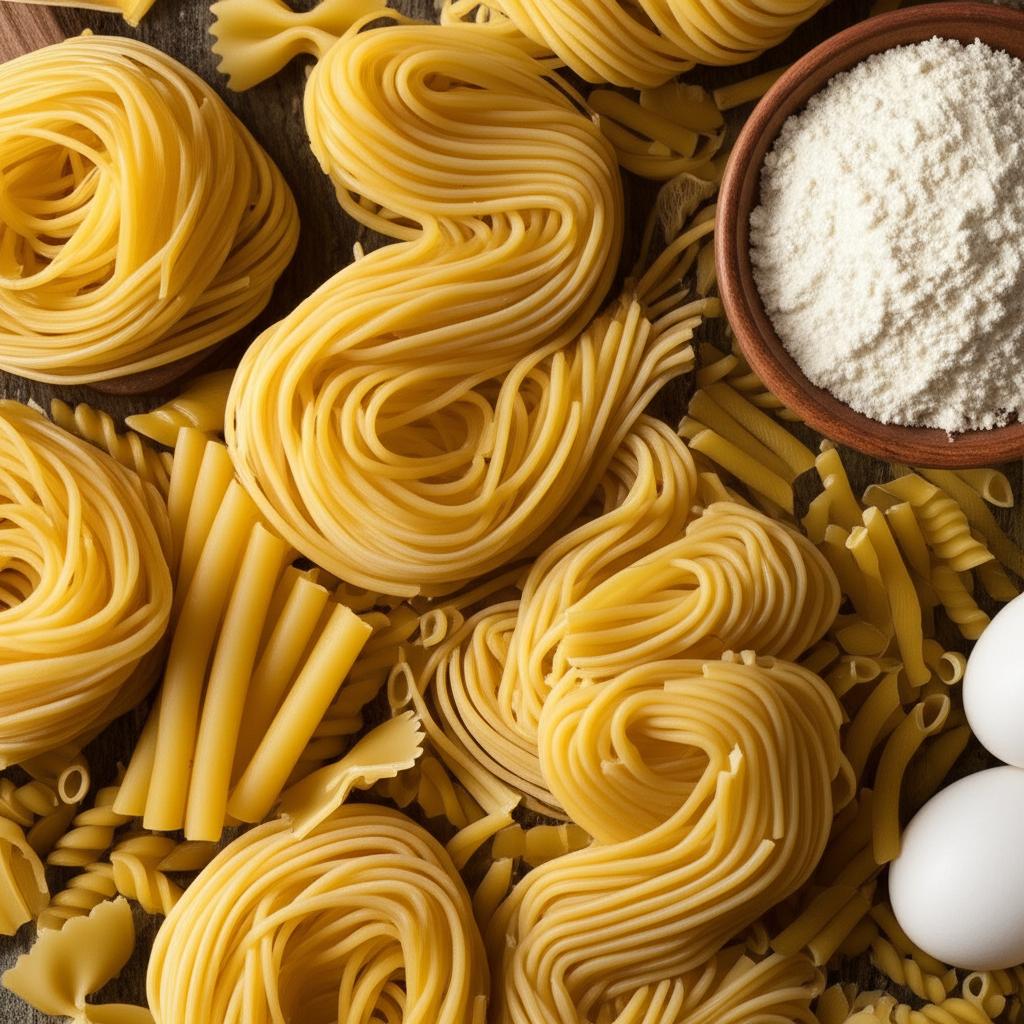
- Flour: Bread flour is ideal for its higher protein content, which develops strong gluten for a chewy crust. All-purpose flour can work, but the results might be slightly less chewy.
- Water: Lukewarm water (around 105-115°F or 40-46°C) is crucial for activating the yeast.
- Yeast: Active dry yeast or instant yeast. Both work well; instant yeast can often be mixed directly with dry ingredients, while active dry typically needs to be proofed first.
- Salt: Essential for flavor and to regulate yeast activity. Don’t skip it!
- Olive Oil: Adds flavor, tenderness, and helps with browning.
Step-by-Step Dough Making:
- Activate the Yeast (if using active dry): In a large bowl, combine your lukewarm water with a pinch of sugar (feeds the yeast). Sprinkle the yeast over the water. Let it sit for 5-10 minutes until it becomes foamy. If it doesn’t foam, your yeast might be old or the water temperature was off – start again with fresh yeast!
- Combine Ingredients: If using instant yeast, mix it directly with your flour and salt in a large bowl. If you proofed active dry yeast, add the flour, salt, and olive oil to the foamy yeast mixture.
- Mix: Use a sturdy spoon or your hands to mix until a shaggy dough forms. It will look a bit rough, but that’s normal.
- Knead: Turn the dough out onto a lightly floured surface. Knead for 8-10 minutes until the dough is smooth, elastic, and springs back when gently poked. This develops the gluten, which gives your pizza its structure and chew. You can also use a stand mixer with a dough hook for about 6-8 minutes.
- First Rise (Bulk Fermentation): Lightly oil a clean bowl. Place the dough in the bowl, turning it once to coat. Cover the bowl tightly with plastic wrap or a damp towel. Let it rise in a warm, draft-free place until doubled in size (this typically takes 1-2 hours, depending on room temperature).
- Punch Down & Portion: Once doubled, gently punch down the dough to release the air. Divide it into portions (usually 2-4, depending on your desired pizza size).
- Second Rise (Optional but Recommended): Form each portion into a ball. Place them on a lightly floured surface, cover loosely, and let them rest for another 15-30 minutes. This relaxes the gluten, making the dough easier to stretch.
Common Dough Mistakes to Avoid:
- Too much flour: This makes the dough tough and dry. Resist the urge to add excessive flour during kneading. A slightly sticky dough is often a good thing.
- Not kneading enough: Under-kneaded dough won’t develop enough gluten, resulting in a dense, bread-like crust rather than a chewy, airy one.
- Cold environment: Yeast loves warmth! If your room is too cold, your dough won’t rise properly.
- Rushing the rise: Patience is key! Don’t cut the rising time short; a slow rise develops better flavor.
2. The Heart of the Pizza: Sauce & Cheese
Once your dough is resting, turn your attention to the delicious layers that will top it.
The Sauce: Keep it Simple, Make it Flavorful
For a classic pizza, less is often more with the sauce. A vibrant, fresh sauce allows the other ingredients to shine.
- The Best Base: Start with high-quality canned crushed tomatoes (San Marzano are a favorite for their sweetness, but any good quality crushed tomato will work).
- Flavor Boosters: Stir in a clove of minced garlic, a pinch of dried oregano or basil, a little salt, and a dash of olive oil.
- No Cook Required: For a truly fresh taste, there’s no need to cook your pizza sauce. The flavors will meld beautifully in the hot oven.
The Cheese: The Gooey Perfection
Choosing the right cheese makes all the difference in texture and taste.
- The Classic: Low-moisture, whole-milk mozzarella is your best friend. It melts beautifully, stretches wonderfully, and doesn’t release too much water, which can make your crust soggy.
- Fresh Mozzarella: If using fresh mozzarella (the kind packed in water), be sure to blot it dry thoroughly with paper towels and tear it into smaller pieces. This prevents excess moisture from making your pizza watery.
- Adding Complexity: Feel free to mix in other cheeses like grated Parmesan, Pecorino Romano, or even a little provolone for added depth of flavor.
3. The Creative Canvas: Toppings
This is where your personality shines! But remember, balance is key.
Tips for Topping Success:
- Less is More: This is the golden rule of pizza toppings. Overloading your pizza leads to a soggy crust that struggles to cook through. Aim for a balanced distribution that allows each ingredient to shine.
- Prepare Ahead: Cook any meats (sausage, pepperoni, chicken) before adding them to the pizza. Raw meats won’t cook thoroughly in the short oven time.
- Pre-Cook Veggies (Sometimes): For watery or denser vegetables like mushrooms, onions, or peppers, a quick sauté beforehand can enhance their flavor and prevent them from releasing too much moisture on your pizza.
- Cut Evenly: Slice your toppings into similar, manageable sizes for even cooking and easier eating.
- Layer Strategically:
- Sauce first (a thin, even layer).
- Half your cheese (this creates a barrier for wet toppings).
- Your toppings.
- Remaining cheese (this helps hold everything in place and creates a beautiful top crust).
4. The Grand Finale: Baking Your Masterpiece
The final act is crucial. A super hot oven is the secret to a perfectly crispy crust and bubbly, golden cheese.
Essential Equipment:
- Pizza Stone or Steel: These are game-changers! They absorb and retain heat, providing an intensely hot surface that mimics a professional pizza oven, resulting in a crispier crust. Place it in your oven before preheating.
- Pizza Peel: A large, flat paddle used to slide the pizza into and out of the oven. Dust it with a generous amount of cornmeal or semolina to prevent sticking.
Step-by-Step Baking:
- Preheat Your Oven: This is perhaps the MOST CRUCIAL STEP. Place your pizza stone or steel in the oven and preheat your oven to its highest possible temperature (usually 500-550°F or 260-290°C). Let it preheat for at least an hour – this allows the stone/steel to get screaming hot.
- Shape the Dough: On a lightly floured surface or a piece of parchment paper, gently stretch or roll your dough to your desired thickness and shape. If the dough springs back, let it rest for a few minutes to relax the gluten.
- Transfer to Peel: Carefully transfer your shaped dough to your cornmeal-dusted pizza peel. Work quickly once the dough is on the peel to add toppings, as it will start to stick.
- Top Your Pizza: Add your sauce, cheese, and toppings as desired.
- Launch Your Pizza: Carefully slide the pizza from the peel onto the preheated stone/steel in the oven. A quick, decisive jerk motion works best.
- Bake: Bake for 8-15 minutes, rotating halfway through if your oven has hot spots. Look for a beautifully golden, bubbly crust and melted, slightly browned cheese.
- Rest & Slice: Carefully remove the pizza from the oven using your peel. Transfer it to a cutting board. Let it rest for 2-5 minutes before slicing. This allows the cheese to set and prevents toppings from sliding off.
Common Baking Mistakes to Avoid:
- Not preheating long enough: A cool stone/steel equals a soggy, undercooked crust. Don’t rush the preheating!
- Oven temperature too low: Pizza needs high heat to cook quickly and achieve that desirable crispness.
- Opening the oven too often: Every time you open the door, you lose precious heat. Trust your oven and your preheating.
- Slicing immediately: This can cause the cheese and toppings to slide off, leading to a messy slice. Patience for a few minutes pays off!
Enjoy Your Homemade Masterpiece!
There you have it! From a simple ball of dough to a mouth-watering creation, you now possess the knowledge and confidence to make the perfect pizza right in your own kitchen. Don’t be afraid to experiment with different toppings and techniques. Each pizza you make will teach you something new, bringing you closer to your ultimate perfect pie.
So, gather your ingredients, fire up that oven, and get ready to enjoy the incredible taste of truly homemade deliciousness. Happy pizza making!
- HANS GRILL PIZZA STONE | Rectangular Pizza Stone For Oven Baking & BBQ Grilling With Free Wooden Peel | Extra Large 15 x 12″ Inch Durable Cordierite Cooking Stone.
- Unicook Pizza Stone, Heavy Duty Cordierite Pizza Pan for Oven and Grill, Thermal Shock Resistant Baking Stone for Bread, 15 X 12 Inch Rectangular, 6.6 lbs
- Cuisinart 3 Piece Pizza Grilling Pack, 13” Round Pizza Stone for Grill with Cutter and Foldable Stainless Steel Peel, Complete Set to Build Your Own Pizzas at Home
FAQ
Q. What is the most crucial step for achieving a perfect pizza dough texture, according to “The Perfect Pizza”?
A. The book emphasizes that the most crucial step is proper hydration combined with a slow, cold fermentation (often in the refrigerator for 24-72 hours). This extended period allows the gluten to develop fully, flavors to deepen, and results in a more extensible, airy, and digestible crust with a superior crumb structure.
Q. What’s the ideal oven temperature and cooking surface recommended in “The Perfect Pizza” for achieving a crispy crust?
A. “The Perfect Pizza” strongly recommends baking at the highest possible temperature your home oven can reach (typically 500-550°F or 260-290°C), utilizing a preheated pizza stone or steel. This intense, direct heat is key to quickly cooking the dough, ensuring a crisp bottom and a wonderfully puffed, chewy crust.
Q. My pizza often turns out soggy in the middle. How does “The Perfect Pizza” address this common issue?
A. The book tackles sogginess by advising several techniques: thoroughly draining fresh mozzarella and other high-moisture toppings, pre-cooking or dehydrating certain vegetables, and, crucially, not overloading the pizza. It also reiterates the importance of a very hot oven and a preheated baking surface to rapidly cook the base from underneath.
Q. How important is the quality of ingredients, especially flour and tomatoes, according to the principles of “The Perfect Pizza”?
A. “The Perfect Pizza” places immense importance on ingredient quality, asserting that it’s fundamental to the final product’s flavor and texture. It advocates for specific types of flour (like ’00’ flour or high-protein bread flour for optimal gluten) and premium crushed tomatoes (such as San Marzano), arguing that superior foundational ingredients elevate the entire pizza experience.
Q. Can I prepare the pizza dough ahead of time, and how long can it be stored, based on “The Perfect Pizza” guidelines?
A. Yes, “The Perfect Pizza” strongly encourages preparing dough in advance. It can be refrigerated for 2-5 days, with longer cold fermentation often improving the flavor and extensibility. The book also provides instructions for freezing dough for longer storage, typically up to 1-2 months, without significant loss of quality.
Q. My homemade pizza crust sometimes comes out tough or hard. What might I be doing wrong, according to the book’s troubleshooting tips?
A. A tough or hard crust is often attributed to overworking the dough, insufficient hydration (not enough water in the recipe), or not allowing enough time for proper gluten relaxation and fermentation. “The Perfect Pizza” guides you on gentle handling, precise water-to-flour ratios, and adequate resting and proofing periods to ensure a tender and pliable dough.
Q. Is there a specific order or technique for adding toppings to ensure even cooking and flavor distribution, as taught in “The Perfect Pizza”?
A. Yes, the book suggests a strategic layering approach. Typically, it recommends starting with a thin layer of sauce, followed by torn or shredded cheese (especially fresh mozzarella) to allow even melting, and then other toppings. It also stresses the importance of not overloading the pizza, allowing space for even heat distribution and steam escape, which prevents a dense or undercooked center.