The Art of Making Perfect Eggs: Your Ultimate Guide to Egg-cellent Cooking!
- DASH Rapid Egg Cooker: 6 Egg Capacity Electric Egg Cooker for Hard Boiled Eggs, Poached Eggs, Scrambled Eggs, or Omelets with Auto Shut Off Feature – Black
- Elite Gourmet EGC115M Easy Egg Cooker Electric 7-Egg Capacity, Soft, Medium, Hard-Boiled Egg Cooker with Auto Shut-Off, Measuring Cup Included, BPA Free, Retro Mint
- Urbinz Mini Electric Egg Grill – Fun Egg Shape – Non-Stick Coating, Easy to Clean – Great for Families, Kids, Dorms, Apartments, RVs – Gift for Holidays, Birthdays, Weddings
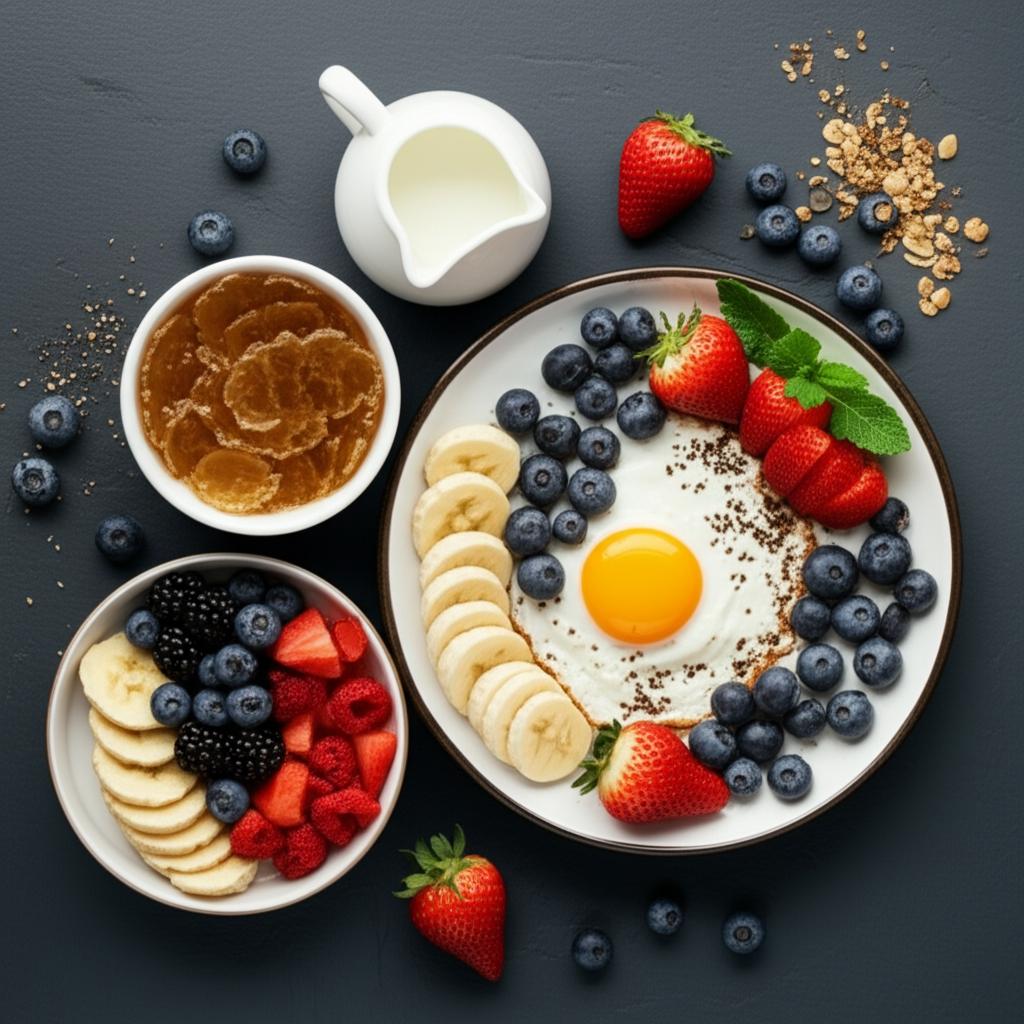
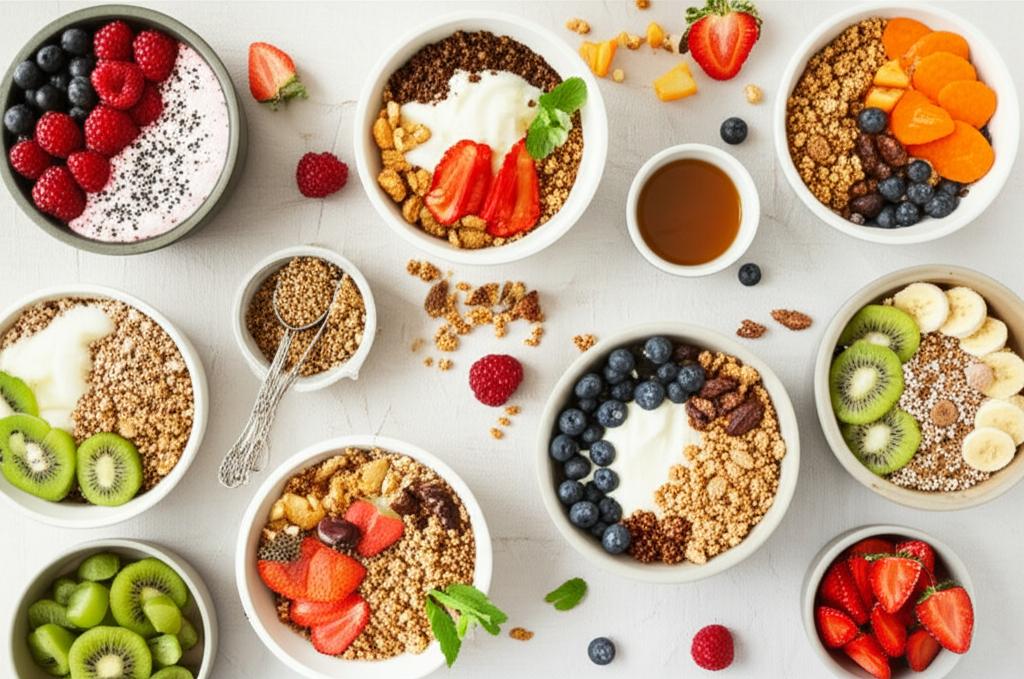
Eggs. They’re a breakfast staple, a quick lunch, a dinner hero, and a baking essential. Versatile, nutritious, and incredibly satisfying, eggs are a cornerstone of countless cuisines worldwide. Yet, despite their apparent simplicity, mastering the art of cooking them can feel daunting. Have you ever ended up with rubbery scrambled eggs, a broken fried yolk, or a hard-to-peel boiled egg? You’re not alone!
But don’t worry, help is here! This comprehensive guide will transform you into an egg aficionado, capable of whipping up perfect eggs every single time. We’ll cover the most popular cooking methods, offering step-by-step instructions, insider tips, and crucial mistakes to avoid. Get ready to unlock the secrets to truly delicious, perfectly cooked eggs!
The Golden Rules of Egg Cooking (No Matter the Method!)
Before we dive into specific techniques, let’s establish some universal truths that apply to all egg preparations:
- Freshness Matters (Mostly): For most preparations like frying, poaching, or making an omelet, fresh eggs are your best friend. They hold their shape better and have vibrant yolks. However, for hard-boiled eggs, slightly older eggs (a week or two old) can be easier to peel.
- Room Temperature Eggs: While not strictly necessary, bringing your eggs to room temperature (about 20-30 minutes out of the fridge) before cooking can help them cook more evenly and prevent cracking (especially for boiling).
- Season Generously: Eggs absorb flavor beautifully. Always season your eggs with salt and pepper while cooking, or just before serving. A little pinch can make a huge difference!
- Patience is Key: Don’t rush the process! Most egg preparations benefit from gentle heat and a watchful eye.
Mastering the Classics: Step-by-Step Guides
Let’s crack into the most popular ways to enjoy eggs!
1. The Creamy, Fluffy Scramble
Often deceptively simple, achieving creamy, fluffy scrambled eggs instead of rubbery chunks is a true culinary victory.
What You’ll Need:
* 2-3 eggs per person
* 1 tablespoon butter or a swirl of oil
* Pinch of salt and pepper
* Optional: 1-2 teaspoons of milk, cream, or water (for extra creaminess, though not strictly necessary)
Step-by-Step:
1. Whisk with Vigor: In a bowl, crack your eggs. Add your pinch of salt and pepper (and optional liquid). Whisk vigorously with a fork until the yolks and whites are fully combined and slightly frothy. This incorporates air, leading to fluffiness.
2. Low and Slow: Melt your butter (or heat oil) in a non-stick pan over low to medium-low heat. The pan should be hot enough to sizzle the butter, but not smoking.
3. Pour and Wait: Pour the egg mixture into the pan. Let it sit undisturbed for about 30-60 seconds until the edges just begin to set.
4. Gentle Scrape and Fold: Using a rubber spatula, gently push the cooked edges towards the center, allowing the uncooked egg to flow underneath. Continue this gentle scraping and folding motion, rotating the pan as needed.
5. Know When to Stop: Remove the pan from the heat when the eggs are still slightly wet and glossy, but mostly set. They will continue to cook from residual heat. This is the secret to preventing rubbery eggs!
6. Serve Immediately: Transfer to a plate and enjoy!
Tips for Perfection:
* Don’t Overcrowd the Pan: Cook in batches if making a large quantity.
* Add-ins: Stir in cheese, herbs (chives, parsley), or cooked vegetables (spinach, mushrooms) in the last minute of cooking.
* Don’t Over-Whisk at the End: Once in the pan, resist the urge to constantly stir or break up the curds too much.
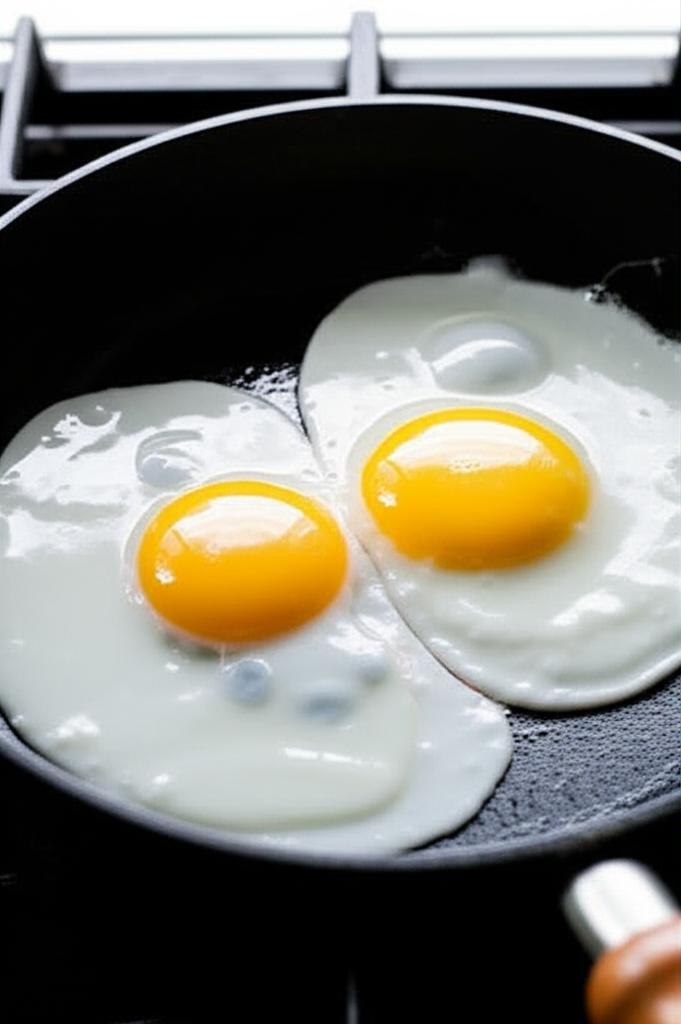
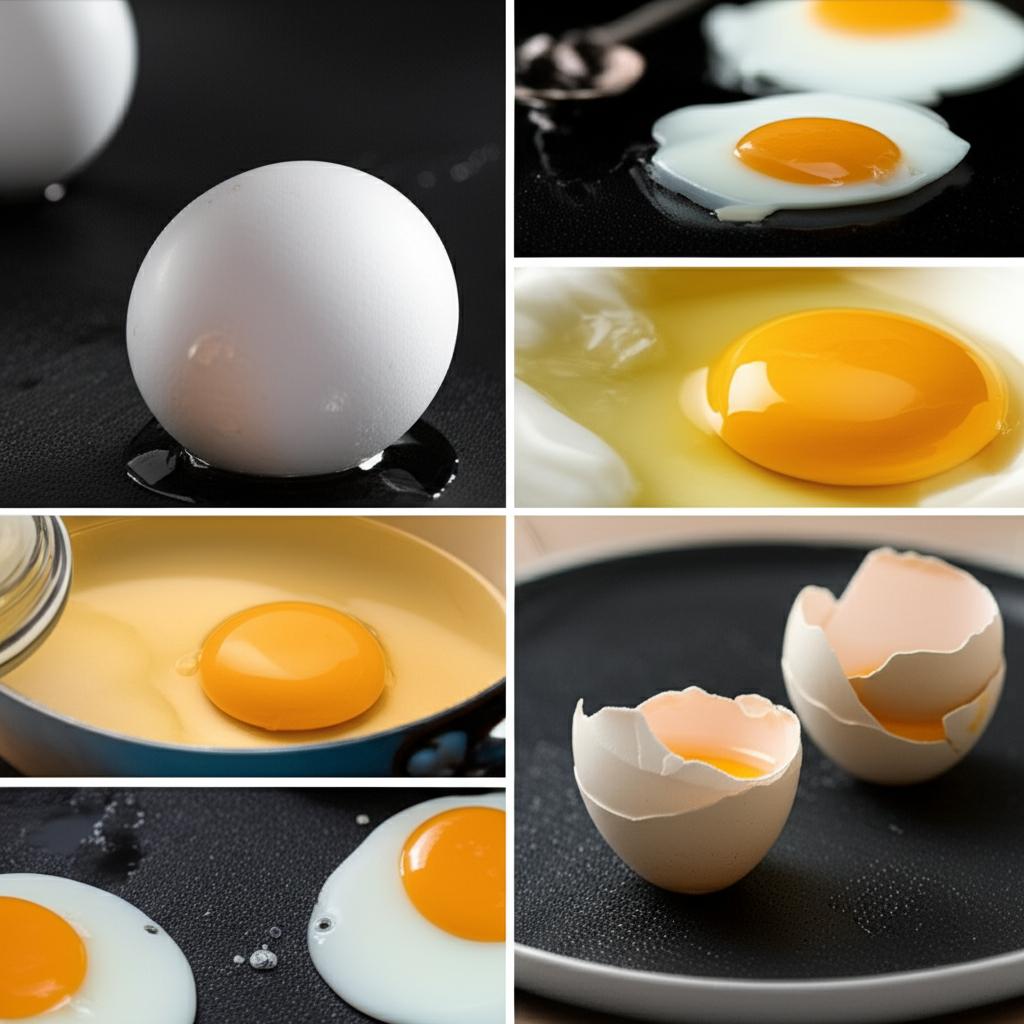
2. The Perfectly Fried Egg
Whether you prefer a runny yolk for dipping toast or a firmer center, a fried egg is a quick and satisfying meal.
What You’ll Need:
* 1-2 eggs per person
* 1 tablespoon butter or oil
* Pinch of salt and pepper
Step-by-Step:
1. Heat Your Fat: Melt butter or heat oil in a non-stick or well-seasoned pan over medium heat.
2. Crack Carefully: Gently crack an egg directly into the pan, close to the surface to prevent the yolk from breaking. If cooking multiple, leave space between them.
3. Cook to Your Liking:
* Sunny-Side Up: Cook undisturbed until the whites are fully set but the yolk remains completely runny. The edges might get slightly crispy. This usually takes 2-3 minutes.
* Over Easy: Cook sunny-side up for 2 minutes, then gently flip and cook for another 30 seconds for a very runny yolk.
* Over Medium: Cook sunny-side up for 2 minutes, then flip and cook for about 1 minute for a slightly set but still jammy yolk.
* Over Hard: Cook sunny-side up for 2 minutes, then flip and cook for 2-3 minutes, breaking the yolk if desired, until fully set.
4. Season and Serve: Season with salt and pepper immediately after removing from the pan.
Tips for Perfection:
* The “Baste” Method: For set whites and a runny yolk without flipping, add a teaspoon of water to the pan and cover with a lid for the last minute of cooking. The steam will cook the top of the egg.
* Crispy Edges: Use slightly higher heat for a shorter time, and a little extra fat.
* Freshness: Fresh eggs are crucial for a tight, round white.
3. The Easy-Peel Boiled Egg (Soft, Medium, & Hard)
Boiled eggs are fantastic for salads, sandwiches, or just a quick snack. The key is precise timing and a good peeling technique.
What You’ll Need:
* Eggs
* Large pot
* Ice bath (bowl of ice water)
Step-by-Step (The Cold Start Method – Recommended for easy peeling):
1. Place Eggs in Pot: Carefully place eggs in a single layer at the bottom of a pot.
2. Cover with Water: Fill the pot with cold water, ensuring the eggs are covered by at least an inch.
3. Bring to a Boil, Then Simmer: Place the pot on the stove over high heat. Once the water reaches a rolling boil, immediately turn off the heat, cover the pot with a lid, and let it sit undisturbed for the desired time:
* Soft-Boiled (Jammy Yolk): 6-7 minutes
* Medium-Boiled (Mostly Set, Creamy Center): 8-9 minutes
* Hard-Boiled (Fully Set Yolk): 10-12 minutes
4. Ice Bath is Crucial: As soon as the timer goes off, immediately transfer the eggs to an ice bath using a slotted spoon. Let them sit for at least 5 minutes (or until completely cool). This stops the cooking process and helps with peeling.
5. Peel with Ease: Gently tap the cooled egg on a hard surface to crack the shell all over. Roll it between your hands to loosen the shell further. Start peeling from the wider end, often there’s an air pocket there that helps. Peel under cold running water if needed.
Tips for Perfection:
* Older Eggs: As mentioned, slightly older eggs (a week or two) tend to peel much easier than very fresh ones.
* Don’t Overcook: Overcooked hard-boiled eggs can get a grey-green ring around the yolk – harmless, but less appetizing.
* Store Properly: Peeled boiled eggs can be stored in the fridge in an airtight container for up to 5 days.
4. The Elegant Poached Egg
Often seen as the most challenging, a perfectly poached egg with its silky white and runny yolk is a thing of beauty.
What You’ll Need:
* 1-2 eggs per person (use very fresh eggs!)
* Small saucepan or deep skillet
* 1 teaspoon white vinegar (optional, but highly recommended)
* Slotted spoon
* Small bowl or ramekin
Step-by-Step:
1. Prepare Water: Fill a saucepan with about 3-4 inches of water. Add the vinegar if using (it helps the whites set faster). Bring the water to a gentle simmer – you should see small bubbles forming at the bottom, but no vigorous boiling.
2. Crack Egg: Carefully crack one egg into a small bowl or ramekin. This allows you to gently slide it into the water and check for shell fragments.
3. Create a Vortex (Optional but Helpful): Use a spoon to gently swirl the water in the pot to create a very slow vortex.
4. Slide In: Carefully lower the bowl or ramekin close to the water’s surface and gently slide the egg into the center of the vortex. If poaching multiple eggs, add them one by one, giving them a little space. Don’t overcrowd the pot.
5. Cook to Perfection: Cook for 3-4 minutes for a runny yolk. The whites should be set but tender.
6. Remove and Drain: Using a slotted spoon, carefully lift the egg from the water. Let any excess water drain off. You can gently trim any wispy bits of white with kitchen shears if desired for presentation.
7. Season and Serve: Place on toast, an English muffin, or salad. Season with salt and pepper immediately.
Tips for Perfection:
* Freshness is King: Extremely fresh eggs are paramount for poaching. Older eggs spread too much in the water.
* Vinegar Helps: The acid in vinegar helps the egg white coagulate quickly, keeping it compact. You won’t taste it.
* Don’t Boil: Keep the water at a gentle simmer. Too vigorous a boil will break up the egg.
* Strain First (Pro Tip): For the absolute neatest poached eggs, crack your egg into a fine-mesh sieve over a bowl for a minute. This drains off the very thin, watery part of the white that often creates “wisps” in the water.
5. The Elegant Omelet
A classic French omelet is about lightness, speed, and a perfectly cooked, unbrowned exterior.
What You’ll Need:
* 2-3 eggs
* 1 tablespoon butter
* Pinch of salt and pepper
* Optional fillings: Cheese, herbs, finely diced cooked vegetables
Step-by-Step:
1. Prepare Eggs: Crack eggs into a bowl, add salt and pepper. Whisk vigorously with a fork until just combined and slightly frothy, but not foamy.
2. Heat Pan: Melt butter in an 8-inch non-stick skillet over medium-high heat. The butter should be sizzling but not browned.
3. Pour and Swirl: Pour the egg mixture into the hot pan. Immediately swirl the pan to evenly coat the bottom.
4. Cook and Push: Let the eggs cook for a few seconds. As the edges begin to set, use a rubber spatula to gently push the cooked egg from the edges towards the center, tilting the pan to allow uncooked egg to flow underneath. Continue until most of the egg is set but still wet on top.
5. Add Fillings (Optional): If using fillings, sprinkle them over half of the omelet at this point.
6. Fold and Serve: Tilt the pan away from you. With your spatula, fold one half of the omelet over the other. Gently slide the omelet onto a plate. It should be light, fluffy, and slightly golden (not browned) on the outside.
Tips for Perfection:
* Non-Stick is Essential: A good quality non-stick pan is crucial for a successful omelet.
* Don’t Overfill: Too many fillings will make the omelet difficult to fold and can make it heavy.
* Speed is Key: Omelets cook quickly. Have your fillings ready and work swiftly.
* French vs. American: This method describes a French omelet. American omelets are often cooked until fully set, then folded or just served open-faced with fillings. Both are delicious!
Common Mistakes to Avoid (The Egg No-Nos!)
To ensure your egg-cooking journey is a smooth one, steer clear of these common pitfalls:
- Overcooking: This is the most frequent sin! Overcooked eggs become rubbery, dry, and lose their delicate texture. Always err on the side of undercooking, as eggs continue to cook with residual heat.
- Too High Heat: High heat often leads to tough whites and burnt bottoms before the rest of the egg is cooked through. Low to medium heat is generally your friend when cooking eggs.
- Not Seasoning: Bland eggs are a wasted opportunity. Always season your eggs with salt and pepper during or immediately after cooking.
- Overcrowding the Pan: Trying to cook too many eggs at once will lower the pan temperature, steam the eggs instead of cooking them properly, and make them stick together. Cook in batches if needed.
- Using Old Eggs for Poaching/Frying: As mentioned, older eggs have thinner whites that spread excessively, leading to messy fried or poached eggs. Save them for boiling!
- Rushing the Process: Eggs require a gentle hand and a bit of patience. Rushing often leads to broken yolks, tough whites, or uneven cooking.
The Grand Finale: Enjoy Your Masterpieces!
Congratulations! You now possess the knowledge and techniques to create perfect eggs using a variety of methods. Remember that cooking is an art, and practice makes perfect. Don’t be afraid to experiment with different seasonings, add-ins, and cooking times to discover your personal preferences.
From a quick weekday breakfast to an elegant brunch, mastering the art of making perfect eggs will undoubtedly elevate your culinary skills and bring joy to your kitchen. So go forth, crack those eggs with confidence, and savor every delicious bite! Happy cooking!
- DASH Rapid Egg Cooker: 6 Egg Capacity Electric Egg Cooker for Hard Boiled Eggs, Poached Eggs, Scrambled Eggs, or Omelets with Auto Shut Off Feature – Black
- Elite Gourmet EGC115M Easy Egg Cooker Electric 7-Egg Capacity, Soft, Medium, Hard-Boiled Egg Cooker with Auto Shut-Off, Measuring Cup Included, BPA Free, Retro Mint
- Urbinz Mini Electric Egg Grill – Fun Egg Shape – Non-Stick Coating, Easy to Clean – Great for Families, Kids, Dorms, Apartments, RVs – Gift for Holidays, Birthdays, Weddings
FAQ
Q. How do I achieve the perfect soft-boiled or hard-boiled egg?
A. For a perfectly runny yolk soft-boiled egg, boil for 5-6 minutes. For a jammy yolk, try 7-8 minutes. For a firm, hard-boiled egg with no green ring, boil for 9-10 minutes. Always start with cold water covering the eggs, bring to a rolling boil, then lower to a simmer and set your timer. Immediately transfer to an ice bath to stop cooking.
Q. My hard-boiled eggs are always so difficult to peel. What’s the secret?
A. The key to easy peeling is proper cooling and freshness. Older eggs tend to peel more easily than very fresh ones. After boiling, immediately transfer your eggs to an ice bath for at least 5 minutes. This rapid cooling helps the membrane separate from the egg white. Crack the shell all over, then peel under cold running water for best results.
Q. How can I make my scrambled eggs creamy and not dry or rubbery?
A. The secret to creamy scrambled eggs lies in low heat and gentle stirring. Whisk eggs with a splash of milk or cream (optional) until just combined. Melt butter in a non-stick pan over medium-low heat. Pour in eggs and let them sit for a moment until the edges just begin to set. Then, gently push the cooked egg from the edges towards the center, tilting the pan to let uncooked egg flow underneath. Continue this gentle folding until they are just set but still moist. Remove from heat just before they reach your desired consistency, as they will continue to cook slightly.
Q. My poached eggs always spread out and look messy. How do I get them to hold a perfect shape?
A. Achieving a perfect poached egg involves a few steps. First, use very fresh eggs, as their whites are thicker and hold together better. Second, add a tablespoon of white vinegar to the simmering water – it helps the proteins set faster. Third, crack each egg into a small ramekin or bowl first, then gently slide it into the simmering (not boiling) water. Some chefs create a gentle vortex in the water before adding the egg, but careful sliding is often sufficient. Don’t overcrowd the pot.
Q. I want fried eggs with crispy edges and a runny yolk. How do I achieve that?
A. For crispy edges, you need medium-high heat and a good amount of fat. Heat butter or oil in a non-stick or cast-iron skillet until shimmering. Crack the egg directly into the pan. Let it cook undisturbed until the edges start to crisp and turn golden brown. For a runny yolk with set whites, you can either baste the top of the egg with hot oil/butter using a spoon, or add a tablespoon of water to the pan and immediately cover it with a lid for 30-60 seconds to steam the top.
Q. My omelets often turn out flat and rubbery. How do I make them light and fluffy?
A. The key to a fluffy omelet is whisking air into the eggs and cooking quickly over medium-high heat. Whisk 2-3 eggs vigorously until slightly foamy (don’t add milk or water if you want a classic French omelet). Melt butter in a non-stick pan until sizzling. Pour in the eggs. As the edges set, gently push the cooked egg towards the center, tilting the pan to allow uncooked egg to flow underneath. Once mostly set but still moist on top, add your fillings to one half, then fold the other half over. Serve immediately.