Mastering the Art of Frying Eggs: Your Ultimate Guide to Breakfast Perfection
- SENSARTE Nonstick Frying Pan Skillet, Swiss Granite Coating Omelette Pan, Healthy Stone Cookware Chef’s Pan, PFOA Free (8/9.5/10/11/12.5 Inch) (9.5 Inch)
- Tramontina Professional 10-Inch Non Stick Frying Pan, Heavy-Gauge Aluminum Skillet with Reinforced Nonstick Coating, Red Handle, Dishwasher and Oven Safe
- T-fal Ultimate Hard Anodized Nonstick Fry Pan Set 2 Piece, 10, 12 Inch, Oven Broiler Safe 400F, Cookware, Pots and Pans Set Non Stick, Kitchen Frying Pans, Cooking Skillets, Dishwasher Safe, Grey
Ah, the humble fried egg. Simple, versatile, and utterly delicious. While it might seem like a basic culinary task, achieving that perfectly cooked fried egg – with its glistening, runny yolk and tender, set whites – is an art form many strive to master. Forget those sad, rubbery failures or those with broken yolks! This comprehensive guide will walk you through everything you need to know to fry eggs like a pro, turning a simple ingredient into a breakfast masterpiece.
Whether you crave a sunny-side up wonder atop your avocado toast, a dippable yolk for crispy bacon, or a fully set addition to a hearty sandwich, mastering the fried egg opens up a world of culinary possibilities. Let’s crack into it!
Why Frying Eggs is an Art (and Not Just a Task)
Frying an egg isn’t just about heat and a pan; it’s about temperature control, timing, and understanding the nuances of egg whites and yolks. Too hot, and you get crispy, burnt edges and an undercooked center. Too cold, and the egg spreads out thinly, taking forever to cook. The goal is a harmonious balance: crispy edges (optional, but delightful), set whites, and a runny (or perfectly cooked) yolk.
The Essentials: What You’ll Need
Before you begin your fried egg journey, ensure you have the right tools and ingredients. Quality matters!
- Fresh Eggs: This is arguably the most crucial ingredient. Fresh eggs have tighter whites that hold their shape better, leading to a neater fried egg. Older eggs tend to spread more.
- Your Preferred Fat:
- Butter: Offers a rich, nutty flavor and helps create slightly crispy, golden edges.
- Olive Oil: A healthier option, provides a clean taste, and can get quite hot without burning easily.
- Vegetable Oil/Canola Oil: Neutral in flavor, great for high-heat frying if you want extra crispy edges.
- Bacon Fat: If you’re cooking bacon, save the fat! It imparts incredible flavor.
- A Good Pan: A non-stick pan (8-10 inches) is your best friend, especially when starting out. It ensures your eggs don’t stick and makes for easy flipping and removal. Cast iron can also work beautifully for crispier edges, but requires good seasoning and precise heat control.
- A Thin, Flexible Spatula: Essential for gently sliding under the cooked egg without tearing it and for flipping.
- Salt and Pepper: Simple sea salt and freshly ground black pepper are all you need to enhance the natural flavor.
Your Step-by-Step Guide to Fried Egg Perfection
Let’s break down the process for a classic Sunny-Side Up egg, then cover the popular variations.
Step 1: Preparation is Key
- Bring eggs to room temperature (optional but recommended): While not strictly necessary, taking your eggs out of the fridge about 15-20 minutes before cooking can help them cook more evenly. Cold eggs hit a hot pan and can cause the whites to seize up or spread unevenly.
- Gather your ingredients and tools: Have your fat, salt, pepper, and spatula ready by the stove.
Step 2: Heating the Pan & Fat
- Place your pan over medium-low heat. This is where many go wrong – too high heat equals burnt whites and raw yolks.
- Add 1-2 teaspoons of your chosen fat (butter, oil, or a combination) to the pan.
- Allow the fat to melt and heat up fully. For butter, wait until it’s melted and slightly foamy but not browning. For oils, wait until it shimmers slightly. Don’t let the fat smoke, as this indicates it’s too hot and will burn your egg.
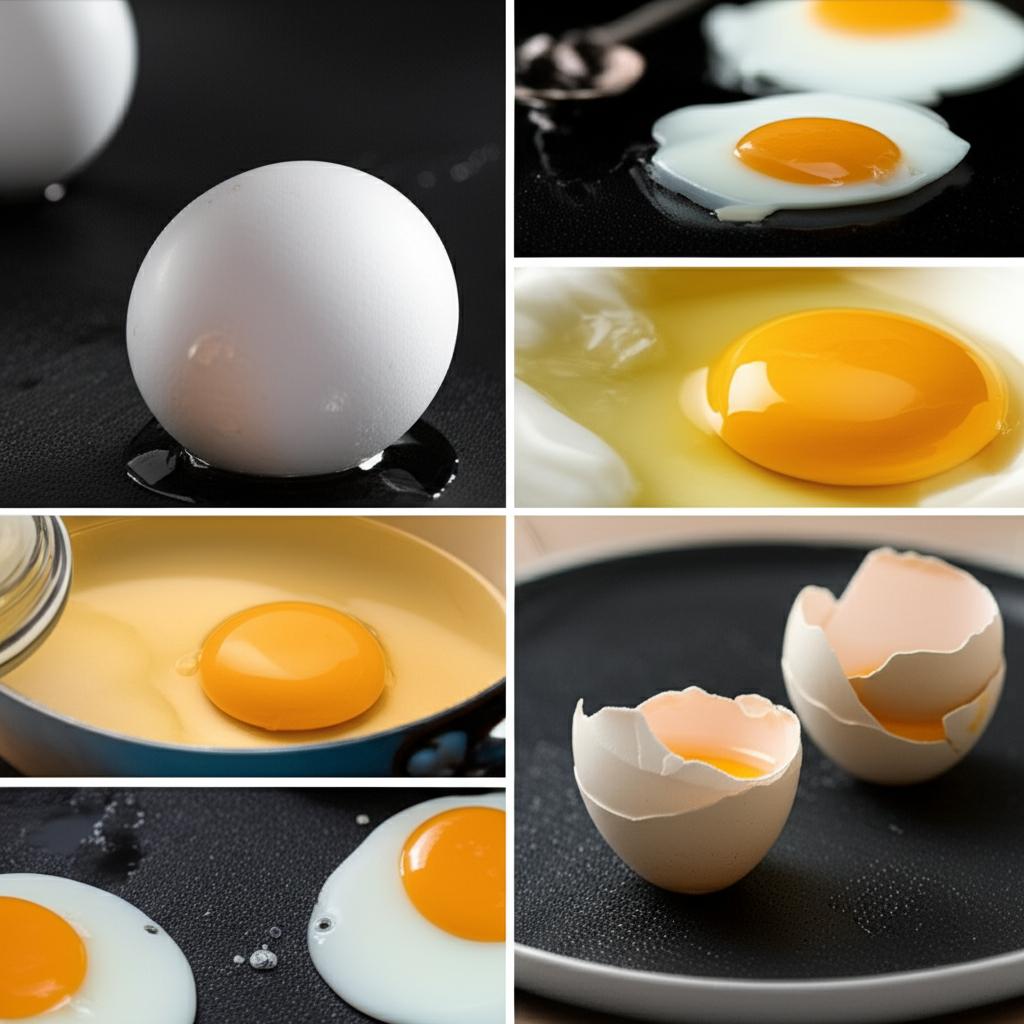
Step 3: Cracking the Egg
- Gently crack each egg into a small bowl or ramekin first. This serves two purposes:
- It helps you check for any shell fragments.
- It allows you to gently slide the egg into the hot pan, minimizing splash and helping the egg maintain a beautiful, round shape.
- Alternatively, you can crack the egg directly into the pan, but do so very close to the surface to prevent the yolk from breaking.
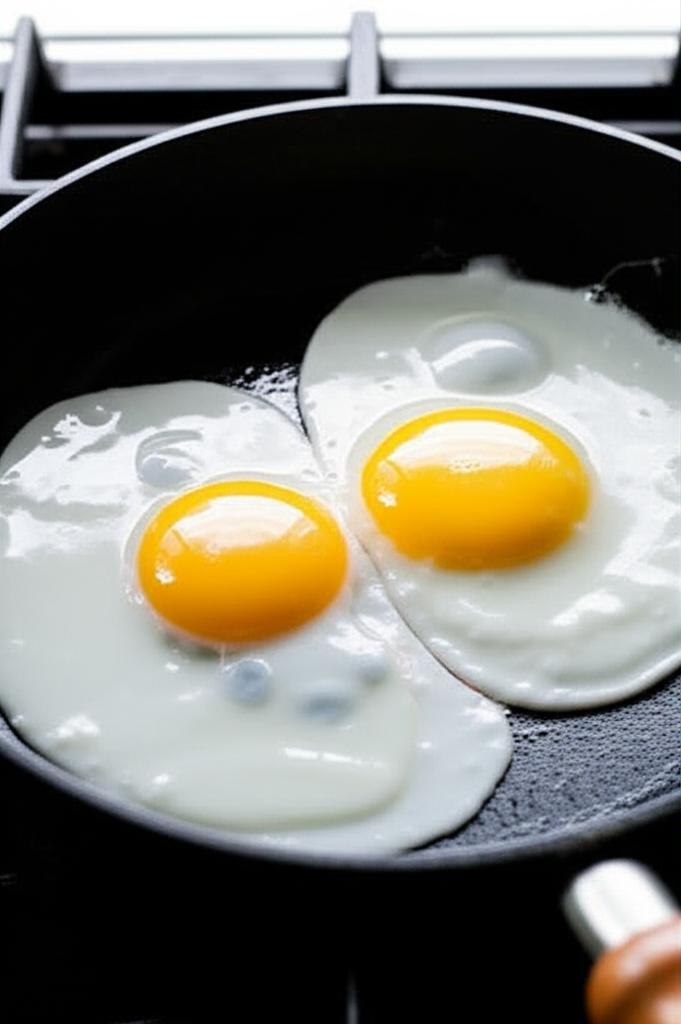
Step 4: Cooking the Sunny-Side Up Egg
- Slide the egg(s) carefully into the preheated pan. If cooking multiple eggs, don’t overcrowd the pan. Give each egg space to breathe, usually no more than two eggs in an 8-inch pan.
- Immediately, season the egg with a pinch of salt and pepper.
- Cook for approximately 2-4 minutes. Keep a close eye on the whites. They will start to set from the edges inwards.
- Watch for the whites to be completely opaque and set, but the yolk should still be perfectly runny. If you want moister whites without flipping, you have two options:
- Basting: Spoon some of the hot fat over the whites of the egg repeatedly until they are cooked through.
- Covering: Place a lid on the pan for the last 30-60 seconds of cooking. The trapped steam will cook the top of the whites without solidifying the yolk.
- Once the whites are set and the yolk is to your desired runniness, carefully slide the egg onto your plate using your thin spatula.
Step 5: Achieving Other Fried Egg Styles (Flipping Required!)
The secret to these styles is the flip. Wait until the whites are mostly set, and the edges are starting to crisp slightly before flipping.
- Over Easy:
- Cook sunny-side up until the whites are mostly set (about 2-3 minutes).
- Slide your spatula completely under the egg and, with a quick, confident motion, flip the egg over.
- Cook for only 30 seconds to 1 minute on the second side. The yolk should still be very runny, with a thin film of cooked white over it.
- Over Medium:
- Follow the “Over Easy” steps, but cook on the second side for 1-2 minutes. The yolk will be partially set, still soft and jammy in the center.
- Over Hard:
- Follow the “Over Easy” steps, but cook on the second side for 2-3 minutes, or until you can feel the yolk is firm when gently pressed with your spatula. The yolk will be completely solid.
Tips for Next-Level Frying
- Freshness is Paramount: Seriously, fresher eggs equal better-looking and better-tasting fried eggs.
- Temperature Control is King: Low to medium-low heat is key for even cooking without burning. If your fat is smoking, your pan is too hot. If the egg spreads thin and takes forever to set, your pan is too cold.
- Don’t Overcrowd the Pan: Give each egg its space to cook evenly. Cook in batches if necessary.
- Basting for Brilliance: If you don’t like flipping but want perfectly cooked whites on top, spoon hot fat over the whites as they cook. It’s a game-changer!
- Covering for Evenness: A lid creates a mini-oven, steaming the top of the egg without flipping, especially good for sunny-side up.
- Season at the End: While some salt goes on at the start, a final sprinkle of flaky sea salt just before serving elevates the flavor and provides a delightful textural crunch.
Common Mistakes to Avoid
- Using Cold Eggs Directly from the Fridge: Can cause uneven cooking and make whites seize up.
- Wrong Pan Temperature: Too hot (burnt edges, raw center) or not hot enough (eggs stick, spread too thin, take too long).
- Too Much or Too Little Fat: Too much results in a greasy egg; too little causes sticking.
- Overcrowding the Pan: Leads to uneven cooking and makes flipping difficult.
- Rushing the Process: Frying eggs is quick, but it’s not a race. Patience yields perfection.
- Impatient Flipping: If you try to flip too early, the egg will tear, and the yolk might break. Wait until the whites are mostly set.
- Breaking the Yolk: Be gentle when cracking and handling the egg, especially if you want a runny yolk.
Serving Your Masterpiece
Once your egg is perfectly fried, gently slide it onto your plate. It’s a fantastic addition to:
- Classic toast or English muffins
- Avocado toast
- Breakfast sandwiches
- Burgers
- Noodle dishes (ramen, fried rice)
- Salads for added protein
- Just by itself with a sprinkle of chives or chili flakes!
With a little practice and attention to these details, you’ll be frying perfect eggs every single time. So, grab your pan, crack an egg, and enjoy the delicious journey to fried egg mastery! Happy cooking!
- SENSARTE Nonstick Frying Pan Skillet, Swiss Granite Coating Omelette Pan, Healthy Stone Cookware Chef’s Pan, PFOA Free (8/9.5/10/11/12.5 Inch) (9.5 Inch)
- Tramontina Professional 10-Inch Non Stick Frying Pan, Heavy-Gauge Aluminum Skillet with Reinforced Nonstick Coating, Red Handle, Dishwasher and Oven Safe
- T-fal Ultimate Hard Anodized Nonstick Fry Pan Set 2 Piece, 10, 12 Inch, Oven Broiler Safe 400F, Cookware, Pots and Pans Set Non Stick, Kitchen Frying Pans, Cooking Skillets, Dishwasher Safe, Grey
FAQ
Q. How do I prevent my fried eggs from sticking to the pan?
A. The key to preventing sticking is proper pan preparation and temperature. Always use a good quality non-stick pan, a well-seasoned cast iron skillet, or a stainless steel pan with enough fat. Preheat your pan over medium-low heat before adding the fat (butter, oil, or a mix), and let the fat melt and coat the entire surface. Ensure the pan is hot enough to create a gentle sizzle when the egg is added, but not so hot that the fat starts smoking aggressively.
Q. What is the ideal temperature for frying eggs?
A. For most fried eggs, a medium-low to medium heat is ideal. This allows the whites to set slowly and evenly without browning too quickly, giving the yolk time to warm up without solidifying. Too low, and the egg can spread too much and take too long to cook; too high, and the whites will crisp or burn while the yolk remains cold or uncooked. A good indicator is when the butter or oil shimmers gently without smoking.
Q. How can I achieve a perfectly runny yolk with fully set whites?
A. To get a runny yolk with set whites, you need gentle, consistent heat. Crack the egg into the preheated, lightly oiled pan. Cook over medium-low heat. You can either spoon some of the hot fat over the whites (basting) to help them set faster, or cover the pan with a lid for the last minute of cooking. The steam trapped by the lid will cook the top of the whites without solidifying the yolk. Watch closely; once the whites are opaque and firm, and the yolk is still jiggling, it’s ready.
Q. Is it possible to get crispy edges on my fried egg without overcooking the yolk?
A. Absolutely! To achieve crispy edges, use a slightly higher heat and a generous amount of fat (like butter or bacon fat). Heat your pan to medium-high until the fat is shimmering. Crack your egg directly into the hot fat. The higher heat and ample fat will rapidly crisp the edges of the whites as they hit the pan. Immediately reduce the heat to medium-low or low, and continue cooking for a short period, or baste the top of the whites with the hot fat, being careful not to spoon fat directly onto the yolk if you want it to remain very runny. The rapid initial sizzle creates the crispness.
Q. What’s the best type of oil or fat to use for frying eggs?
A. The “best” fat depends on your desired flavor and texture. Butter provides a rich, classic flavor and helps achieve crispy, lacy edges, but be careful not to burn it. Olive oil (especially light or extra light) is a healthy option with a mild flavor. Bacon fat imparts a delicious savory taste. Other good choices include avocado oil, ghee, or even a blend of butter and a high smoke-point oil to prevent butter from burning. Experiment to find your favorite!
Q. How do I know when my fried egg is perfectly done to my liking?
A. Knowing when your egg is done is all about visual cues and personal preference. For sunny-side up, the whites should be fully set and opaque, with no visible clear parts, and the yolk should be warm and completely runny. For over-easy, the whites are set, and the yolk is liquid, barely warmed through. For over-medium, the whites are set, and the yolk is jammy or slightly runny in the center. For over-hard, both the whites and yolk are fully firm and cooked through. Observe the edges and the top surface of the whites for opacity, and gently nudge the pan to check the jiggle of the yolk.
Q. Should I use a lid when frying eggs, and what’s the benefit?
A. Using a lid is optional but can be very beneficial, especially if you prefer set whites without flipping, or if you want a quicker cook. Placing a lid over the pan for the last minute or two of cooking traps steam, which gently cooks the top surface of the egg, including the whites directly over the yolk. This ensures the entire white is set and opaque, even sunny-side up, without needing to flip the egg or baste excessively. It’s excellent for achieving “steamed” or “basted” eggs with perfectly cooked whites and a runny yolk.