Unveiling the Magic: Delicious Gluten-Free Desserts That Delight Every Palate
- King Arthur, Gluten Free All-Purpose Biscuit & Baking Mix, Gluten Free, Non-GMO Project Verified, Certified Kosher, 24 Ounces, Packaging may vary (Pack of 6)
- King Arthur Gluten Free Fudge Brownie Mix: Rich, Chocolatey Dessert for Celiac and Non-GMO Diets – Certified Kosher Baking Mix, Easy to Prepare, 17 oz Box for Delicious Homemade Brownies
- King Arthur Gluten Free Pancake Mix: Non-GMO, Kosher Certified, Easy-to-Prepare Breakfast Delight – Perfect for Fluffy, Delicious Pancakes (15 oz) – Packaging May Vary
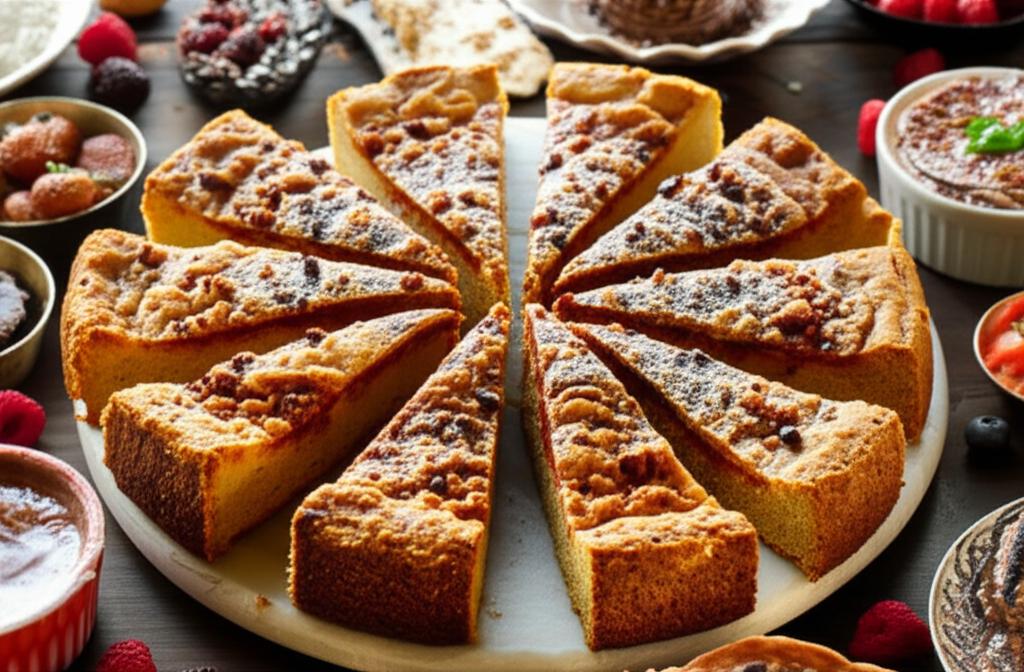
For too long, the mere mention of “gluten-free desserts” conjured images of dry, crumbly, and frankly, unappetizing concoctions. But those days are long gone! Thanks to incredible advancements in gluten-free flours and innovative baking techniques, the world of delicious gluten-free desserts is now as vibrant, rich, and satisfying as any traditional treat.
Whether you’re managing celiac disease, have a gluten sensitivity, or simply choose a gluten-free lifestyle, you no longer have to miss out on the pure joy of a perfectly baked cookie, a rich brownie, or a comforting fruit crumble. This comprehensive guide will equip you with the knowledge, recipes, and tips to bake truly delicious gluten-free desserts that will impress everyone, regardless of their dietary needs.
Why Go Gluten-Free with Your Desserts?
Beyond necessity for those with celiac disease or gluten sensitivity, embracing gluten-free baking can offer several benefits:
- Inclusivity: Hosting a gathering? Offering gluten-free options ensures everyone can enjoy dessert without feeling left out.
- Digestive Comfort: Many people find that reducing gluten intake can lead to better digestion and less bloating.
- Exploring New Flavors: Gluten-free flours bring unique textures and subtle flavors to your baking, opening up a world of culinary discovery.
- Naturally Delicious: Many naturally gluten-free ingredients like nuts, fruits, and certain starches form the base of incredibly decadent desserts.
The Gluten-Free Flour Playbook: Your Key to Success
The biggest secret to successful gluten-free baking lies in understanding flours. You can’t simply swap wheat flour for a single gluten-free alternative and expect the same results. Gluten-free flours lack the elastic structure that gluten provides, so a blend is almost always essential to achieve the right texture, flavor, and stability.
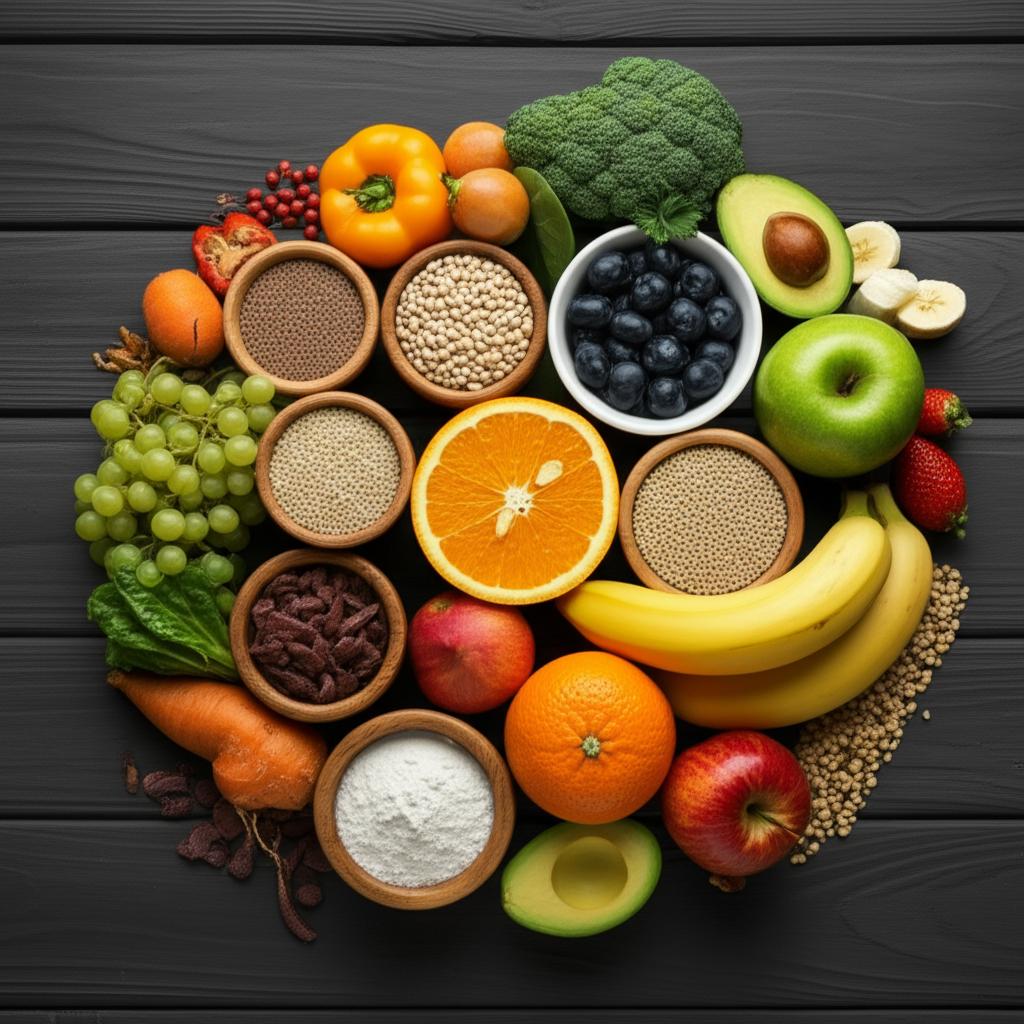
Here’s a quick look at common gluten-free flours and their roles:
- Whole Grain Flours (for structure and fiber):
- Brown Rice Flour: Neutral flavor, good for structure.
- Sorghum Flour: Mild, slightly sweet, good all-purpose.
- Oat Flour (Certified Gluten-Free): Adds chewiness and a lovely nutty flavor. Always ensure it’s certified GF to avoid cross-contamination.
- Buckwheat Flour: Earthy, distinctive flavor; use in moderation.
- Almond Flour/Meal: Adds moisture, richness, and protein; best for lighter, more tender baked goods.
- Starchy Flours (for binding and lightness):
- Tapioca Starch/Flour: Provides chewiness and crispness, good binder.
- Potato Starch/Flour: Lightens texture, adds moisture.
- Corn Starch: Common thickener and tenderizer.
The Golden Rule: For most baked goods, you’ll want to use a well-balanced gluten-free flour blend (either store-bought or homemade). These blends typically combine 2-3 whole grain flours with 1-2 starchy flours. They are formulated to mimic the properties of wheat flour as closely as possible.
Essential Gluten-Free Baking Principles
Before we dive into recipes, let’s cover some universal tips for delicious gluten-free baking:
- Measure Accurately: Always measure by weight (grams) if possible, especially for flour. Volume measurements can be inconsistent with gluten-free flours.
- Room Temperature Ingredients: Eggs and dairy should be at room temperature for better emulsion and a smoother batter.
- Don’t Overmix: Overmixing can incorporate too much air, leading to dry or crumbly results. Mix just until combined.
- Rest Your Dough/Batter: Allowing gluten-free dough or batter to rest for 15-30 minutes allows the flours to hydrate properly, preventing a gritty texture and improving structure.
- Use Parchment Paper: Gluten-free baked goods can be more delicate and prone to sticking. Lining pans with parchment paper is a simple way to ensure easy removal.
- Cool Completely: Many gluten-free treats need to cool completely to set properly and prevent crumbling. Patience is key!
Recipe Spotlight: Fudgy Gluten-Free Brownies
These brownies are so rich and decadent, no one will guess they’re gluten-free! They hit all the right notes: a crackly top, a chewy edge, and a gooey, fudgy center.
Yields: 16 brownies
Prep time: 15 minutes
Bake time: 25-30 minutes
Ingredients:
- 1/2 cup (113g) unsalted butter, melted
- 1 cup (200g) granulated sugar
- 1/2 cup (100g) packed light brown sugar
- 2 large eggs, at room temperature
- 1 teaspoon vanilla extract
- 3/4 cup (75g) unsweetened cocoa powder (good quality makes a difference!)
- 1/2 cup (60g) gluten-free all-purpose flour blend (containing xanthan gum, or add 1/4 tsp if your blend doesn’t)
- 1/2 teaspoon salt
- 1/2 cup (85g) chocolate chips or chunks (optional, but highly recommended!)
Instructions:
- Preheat Oven: Preheat your oven to 350°F (175°C). Line an 8×8 inch baking pan with parchment paper, leaving an overhang on two sides for easy lifting. Lightly grease the parchment paper.
- Melt Butter & Sugars: In a large bowl, whisk together the melted butter, granulated sugar, and brown sugar until well combined and smooth.
- Add Wet Ingredients: Whisk in the eggs one at a time, ensuring each is fully incorporated before adding the next. Stir in the vanilla extract. The mixture should be glossy and thick.
- Combine Dry Ingredients: In a separate medium bowl, whisk together the cocoa powder, gluten-free flour blend, and salt.
- Combine Wet and Dry: Gradually add the dry ingredients to the wet ingredients, mixing on low speed or by hand just until no streaks of flour remain. Do not overmix! Gently fold in the chocolate chips, if using.
- Bake: Pour the batter into the prepared pan and spread evenly. Bake for 25-30 minutes, or until a toothpick inserted into the center comes out with moist crumbs attached (not wet batter). The edges should be set, and the top crackly.
- Cool Completely: This is crucial! Allow the brownies to cool completely in the pan on a wire rack before lifting them out using the parchment paper overhang and cutting into squares. This ensures they set properly and maintain their fudgy texture.
Tips for Perfect GF Brownies:
- For an extra rich flavor, try using a mix of dark and milk chocolate chips.
- Add a pinch of instant coffee powder to the batter to enhance the chocolate flavor without tasting like coffee.
- Store cooled brownies in an airtight container at room temperature for up to 3 days, or freeze for longer storage.
Recipe Spotlight: Easy Berry Coconut Crumble
This vibrant crumble is naturally gluten-free, showcasing the beauty of fresh fruit and a simple, satisfying topping. It’s wonderfully adaptable to any seasonal fruit!
Yields: 6 servings
Prep time: 15 minutes
Bake time: 30-35 minutes
Ingredients:
For the Filling:
* 4 cups (about 600g) mixed berries (fresh or frozen, like blueberries, raspberries, sliced strawberries)
* 2 tablespoons granulated sugar (adjust to sweetness of fruit)
* 1 tablespoon cornstarch (or tapioca starch)
* 1 teaspoon lemon juice
* 1/2 teaspoon vanilla extract
For the Topping:
* 1 cup (90g) certified gluten-free rolled oats
* 1/2 cup (60g) almond flour
* 1/4 cup (50g) packed light brown sugar
* 1/4 cup (25g) shredded unsweetened coconut
* 1/2 teaspoon ground cinnamon
* 1/4 teaspoon salt
* 1/2 cup (113g) cold unsalted butter, cut into small cubes
Instructions:
- Preheat Oven: Preheat your oven to 375°F (190°C). Lightly grease an 8×8 inch baking dish or a similar-sized oven-safe dish.
- Prepare Filling: In a large bowl, gently combine the mixed berries, granulated sugar, cornstarch, lemon juice, and vanilla extract. Pour the berry mixture into the prepared baking dish.
- Make Topping: In a separate medium bowl, combine the gluten-free rolled oats, almond flour, brown sugar, shredded coconut, cinnamon, and salt.
- Cut in Butter: Add the cold, cubed butter to the dry topping ingredients. Using your fingertips or a pastry blender, cut the butter into the mixture until it resembles coarse crumbs with some pea-sized pieces of butter remaining.
- Assemble & Bake: Evenly sprinkle the crumble topping over the berry filling.
- Bake for 30-35 minutes, or until the fruit filling is bubbly and the topping is golden brown and crisp.
- Cool Slightly: Let the crumble cool for at least 15-20 minutes before serving. This allows the fruit filling to set and prevents it from being too runny. Serve warm, perhaps with a scoop of dairy-free ice cream or coconut cream.
Tips for Perfect GF Crumble:
- Fruit Variations: Feel free to swap berries for sliced apples, peaches, pears, or a combination. Adjust sugar according to the fruit’s sweetness.
- Add Nuts: For extra crunch and flavor, add 1/4 cup chopped pecans or walnuts to the crumble topping.
- Serving Suggestions: This crumble is fantastic warm with a dollop of whipped coconut cream or a scoop of your favorite non-dairy ice cream.
Common Gluten-Free Baking Mistakes to Avoid
Even with the best intentions, it’s easy to stumble in gluten-free baking. Here are some common pitfalls and how to steer clear of them:
- Using Single Flours for Everything: As mentioned, trying to substitute wheat flour with just rice flour or just almond flour for a recipe designed for blends will almost certainly lead to disappointment. Always use a specifically designed gluten-free flour blend unless the recipe calls for a specific single flour (e.g., almond flour in a macaron recipe).
- Not Adding Xanthan Gum (When Needed): If your gluten-free flour blend doesn’t contain xanthan gum (a common binder and elasticity provider), you’ll likely need to add a small amount (usually 1/4 to 1 teaspoon per cup of flour blend, depending on the recipe). Without it, your baked goods can be crumbly or dense.
- Over-Mixing the Batter: This is a cardinal sin in gluten-free baking. While you don’t have gluten to develop, overmixing can introduce too much air, leading to a dry, tough, or crumbly texture. Mix only until just combined.
- Impatience with Cooling: Many gluten-free baked goods are very fragile when hot. Resist the urge to cut or handle them until they are completely cool. They need time to set and firm up.
- Ignoring Humidity: Gluten-free flours absorb moisture differently. On very humid days, you might need slightly less liquid; on dry days, a touch more. While not always critical, severe changes can impact results.
- Not Checking Labels: Cross-contamination is a real concern for those with celiac disease. Always ensure all your ingredients (oats, chocolate chips, extracts, etc.) are certified gluten-free.
General Tips for Gluten-Free Success
- Read the Recipe Twice: Before you start, read the entire recipe from start to finish. This helps you understand the process and have all ingredients ready.
- Invest in a Good Scale: For precise measurements, especially with gluten-free flours, a digital kitchen scale is invaluable.
- Don’t Be Afraid to Experiment: Once you get the hang of the basics, try substituting different gluten-free flours in your blends or adding new flavor combinations.
- Store Properly: Gluten-free baked goods can sometimes dry out faster than their traditional counterparts. Store them in an airtight container to maintain freshness. Freezing is also a great option for longer storage.
Embrace the Delicious!
Baking delicious gluten-free desserts is not just possible, it’s incredibly rewarding. With the right understanding of flours, a few key techniques, and a dash of patience, you can create treats that are so good, no one will even notice they’re missing the gluten. So, preheat your oven, gather your ingredients, and get ready to impress! Happy baking!
- King Arthur, Gluten Free All-Purpose Biscuit & Baking Mix, Gluten Free, Non-GMO Project Verified, Certified Kosher, 24 Ounces, Packaging may vary (Pack of 6)
- King Arthur Gluten Free Fudge Brownie Mix: Rich, Chocolatey Dessert for Celiac and Non-GMO Diets – Certified Kosher Baking Mix, Easy to Prepare, 17 oz Box for Delicious Homemade Brownies
- King Arthur Gluten Free Pancake Mix: Non-GMO, Kosher Certified, Easy-to-Prepare Breakfast Delight – Perfect for Fluffy, Delicious Pancakes (15 oz) – Packaging May Vary
FAQ
Q. What exactly does “gluten-free” mean when applied to desserts?
A. Gluten-free means the dessert is made without ingredients containing gluten, which is a protein found primarily in wheat, barley, rye, and triticale. For desserts, this most commonly means replacing traditional wheat flour with gluten-free alternatives and ensuring all other ingredients are also free from gluten contamination.
Q. Do gluten-free desserts taste different or inferior to traditional ones?
A. Not at all! Modern gluten-free baking has advanced significantly. Many delicious gluten-free desserts are indistinguishable from their gluten-containing counterparts, and some even offer unique textures and flavors due to the alternative flours used. The key is using well-developed recipes and appropriate ingredient combinations.
Q. What common ingredients are used as substitutes for wheat flour in gluten-free desserts?
A. A variety of flours and starches are used, often in carefully balanced blends, to mimic the properties of wheat flour. Common substitutes include rice flour (brown and white), almond flour, coconut flour, tapioca starch, potato starch, cornstarch, sorghum flour, and certified gluten-free oat flour.
Q. Are gluten-free desserts automatically healthier than regular desserts?
A. Not necessarily. While they are beneficial for those avoiding gluten, gluten-free desserts can still be high in sugar, fats, and calories, just like traditional desserts. The health aspect largely depends on the specific ingredients and preparation methods. Some may contain more fiber if whole-grain gluten-free flours are used, but they aren’t inherently “diet” foods.
Q. Can I simply swap regular flour for a gluten-free flour blend in any dessert recipe?
A. It’s generally not recommended to do a direct 1:1 swap in most traditional baking recipes. Gluten-free flours behave differently than wheat flour; they absorb liquids differently, lack gluten’s elastic properties, and can affect texture and structure. It’s best to use recipes specifically developed for gluten-free baking or use a tested all-purpose gluten-free flour blend that specifies it can be used cup-for-cup, and even then, some adjustments might be needed.
Q. Are gluten-free desserts safe for individuals with Celiac Disease?
A. Yes, if prepared correctly and with certified gluten-free ingredients to prevent cross-contamination. For those with Celiac Disease, even trace amounts of gluten can cause an adverse reaction. Therefore, it’s crucial that all ingredients are verified gluten-free and that separate utensils, cutting boards, and baking pans are used if there’s a risk of gluten exposure from other foods in the kitchen.
Q. Where can I find reliable recipes for delicious gluten-free desserts?
A. Many excellent resources are available! Look for specialized gluten-free cookbooks, reputable food blogs focusing on gluten-free baking, and websites dedicated to dietary restrictions. Major food publications often have well-tested gluten-free sections. Always check reviews and choose sources known for well-developed and reliable recipes.


