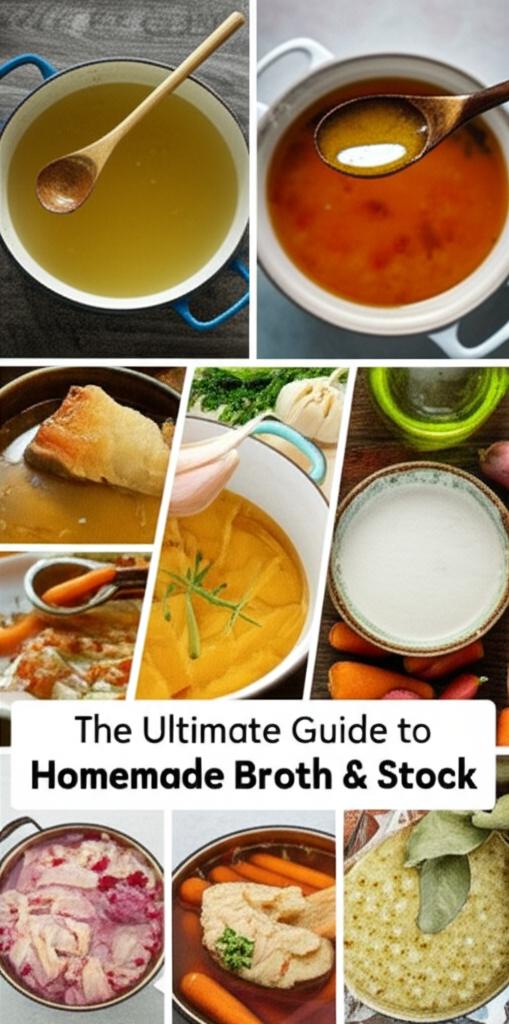
The Ultimate Guide to Homemade Broth & Stock: Crafting Liquid Gold in Your Kitchen
- Stockpot – 20 Quart – Brushed Stainless Steel – Heavy Duty Induction Pot with Lid and Riveted Handles – For Soup, Seafood, Stock, Canning and for Catering for Large Groups and Events by BAKKEN
- GasOne 30Qt Aluminum Stock Pot with Strainer and Lid – Large Deep Fryer Pot with Basket for Boiling, Frying Turkey, Seafood, Crawfish – Food-Grade Aluminum Large Cooking Pot with Sturdy Handles
- IMUSA 12 Quart Stainless Steel Stock Pot with Lid
There’s a comforting aroma that fills the kitchen when a pot of homemade broth or stock is simmering gently on the stove. It’s more than just a culinary base; it’s a secret weapon that elevates everyday meals from good to extraordinary. Forget bland, store-bought cartons – making your own is surprisingly simple, incredibly rewarding, and packed with flavor and nutrients you just can’t buy.
This ultimate guide will walk you through everything you need to know to create your own batches of liquid gold, from understanding the difference between broth and stock to mastering the art of the perfect simmer. Let’s dive in!
Why Go Homemade? The Unbeatable Benefits
Before we get to the how-to, let’s talk about why homemade is always the better choice:
- Superior Flavor: This is the #1 reason! Homemade broth and stock boast a depth of flavor that store-bought versions simply can’t match. It’s the taste of real ingredients, simmered slowly.
- Nutrient Powerhouse: Especially with bone broth, you’re extracting valuable minerals, collagen, and amino acids that support gut health, joint function, skin elasticity, and overall well-being.
- Cost-Effective: You can transform kitchen scraps and leftover bones into a valuable ingredient, significantly reducing food waste and saving money.
- Control Over Ingredients: Say goodbye to excessive sodium, artificial flavors, and preservatives. When you make it yourself, you control exactly what goes in, making it perfect for dietary restrictions or specific health goals.
- Amazing Aroma: The scent of simmering broth is therapy in itself. It makes your home smell wonderfully cozy and inviting.
Broth vs. Stock vs. Bone Broth: What’s the Difference?
This is a common point of confusion, but understanding the nuances will help you choose the right base for your culinary creations.
-
Stock: Primarily made from bones (often roasted), a mirepoix (onions, carrots, celery), and water. It’s typically simmered for a longer period (4-8 hours) to extract gelatin from the bones, giving it a richer body and mouthfeel. Stock is traditionally unseasoned and used as a base for sauces, gravies, and soups where you want to build flavor. When chilled, it will often gelatinize due to the collagen.
-
Broth: Made from meat, vegetables, and sometimes a small amount of bones, along with aromatics and water. It’s usually simmered for a shorter period (1-2 hours) and is often lightly seasoned with salt and herbs. Broth is lighter than stock and is commonly consumed on its own (like a sipping broth) or used in dishes where you want a lighter, cleaner flavor. It typically won’t gelatinize significantly when chilled.
-
Bone Broth: A specific type of stock that prioritizes bone content (often roasted) and is simmered for an extended period (12-24+ hours), sometimes with the addition of apple cider vinegar to help extract even more minerals and collagen from the bones. The goal is to maximize the nutritional benefits and gelatin content. It’s very rich and nourishing, often enjoyed on its own for health purposes, or used as a robust base for soups and stews.
In summary: Stock is for body, broth is for sipping/light flavor, and bone broth is for maximum nutrition. For simplicity, many people use “broth” and “stock” interchangeably for homemade versions.
The Anatomy of a Great Broth or Stock
No matter which type you’re making, the fundamental components remain the same:
-
The Foundation (Bones & Vegetables):
- Bones: For chicken stock, use a whole chicken carcass, roasted chicken bones, or chicken feet. For beef, use beef marrow bones, knuckle bones, or oxtail. Roasting bones beforehand adds a deep, rich flavor and color, especially for beef or darker chicken stocks.
- Vegetables: The classic trio is mirepoix: onions (cut into large chunks), carrots (scrubbed, not necessarily peeled), and celery (stalks and leaves). You can also add leek tops, parsnips, or even mushroom stems. Avoid cruciferous vegetables like broccoli, cauliflower, or cabbage, as they can make your broth bitter or funky.
-
Aromatics & Seasonings:
- Garlic: A few smashed cloves add wonderful depth.
- Herbs: Bay leaves are a must! Fresh or dried thyme sprigs, parsley stems, or rosemary can also be excellent additions.
- Peppercorns: Whole black peppercorns add a mild spice. Avoid ground pepper, which can make your broth cloudy.
- Salt: Add salt towards the end of the simmering process or when you’re ready to use the broth. This prevents it from becoming overly salty as it reduces.
-
Acid (For Bone Broth):
- A splash of apple cider vinegar (1-2 tablespoons per gallon) added at the beginning of a bone broth simmer helps to leach minerals and collagen from the bones. Don’t worry, you won’t taste it in the final product!
-
Water:
- Cold water is crucial. Starting with cold water helps to slowly extract impurities and proteins from the bones and vegetables, resulting in a clearer, cleaner-tasting broth.
Step-by-Step Guides to Your Homemade Broth & Stock
Choose your adventure! While the specific ingredients vary, the general process for all broths and stocks is similar.
1. Easy Homemade Vegetable Broth
Perfect for vegans, vegetarians, or anyone looking for a clean, light base. This is also a fantastic way to reduce food waste by saving vegetable scraps!
What you’ll need:
* Vegetable Scraps/Chopped Veg: 4-6 cups (onion ends & skins, carrot peels & ends, celery ends, mushroom stems, parsley stems, leek greens, garlic skins)
* Aromatics: 1 bay leaf, 1 tsp whole black peppercorns, sprig of fresh thyme (optional)
* Water: 8-10 cups (enough to cover the vegetables)
* Large Pot
Instructions:
1. Gather Your Scraps: Keep a large freezer bag in your freezer and add clean vegetable scraps to it as you cook throughout the week. When it’s full, you’re ready to make broth!
2. Combine Ingredients: Place all your vegetable scraps, aromatics, and water into a large pot.
3. Bring to a Simmer: Bring the mixture to a boil over high heat, then immediately reduce the heat to low to maintain a gentle simmer.
4. Simmer: Let it simmer, uncovered or partially covered, for 45 minutes to 1.5 hours. Any longer, and vegetables can start to break down and make the broth bitter.
5. Strain: Carefully pour the contents of the pot through a fine-mesh sieve or colander lined with cheesecloth into a large heatproof bowl or another clean pot. Discard all the solids.
6. Cool & Store: Allow the broth to cool completely before transferring it to airtight containers for storage.
2. Classic Homemade Chicken Stock/Broth
A versatile staple, perfect for chicken noodle soup, risottos, or simply sipping.
What you’ll need:
* Chicken Bones: 1-2 roasted chicken carcasses (from a rotisserie chicken is perfect!), or about 3-4 lbs raw chicken bones (backs, necks, wings, feet).
* Mirepoix: 2 large carrots (roughly chopped), 2 stalks celery (roughly chopped), 1 large onion (quartered).
* Aromatics: 2-3 cloves garlic (smashed), 2 bay leaves, 1 tsp whole black peppercorns, a few sprigs fresh thyme or parsley.
* Water: 10-12 cups (enough to cover bones and vegetables by about 1 inch).
* Large Stockpot
Instructions:
1. Roast Bones (Optional but Recommended for Flavor): If using raw bones, spread them on a baking sheet and roast at 400°F (200°C) for 30-40 minutes until golden brown. This significantly deepens the flavor. Drain off any excess fat.
2. Combine Ingredients: Place roasted (or raw) chicken bones, chopped mirepoix, and all aromatics into your large stockpot.
3. Add Cold Water: Pour in enough cold water to cover the ingredients by about 1 inch.
4. Bring to a Simmer & Skim: Bring the pot to a boil over medium-high heat. As it heats up, foam and scum will rise to the surface. Use a spoon or ladle to diligently skim off and discard this foam for the first 20-30 minutes. This is crucial for a clear broth.
5. Simmer: Once skimming is complete, reduce the heat to low to maintain a very gentle simmer. Simmer, partially covered, for 4-6 hours for stock (up to 8 hours for maximum gelatin extraction) or 1.5-2 hours for a lighter broth.
6. Strain: Carefully strain the broth through a fine-mesh sieve or colander lined with cheesecloth into a clean bowl or pot. Discard all solids.
7. Cool & Degrease (Optional): Allow the broth to cool completely. As it cools, any fat will rise to the surface and solidify. You can easily skim this solid fat off for a less greasy broth.
8. Store: Transfer to airtight containers.
3. Hearty Beef Stock / Bone Broth
Rich, robust, and full of gelatin, perfect for French onion soup, gravies, or a deeply nourishing sip.
What you’ll need:
* Beef Bones: 3-4 lbs beef marrow bones, knuckle bones, neck bones, or oxtail. Ask your butcher for “soup bones.”
* Mirepoix: 2 large carrots (roughly chopped), 2 stalks celery (roughly chopped), 1 large onion (quartered).
* Aromatics: 3-4 cloves garlic (smashed), 2 bay leaves, 1 tsp whole black peppercorns, a few sprigs fresh thyme.
* Apple Cider Vinegar: 1-2 tablespoons (helps extract minerals)
* Water: 10-12 cups (enough to cover bones and vegetables by about 1 inch).
* Large Stockpot
Instructions:
1. Roast Bones (Crucial for Beef): Spread the beef bones in a single layer on a large baking sheet. Roast at 400°F (200°C) for 45-60 minutes, turning once, until deeply browned. This step is essential for rich beef flavor. You can also add the mirepoix to the pan for the last 20 minutes of roasting.
2. Deglaze (Optional but Recommended): Once bones are roasted, if there are browned bits stuck to the pan, you can add a little water or wine to the hot pan on the stovetop, scraping up those bits – this is called deglazing and adds immense flavor to your broth. Pour it into the stockpot.
3. Combine Ingredients: Transfer the roasted beef bones, roasted (or raw) mirepoix, garlic, bay leaves, peppercorns, thyme, and apple cider vinegar to your large stockpot.
4. Add Cold Water: Pour in enough cold water to cover the ingredients by about 1 inch.
5. Bring to a Simmer & Skim: Bring to a boil over medium-high heat. As it heats up, skim off any foam or scum that rises to the surface for the first 20-30 minutes.
6. Simmer (Long and Slow): Reduce the heat to low to maintain a very gentle simmer. Simmer, partially covered, for 12-24 hours for bone broth. The longer, the more gelatin and nutrients you’ll extract.
7. Strain: Carefully strain the broth through a fine-mesh sieve or colander lined with cheesecloth into a clean bowl or pot. Discard all solids.
8. Cool & Degrease: Allow the broth to cool completely. The fat will solidify on top. Skim off the solid fat for a less greasy broth (or leave it for extra richness, if desired). You should see a gelatinous consistency when it’s cold – a sign of a successful bone broth!
9. Store: Transfer to airtight containers.
Essential Tips for Success
- Start with Cold Water: Always add cold water to your bones and vegetables. This allows impurities to rise to the top slowly, making them easier to skim off for a clearer broth.
- Gentle Simmer is Key: Never boil your broth vigorously. A rolling boil emulsifies fat and impurities into the liquid, leading to a cloudy, greasy, and sometimes bitter broth. Aim for just a few gentle bubbles breaking the surface.
- Skim Scum: Be diligent about skimming off the foam and impurities that rise to the surface during the first 30-60 minutes of simmering. This is crucial for a clear, clean-tasting broth.
- Don’t Stir Excessively: Over-stirring can also lead to a cloudy broth by disturbing the solids. Just let it be!
- Don’t Overcrowd the Pot: Give your ingredients room to breathe and simmer properly. If your pot is too full, the broth won’t circulate effectively, and it will be harder to skim.
- Salt at the End: Do not add salt until your broth is finished simmering and strained. As the broth reduces, the salt concentration will increase, and you risk making it too salty. Season to taste when you’re ready to use it.
- Strain Thoroughly: For the clearest broth, strain first through a colander, then through a fine-mesh sieve, and optionally, through a sieve lined with cheesecloth.
- Taste and Adjust: Always taste your broth! It should have a clean, rich flavor. If it tastes weak, you might need to simmer it a bit longer (for stock/bone broth) or reduce it slightly after straining.
Common Mistakes to Avoid
- Boiling Vigorously: As mentioned, this is a big one. It creates cloudy, greasy broth and can extract undesirable flavors from bones. Always keep it at a gentle simmer.
- Adding Salt Too Early: This can result in an overly salty broth once it reduces. Wait until the end.
- Not Skimming the Scum: Skipping this step leads to a murky, less appealing broth.
- Over-Simmering Vegetable Broth: Simmering vegetable broth for too long (over 1.5-2 hours) can make it bitter due to the breakdown of certain vegetable compounds.
- Leaving Solids in Too Long (Especially Vegetables): While bones can go for a long time, vegetables should be removed after a few hours for meat broths/stocks, or after their recommended time for vegetable broth. They will eventually degrade and release unpleasant flavors.
- Not Cooling Properly: This is a food safety issue! Never put a large pot of hot broth directly into the refrigerator. It raises the fridge temperature and can put other foods into the “danger zone” for bacterial growth.
Storing Your Liquid Gold
Once your broth or stock is made and cooled, proper storage is key to enjoying it for weeks or months.
- Cool Down Quickly: This is crucial for food safety.
- Ice Bath: The best way to cool large quantities is to place the hot pot into a sink filled with ice water (an “ice bath”). Stir the broth occasionally to help it cool faster.
- Divide into Smaller Containers: Once the broth has cooled slightly, divide it into smaller, shallow containers. This increases the surface area and helps it cool down more quickly.
- Don’t Cover Tightly Until Cold: Leave containers uncovered or partially covered until the broth is completely cold.
- Refrigeration:
- Once completely chilled, transfer to airtight containers. Homemade broth will last for 3-4 days in the refrigerator.
- Freezing:
- For longer storage, freezing is your best friend!
- Ice Cube Trays: Pour cooled broth into ice cube trays for easy, small portions perfect for deglazing, making sauces, or cooking grains. Once frozen, pop them out and transfer to a freezer-safe bag or container.
- Freezer-Safe Containers/Bags: Use freezer-safe plastic containers, glass jars (leave headspace for expansion!), or heavy-duty freezer bags. Lay bags flat to freeze, then store upright to save space.
- Frozen broth will last for 3-6 months and sometimes even longer without significant loss of quality.
Creative Ways to Use Your Broth & Stock
Now that you have a stash of homemade goodness, here are just a few ideas to put it to work:
- Soups & Stews: The most obvious use! Elevate any soup recipe.
- Risotto: Use broth instead of water for an incredibly flavorful, creamy risotto.
- Gravies & Sauces: The rich body of a good stock is perfect for deglazing a pan and building a delicious sauce.
- Cooking Grains: Cook rice, quinoa, or couscous in broth instead of water for added flavor and nutrients.
- Braising Meats & Vegetables: Provides a flavorful liquid for slow-cooked dishes.
- Pot Roasts: The ultimate liquid for tender, flavorful pot roasts.
- Steaming Vegetables: Use a little broth in the bottom of your steamer for added flavor.
- Directly for Sipping: A warm cup of bone broth can be incredibly comforting and nourishing, especially when feeling under the weather.
Making your own broth and stock is one of the most fundamental and rewarding skills in the kitchen. It’s a practice that embodies flavor, nutrition, and sustainability. So, gather your bones and veggie scraps, embrace the gentle simmer, and get ready to transform your cooking with the incredible power of homemade liquid gold! Happy simmering!
- Stockpot – 20 Quart – Brushed Stainless Steel – Heavy Duty Induction Pot with Lid and Riveted Handles – For Soup, Seafood, Stock, Canning and for Catering for Large Groups and Events by BAKKEN
- GasOne 30Qt Aluminum Stock Pot with Strainer and Lid – Large Deep Fryer Pot with Basket for Boiling, Frying Turkey, Seafood, Crawfish – Food-Grade Aluminum Large Cooking Pot with Sturdy Handles
- IMUSA 12 Quart Stainless Steel Stock Pot with Lid
FAQ
Q. What distinguishes “The Ultimate Guide” from other resources on homemade broth and stock?
A. The Ultimate Guide to Homemade Broth & Stock stands out due to its comprehensive nature, covering foundational techniques for various types of broths and stocks (bone, vegetable, seafood), advanced tips for flavor enhancement, troubleshooting common issues, and practical advice on utilizing scraps and maximizing yield. It’s designed to take you from beginner to broth master, offering a holistic approach to kitchen efficiency and flavor building.
Q. Is this guide suitable for complete beginners, or do I need prior cooking experience?
A. Absolutely, this guide is designed with beginners in mind. It provides clear, step-by-step instructions, essential equipment lists, and explanations of fundamental concepts, making it accessible even for those with no prior broth-making experience. Experienced cooks will also find advanced tips, nuances, and diverse recipes to elevate their craft.
Q. What kind of ingredients does the guide focus on for making broth and stock?
A. The guide emphasizes using readily available ingredients, often focusing on parts typically discarded, such as vegetable scraps (onion peels, carrot tops, celery ends), poultry carcasses, beef bones, and fish frames. It also extensively covers the use of fresh herbs, aromatic vegetables, and spices to build complex flavors, promoting a sustainable, zero-waste approach in your kitchen.
Q. How long does it typically take to make a batch of broth or stock using the methods described?
A. The time commitment varies depending on the type of broth or stock you are making. Vegetable broths can be ready in 1-2 hours of simmering. Chicken stock usually takes 3-6 hours, while beef or bone broths often require 8-24 hours of slow simmering for maximum nutrient and flavor extraction. The guide clearly outlines active prep time versus passive simmering time for each recipe.
Q. Does the guide cover options for vegetarian or vegan broth and stock?
A. Yes, the guide dedicates significant sections to crafting rich and flavorful vegetarian and vegan broths. It explores various plant-based ingredients, umami boosters, and specific techniques to achieve depths of flavor often associated with meat-based broths, ensuring delicious and versatile options for all dietary preferences.
Q. What are the recommended storage methods for homemade broth and stock after it’s made?
A. The guide provides detailed instructions for optimal storage. It recommends refrigerating broth for up to 3-4 days in airtight containers. For longer storage, freezing is highly recommended, with options like ice cube trays for small portions or larger containers/freezer bags, allowing broth to last for several months in the freezer. It also touches upon safe canning methods for shelf-stable options.
Q. Will this guide help me troubleshoot common issues like cloudy broth or lack of flavor?
A. Yes, a dedicated troubleshooting section addresses common problems encountered during broth and stock making. It offers practical solutions for issues like cloudy broth (e.g., proper skimming, gentle simmering, straining techniques), blandness (e.g., appropriate salt usage, roasting bones, adding aromatics at the right time), and other concerns, ensuring you achieve perfect, flavorful results consistently.