Discover Your Perfect Brew: A Guide to the Best Coffee Brewing Methods
- BLACK+DECKER 12-Cup Digital Coffee Maker, Programmable, Washable Basket Filter, Sneak-A-Cup, Auto Brew, Water Window, Keep Hot Plate, Black
- Keurig K-Express Single Serve K-Cup Pod Coffee Maker, 3 Brew Sizes, Strong Button Feature, 42oz Removable Reservoir, Black
- Newhouse Electric Coffee Machine NHCM-001-12, 12-Cup Coffee Maker with Auto Shut Off, Electric Pot with Metal Mesh Coffee Filter Basket, ETL Certified for Hospitality and Residential Use
There’s nothing quite like that first sip of perfectly brewed coffee. It’s more than just a drink; it’s a ritual, a comfort, and often, the much-needed kickstart to your day. But with so many ways to brew, how do you find your ideal cup?
Forget the confusing jargon and endless gadgets. This guide will walk you through the most popular and beloved coffee brewing methods, offering simple, step-by-step instructions, helpful tips, and common mistakes to avoid. Our goal is to help you unlock incredible flavors and brew the best coffee right in your own home, every single time.
Let’s dive in and find your perfect brewing match!
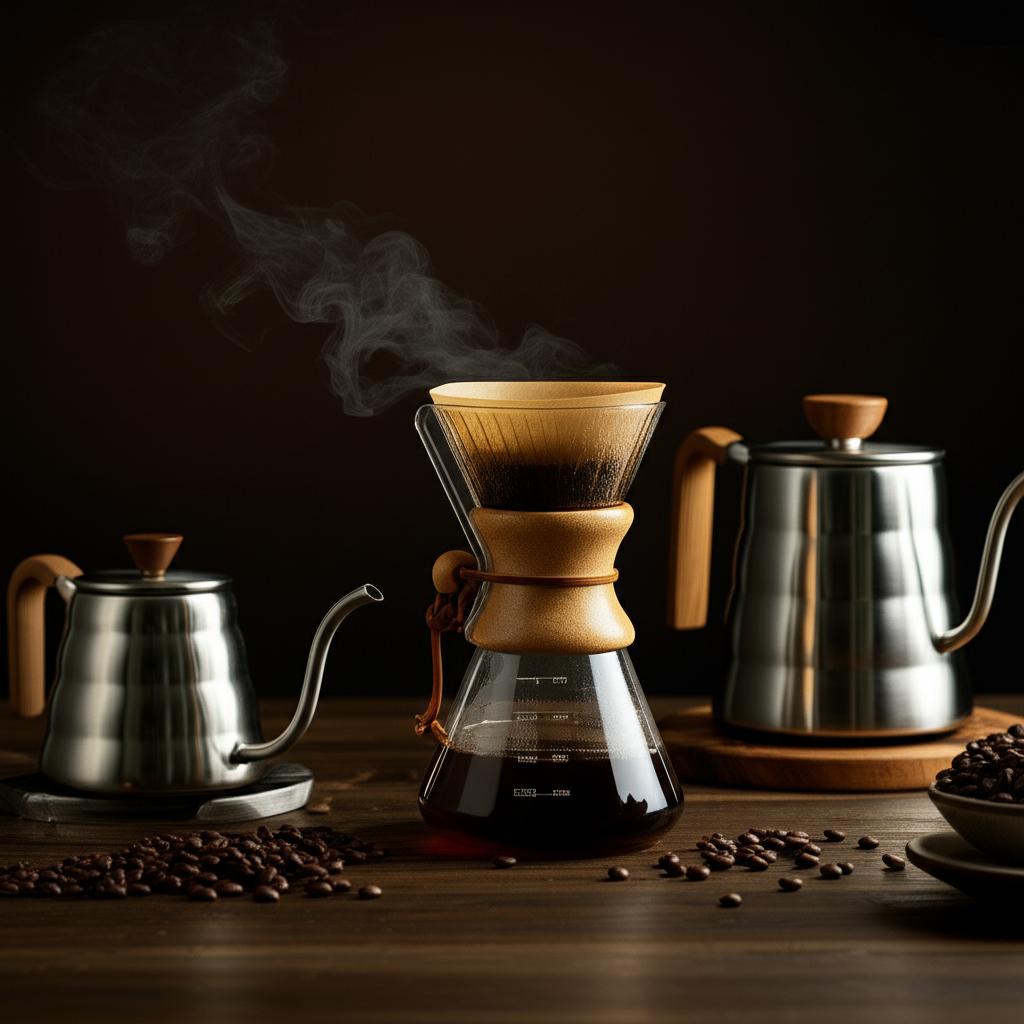
1. The Pour Over: For Clarity & Nuance
Why You’ll Love It: The pour-over method is celebrated for producing an incredibly clean, bright, and nuanced cup of coffee. It allows for precise control over the brewing process, highlighting the subtle flavors and aromas of your beans. If you appreciate a delicate, flavorful coffee without any sediment, this is your go-to.
Taste Profile: Bright acidity, clean finish, clear distinction of origin flavors.
How It Works (Step-by-Step):
- Heat Your Water: Bring fresh, filtered water to between 195°F and 205°F (90-96°C).
- Grind Your Beans: Use a medium-fine grind, similar to table salt.
- Prepare Your Filter: Place a paper filter in your pour-over cone. Rinse the filter thoroughly with hot water to remove any papery taste and preheat your brewing vessel. Discard the rinse water.
- Add Grounds: Add your freshly ground coffee to the wet filter. Gently shake to level the bed of grounds.
- Bloom: Pour just enough hot water (about twice the weight of your coffee) evenly over the grounds to saturate them. Let it “bloom” for 30-45 seconds. This allows trapped gases to escape, leading to a more even extraction.
- Slow Pour: Begin pouring the remaining water slowly and steadily in concentric circles, starting from the center and spiraling outwards, then back in. Avoid pouring directly on the filter paper.
- Watch It Brew: Continue pouring until you’ve reached your desired coffee volume. The total brew time should be around 2.5 to 3.5 minutes.
- Enjoy: Remove the cone and savor your perfectly clear cup!
Key Tips for Success:
- Consistent Pour: Aim for a slow, steady, and even pour. A gooseneck kettle can greatly help with this.
- Fresh Bloom: Don’t skip the bloom! It’s crucial for optimal extraction.
- Right Ratio: A good starting point is 1:15 to 1:17 coffee-to-water ratio (e.g., 20g coffee to 300-340g water).
Common Mistakes to Avoid:
- Rushing the Pour: Pouring too fast leads to under-extraction and a weak, sour cup.
- Wrong Grind Size: Too coarse, and it’s watery; too fine, and it’s bitter and chokes the filter.
- Not Rinsing the Filter: Leaves an unpleasant papery taste in your final brew.
2. The French Press: For Richness & Full Body
Why You’ll Love It: The French Press is beloved for its ability to produce a rich, full-bodied, and robust cup of coffee with a satisfying mouthfeel. Because the coffee grounds remain in contact with the water throughout the steeping process, and no paper filter is used, it allows more of the coffee’s natural oils and fine sediments to pass into your cup, contributing to its unique character.
Taste Profile: Bold, full-bodied, often with earthy or chocolaty notes, and a pleasant sediment in the cup.
How It Works (Step-by-Step):
- Heat Your Water: Bring fresh, filtered water to between 195°F and 205°F (90-96°C).
- Grind Your Beans: Use a very coarse, even grind, similar to breadcrumbs or sea salt. This is crucial to avoid a sludgy brew.
- Preheat (Optional but Recommended): Pour some hot water into your French press, swirl it around, then discard. This keeps your coffee hotter longer.
- Add Grounds: Add your coarse grounds to the bottom of the French press.
- Add Water & Stir: Pour the hot water over the grounds, ensuring they are fully saturated. Give it a gentle stir (not vigorous!) to ensure all grounds are wet.
- Steep: Place the lid on the French press with the plunger pulled up. Let it steep for 4 minutes. For a stronger brew, you can go up to 5 minutes.
- Slowly Press: After steeping, slowly and steadily press the plunger down with even pressure until it reaches the bottom. Resist the urge to press too quickly, as this can force fine particles through and create a muddy cup.
- Serve Immediately: Pour your coffee into a mug right away. Leaving it in the French press will continue the extraction, leading to over-extracted and bitter coffee.
Key Tips for Success:
- Coarse Grind is King: This cannot be emphasized enough. A fine grind will result in a muddy, bitter cup and make plunging difficult.
- Don’t Over-Press: Pressing too hard or too fast can disturb the sediment and ruin the clarity.
- Serve All at Once: Transferring the coffee immediately stops the brewing process.
Common Mistakes to Avoid:
- Fine Grind: The most common mistake, leading to a sludgy, over-extracted mess.
- Steeping Too Long: Results in bitter, harsh coffee.
- Pressing Too Fast/Hard: Forces fines through the filter, making the coffee cloudy and gritty.
3. Automatic Drip Coffee: For Convenience & Consistency
Why You’ll Love It: The automatic drip coffee maker is the quintessential morning workhorse for a reason: it’s incredibly convenient, consistent, and requires minimal effort. It’s perfect for brewing larger batches, making it ideal for households where multiple people enjoy coffee or for those who need their coffee ready with the push of a button.
Taste Profile: Generally balanced, clean, and consistent, varying widely based on the quality of the machine and ingredients.
How It Works (Step-by-Step):
- Fill Water Reservoir: Fill the machine’s water reservoir with fresh, filtered water. Only add the amount of water you intend to brew.
- Insert Filter: Place a clean paper filter (or permanent mesh filter) into the brew basket.
- Grind Your Beans: Use a medium grind, similar to table salt. This is the standard grind size for most drip machines.
- Add Grounds: Add your freshly ground coffee to the filter. A good starting point is 2 tablespoons (or 10g) of coffee per 6 ounces (177ml) of water.
- Start Brewing: Close the lid, place the carafe on the hot plate, and press the brew button.
- Serve & Enjoy: Once the brewing cycle is complete, pour and enjoy.
Key Tips for Success:
- Cleanliness is Key: Regularly clean your drip machine to prevent mineral buildup and mold, which can significantly impact flavor. Descale every 1-3 months.
- Fresh Beans & Grind: Even with an automatic machine, using freshly roasted, freshly ground coffee makes a huge difference.
- Proper Coffee-to-Water Ratio: Don’t skimp on the coffee! Using too little will result in a weak, under-extracted brew.
Common Mistakes to Avoid:
- Using Old/Pre-Ground Coffee: Stale coffee yields a flat, uninspired taste.
- Not Cleaning the Machine: Mineral buildup (scale) can clog the machine and impart off-flavors.
- Wrong Grind Size: Too fine can clog the filter and lead to bitterness; too coarse can lead to weak, watery coffee.
4. The Moka Pot: For Strong, Espresso-Like Coffee
Why You’ll Love It: The Moka Pot, often called a “stovetop espresso maker,” brews a strong, concentrated coffee that’s perfect for those who enjoy a robust, intense flavor similar to espresso, but without needing an expensive machine. It’s iconic for its gurgling sounds and the rich aroma it fills your kitchen with.
Taste Profile: Intense, bold, sometimes slightly bitter (in a good way!), with a dark chocolate or roasted flavor profile. It’s excellent on its own or as a base for milk drinks.
How It Works (Step-by-Step):
- Fill the Base: Fill the lower chamber with cold water, just below the safety valve.
- Add Grounds: Insert the metal filter basket and fill it loosely with medium-fine ground coffee. Do not pack or tamp the grounds down, as this can impede water flow and lead to over-extraction.
- Assemble: Screw the upper chamber firmly onto the base. Ensure a tight seal.
- Heat: Place the Moka pot on your stovetop over medium-low heat.
- Brew: As the water heats, pressure builds, forcing hot water up through the coffee grounds and into the upper chamber. You’ll hear a gurgling sound as the coffee flows.
- Listen & Remove: Once the gurgling sound changes to a sputtering noise and the upper chamber is mostly filled, remove the Moka pot from the heat immediately.
- Serve: Pour your concentrated coffee and enjoy!
Key Tips for Success:
- Medium-Fine Grind: Slightly coarser than espresso, but finer than drip. If it’s too fine, it can get bitter; too coarse, and it’ll be weak.
- Don’t Tamp: Leave the grounds loose in the basket.
- Low and Slow Heat: Brewing on lower heat prevents the coffee from tasting burnt or metallic.
- Remove from Heat Immediately: Over-extracting the last bit of sputtering water will lead to bitterness.
Common Mistakes to Avoid:
- Packing the Grounds: This creates too much resistance and can lead to a burnt taste or an explosion of steam.
- High Heat: Burning the coffee and creating a harsh, metallic flavor.
- Over-Extracting: Leaving it on the heat too long after the coffee has mostly come up.
5. Cold Brew: For Smoothness & Low Acidity
Why You’ll Love It: Cold brew is a revelation for anyone who finds hot coffee too acidic or bitter. By steeping coffee grounds in cold water for an extended period, it produces a remarkably smooth, naturally sweet, and low-acid coffee concentrate. It’s perfect for enjoying over ice, diluting with water, or adding milk.
Taste Profile: Exceptionally smooth, low acidity, naturally sweet, with distinct chocolate, nutty, or caramel notes.
How It Works (Step-by-Step):
- Grind Your Beans: Use a very coarse grind, similar to French press coffee or larger. This prevents over-extraction and makes filtering easier.
- Combine Coffee & Water: In a large jar or container, combine your coarse coffee grounds with cold, filtered water. A common ratio for concentrate is 1:4 to 1:8 coffee-to-water ratio by weight (e.g., 100g coffee to 400-800ml water).
- Stir: Give it a gentle stir to ensure all grounds are fully saturated.
- Steep: Cover the container and let it steep in the refrigerator for 12 to 24 hours. The longer you steep, the stronger the concentrate.
- Filter (First Pass): After steeping, place a fine-mesh sieve lined with cheesecloth or a nut milk bag over another clean container. Pour the cold brew mixture through to remove the large grounds.
- Filter (Second Pass for Clarity): For an even smoother, cleaner concentrate, line a funnel with a paper coffee filter (or a reusable cloth filter) and slowly pour the filtered cold brew through it. This second filtration removes fine sediment.
- Store & Dilute: Store your cold brew concentrate in an airtight container in the refrigerator for up to 1-2 weeks. When ready to drink, dilute it with water, milk, or ice to your preferred strength (usually a 1:1 or 1:2 ratio of concentrate to water/milk).
Key Tips for Success:
- Coarse Grind is Essential: Prevents muddy coffee and over-extraction.
- Long Steep Time: Don’t rush it! The extended contact time with cold water is what extracts flavor without bitterness.
- Dilute to Taste: Cold brew is a concentrate, so don’t drink it straight unless you prefer an extremely strong cup.
Common Mistakes to Avoid:
- Using Fine Grind: Leads to bitter, over-extracted cold brew and makes filtering a nightmare.
- Not Steeping Long Enough: Results in weak, under-extracted concentrate.
- Not Filtering Properly: Leaves a gritty texture. Don’t skip the double filtration for a truly smooth brew.
Crucial Considerations for Any Brewing Method
Regardless of which method you choose, a few universal principles will elevate your coffee experience from good to absolutely glorious:
-
Grind Size is Paramount: This is arguably the most important variable after bean quality. The correct grind size ensures proper extraction for your chosen method. Too fine, and you risk over-extraction (bitterness); too coarse, and you’ll get under-extraction (weak, sour).
- Coarse: French Press, Cold Brew
- Medium-Coarse: Percolator
- Medium: Automatic Drip
- Medium-Fine: Pour Over
- Fine: Moka Pot
- Very Fine: Espresso (not covered here, but good for context)
-
Water Quality & Temperature:
- Use filtered water. Tap water contains impurities and chlorine that can negatively impact flavor.
- Water temperature matters! Aim for 195°F to 205°F (90-96°C) for hot brewing methods. Too cold, and you under-extract; too hot, and you can scorch the grounds, leading to bitterness. Cold brew is the obvious exception here.
-
The Golden Ratio (Coffee-to-Water): While personal preference plays a role, a widely accepted starting point for most hot brewing methods is the “Golden Ratio” of 1:15 to 1:18 (coffee grounds to water by weight).
- For every 1 gram of coffee, use 15-18 grams of water.
- For Cold Brew, use a significantly higher concentrate ratio, as mentioned above.
-
Bean Freshness & Storage:
- Buy fresh roasted coffee beans. Look for a “roasted on” date, not a “best by” date.
- Grind right before brewing. Pre-ground coffee loses its aroma and flavor rapidly (within minutes!). A burr grinder is a worthwhile investment for consistency.
- Store whole beans in an airtight container away from light, heat, and moisture. Do not store in the refrigerator or freezer if you plan to use them daily.
Your Coffee Adventure Awaits!
There’s no single “best” coffee brewing method; the best one is the one that consistently delivers the cup you love, fits your lifestyle, and brings you joy. Don’t be afraid to experiment with different methods, ratios, and grind sizes. Pay attention to how small changes affect the taste in your cup.
With these detailed steps, tips, and common pitfalls to avoid, you’re well on your way to becoming your own favorite barista. So, choose a method that sparks your interest, grab some quality beans, and embark on your journey to brewing the perfect cup, every single time. Happy brewing!
- BLACK+DECKER 12-Cup Digital Coffee Maker, Programmable, Washable Basket Filter, Sneak-A-Cup, Auto Brew, Water Window, Keep Hot Plate, Black
- Keurig K-Express Single Serve K-Cup Pod Coffee Maker, 3 Brew Sizes, Strong Button Feature, 42oz Removable Reservoir, Black
- Newhouse Electric Coffee Machine NHCM-001-12, 12-Cup Coffee Maker with Auto Shut Off, Electric Pot with Metal Mesh Coffee Filter Basket, ETL Certified for Hospitality and Residential Use
FAQ
Q. What’s considered the “best” coffee brewing method?
A. There isn’t one single “best” method as it largely depends on personal preference for taste, body, clarity, and convenience. Popular methods like pour-over, French press, AeroPress, and espresso machines each offer unique characteristics, catering to different palates and lifestyles. The “best” method is ultimately the one that consistently produces coffee you enjoy the most.
Q. Which brewing method is best for a beginner?
A. For beginners, a French Press or an automatic drip coffee maker are often recommended. French Press offers a robust, full-bodied coffee with simple immersion brewing, while automatic drip machines provide convenience and consistency with minimal effort. AeroPress is also quite forgiving and versatile once you get the hang of it, offering a wide range of brew styles.
Q. How does grind size impact different brewing methods?
A. Grind size is crucial and varies significantly per method. Espresso requires an extra-fine grind, Moka pot a fine grind, pour-over and automatic drip coffee a medium grind, and French press a coarse grind. Using the wrong grind size can lead to over-extraction (bitter, harsh coffee) if too fine, or under-extraction (weak, sour coffee) if too coarse, affecting the final taste dramatically.
Q. What’s the main difference between pour-over and automatic drip coffee?
A. While both use a similar drip concept, pour-over offers more control and often a cleaner, more nuanced cup. Pour-over involves manually pouring hot water over coffee grounds in a specific pattern, allowing for precise saturation and extraction based on the brewer’s technique. Automatic drip machines automate this process, offering convenience and consistent results, but typically less control over variables like water flow, temperature, and bloom time.
Q. Which method yields the strongest or most concentrated coffee?
A. Espresso machines produce the most concentrated coffee, yielding a small, intense shot designed to be enjoyed as is or as a base for milk drinks. Moka pots also create a very strong, espresso-like concentrate using steam pressure. For a strong standard cup, French Press can deliver a rich, full-bodied brew due to the extended contact time between water and grounds and the unfiltered oils.
Q. Is water temperature important for brewing, and what’s the ideal range?
A. Yes, water temperature is critically important for optimal extraction. The ideal brewing temperature range is generally between 195°F and 205°F (90°C to 96°C). Water that’s too cool will under-extract the coffee, leading to a sour, weak taste, while water that’s too hot can over-extract, resulting in a bitter, burnt, or overly harsh flavor.
Q. Can I use any brewing method to make iced coffee?
A. Absolutely! While some methods like cold brew are specifically designed for iced coffee, you can adapt most hot brewing methods. For a quick iced coffee, brew your coffee stronger than usual (to account for dilution from melting ice) and pour it directly over ice. Alternatively, you can brew hot and then chill rapidly, or use the “Japanese iced coffee” method with pour-over, brewing directly onto a bed of ice which instantly chills and locks in aromas.