The Art of Making Homemade Syrups: Unlock Natural Flavors & Sweetness
- Cuisinart 1.5 Quart Saucepan w/Cover, Chef’s Classic Stainless Steel Cookware Collection, 719-16
- SENSARTE Nonstick Saucepan with Lid, 1.5 Quarts Small Pot with Swiss Granite Coating, Stay-cool Handle, Multipurpose Handy Sauce Pot Small Kitchen Cooking Pot, Induction Comptable, PFOA Free
- GreenLife 2 Quart Ceramic Nonstick Saucepan with Lid, PFAS-Free, Stay-Cool Handle, Multipurpose Kitchen Cooking Pot, Dishwasher & Oven Safe, Pink
Are you tired of artificial sweeteners and bland, store-bought syrups? Imagine drizzling a rich, fruity concoction over your pancakes, stirring a fragrant herbal syrup into your tea, or crafting a custom cocktail with a burst of natural flavor. Welcome to The Art of Making Homemade Syrups, a delightful journey that empowers you to control ingredients, customize flavors, and elevate everyday culinary experiences.
Making your own syrups is surprisingly simple, incredibly rewarding, and opens up a world of creative possibilities. It’s not just about sweetness; it’s about capturing the essence of fresh fruits, aromatic herbs, and exotic spices in a versatile, liquid form.
Why Homemade Syrups Are a Game-Changer
- Unparalleled Freshness & Quality Control: You choose the best, ripest ingredients, free from artificial colors, flavors, or preservatives.
- Customization & Creativity: The flavor combinations are literally endless! Mix and match fruits, herbs, and spices to create unique profiles you won’t find anywhere else.
- Cost-Effective: Often, making syrups at home is more economical than buying specialty versions, especially if you have an abundance of seasonal produce.
- Reduce Waste: Have an overripe fruit or a garden overflowing with herbs? Turn them into a delicious syrup instead of letting them go to waste.
Ready to transform simple ingredients into liquid gold? Let’s dive in!
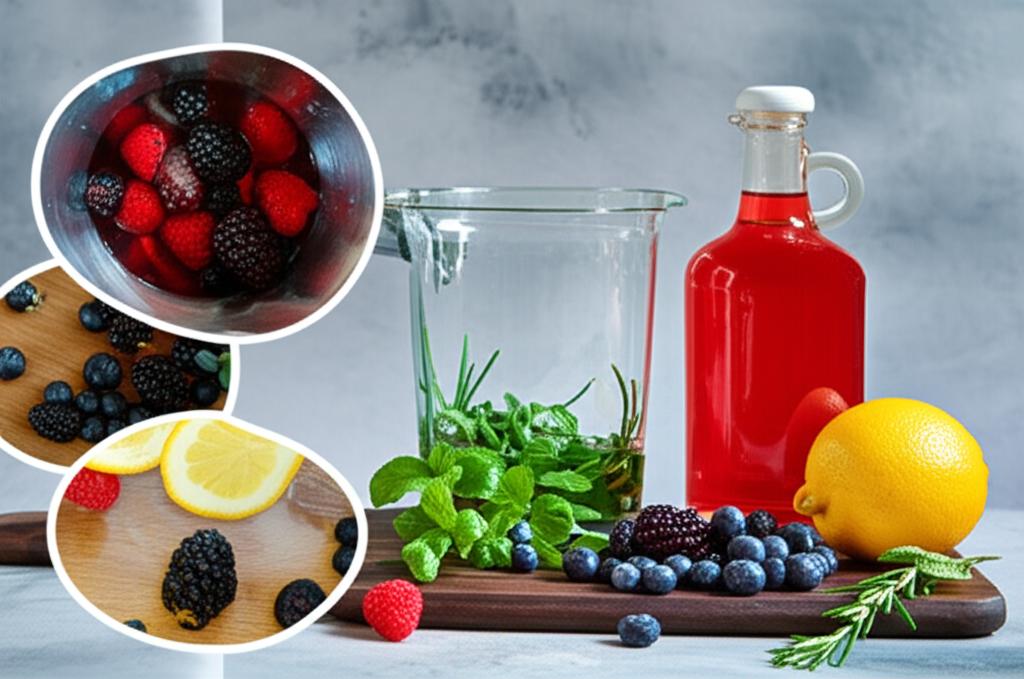
Gather Your Essentials: What You’ll Need
The beauty of homemade syrups lies in their simplicity. You likely have most of these items already:
- Saucepan: A medium-sized one will do.
- Measuring Cups & Spoons: For accurate ingredient ratios.
- Fine-Mesh Sieve or Cheesecloth: Essential for straining out solids for a clear syrup.
- Funnel: Makes pouring into bottles easier and less messy.
- Clean Glass Bottles or Jars with Airtight Lids: Sterilized jars are crucial for good shelf life.
- Basic Ingredients: Water and granulated sugar.
The Basic Simple Syrup Formula: Your Foundation
At its core, most homemade syrups start with a simple syrup base – a solution of sugar and water.
- Standard Simple Syrup (1:1 Ratio): For a versatile, medium-thick syrup, combine 1 part water with 1 part granulated sugar. This is perfect for cocktails, iced tea, or light fruit syrups.
- Rich Simple Syrup (2:1 Ratio): For a thicker, more concentrated syrup, use 2 parts granulated sugar to 1 part water. This is ideal for pancakes, desserts, or when you want less liquid but more sweetness.
While granulated sugar is common, you can also experiment with other sugars like brown sugar (for a molasses note), cane sugar, or even honey (though honey syrups require different ratios and care).
Step-by-Step Guide to Crafting Your Homemade Syrup
This basic method can be adapted for almost any flavor you dream up!
Step 1: Combine & Dissolve
- In your saucepan, combine your water and granulated sugar according to your desired ratio (1:1 or 2:1).
- Place the saucepan over medium heat.
- Stir constantly until the sugar is completely dissolved. You’ll know it’s dissolved when the liquid becomes clear and you can no longer see sugar crystals at the bottom of the pan. Do not boil yet.
Step 2: Add Your Flavor Base (The Infusion)
- Once the sugar is dissolved, you can introduce your chosen flavorings.
- For fruits: Add washed, chopped fruits (berries, stone fruits, citrus peels, etc.) directly to the sugar solution.
- For herbs/spices: Add fresh herbs (lightly bruised for more aroma), whole spices (cinnamon sticks, star anise), or peeled ginger slices.
- Bring the mixture to a gentle simmer. Avoid a rolling boil, as this can evaporate too much water and make your syrup overly thick or concentrated.
Step 3: Simmer & Infuse
- Reduce the heat to low and let the mixture gently simmer for 5 to 20 minutes.
- Delicate flavors (mint, basil, berries): Simmer for a shorter time (5-10 minutes) to retain their freshness.
- Hardier flavors (ginger, cinnamon, robust fruits): Simmer for a longer time (10-20 minutes) to extract maximum flavor.
- Watch for changes in color and aroma. The liquid will likely take on the color of your ingredients.
Step 4: Strain & Cool
- Remove the saucepan from the heat.
- Carefully strain the syrup through a fine-mesh sieve (lined with cheesecloth for extra clarity if desired) into a heat-proof bowl or measuring cup. Press gently on the solids with the back of a spoon to extract all the flavorful liquid. Discard the solids.
- Allow the syrup to cool completely at room temperature. This is a crucial step to prevent condensation inside your storage containers, which can lead to spoilage.
Step 5: Bottle & Store
- Once the syrup is completely cool, use a funnel to pour it into your sterilized glass bottles or jars.
- Seal tightly with an airtight lid.
- Label and date your syrup so you know what it is and when it was made.
Unleashing Your Creativity: Flavor Combinations
This is where the “art” truly comes in! The possibilities are truly endless.
- Fruity & Vibrant:
- Berry Syrups: Strawberry, raspberry, blueberry, blackberry. (Great for lemonade, cocktails, or pancakes).
- Stone Fruit Syrups: Peach, cherry, plum, apricot. (Lovely with iced tea or desserts).
- Citrus Syrups: Lemon, lime, orange, grapefruit. (Wonderful in sparkling water or glazes).
- Tropical Syrups: Mango, pineapple, passion fruit. (Perfect for exotic cocktails or mocktails).
- Herbal & Aromatic:
- Mint Syrup: Refreshing in iced tea or mojitos.
- Basil Syrup: Surprisingly delicious in lemonade or with berries.
- Rosemary Syrup: Pairs beautifully with citrus or gin.
- Lavender Syrup: Adds a delicate floral note to lattes or desserts.
- Spiced & Warming:
- Ginger Syrup: Kick for sodas, hot toddies, or stir-fries.
- Cinnamon Syrup: Cozy addition to coffee, oatmeal, or baked goods.
- Vanilla Bean Syrup: Elevates anything from coffee to whipped cream.
- Star Anise or Cardamom Syrup: Exotic twist for desserts or Middle Eastern-inspired drinks.
- Unique Combos:
- Strawberry-Basil
- Peach-Rosemary
- Ginger-Lemon
- Blueberry-Thyme
Proper Storage for Longevity
To ensure your homemade syrups stay fresh and delicious:
- Always use clean, sterilized glass bottles or jars. This minimizes bacteria introduction.
- Refrigeration is a must. Homemade syrups do not contain preservatives, so they need to be kept cold.
- Shelf Life:
- Fruit-based syrups: Typically last 2-4 weeks in the refrigerator.
- Simple or herbal syrups: Can last 3-6 weeks or even longer if properly sealed and stored.
- Watch for signs of spoilage: Any cloudiness, mold, off-smell, or fermentation bubbles mean it’s time to discard. When in doubt, throw it out!
Common Mistakes to Avoid
Even seasoned syrup makers can sometimes stumble. Be aware of these pitfalls:
- Over-boiling/Reducing Too Much: This can make your syrup overly thick, too sweet, or even give it a burnt sugar taste. Gentle simmering is key.
- Not Stirring Enough During Dissolving: Sugar crystals can stick to the bottom of the pan and burn, tainting the flavor of your syrup.
- Skipping the Straining Step: Leaving solids in the syrup can lead to cloudiness and reduce its shelf life.
- Improper Sterilization of Jars: Any lingering bacteria can cause your syrup to spoil quickly. Always sterilize your containers.
- Overcrowding with Flavorings: While you want flavor, too many solids can make straining difficult and sometimes dilute the intended flavor profile.
- Not Letting it Cool Completely Before Bottling: Pouring warm syrup into a cool container can create condensation, introducing moisture that encourages mold growth.
Expert Tips for Syrup Success
- Use Fresh, Ripe Ingredients: The quality of your raw materials directly impacts the flavor of your finished syrup.
- Taste as You Go (Carefully!): Once cool, taste your syrup and adjust if necessary. Sometimes a pinch of acid (lemon juice) can brighten flavors, or a tiny bit more sweetener if it’s too tart.
- Experiment with Sugar Types: Different sugars impart different flavor notes. Try demerara for a rich, caramel note, or honey for floral undertones.
- Don’t Forget a Pinch of Salt: A tiny pinch of salt can actually enhance and balance the sweetness of your syrup, bringing out the other flavors more effectively.
- Label and Date: This seems simple, but it’s crucial for managing your syrup collection and knowing when to use them by.
- Start Simple: Master the basic simple syrup and one or two fruit/herb infusions before tackling complex combinations.
Delightful Ways to Enjoy Your Homemade Syrups
Once you’ve mastered the art, you’ll find endless applications for your delicious creations:
- Beverages:
- Sweeten coffee, tea, or lemonade (hot or iced).
- Create custom craft cocktails or mocktails.
- Make your own gourmet sodas by mixing with sparkling water.
- Stir into smoothies or milkshakes.
- Desserts:
- Drizzle over pancakes, waffles, French toast, or crepes.
- Pour over ice cream, yogurt, or fresh fruit salads.
- Moisten cakes, cupcakes, or muffins.
- Flavor whipped cream or frosting.
- Savory Dishes (Yes!):
- Use as a glaze for roasted meats or vegetables.
- Whisk into salad dressings.
- Add a touch of sweetness to marinades.
Unleash Your Inner Syrup Alchemist!
The art of making homemade syrups is a journey of flavor, creativity, and simple culinary joy. It’s about taking wholesome ingredients and transforming them into liquid gold that can brighten your morning, elevate your evening drink, or simply add a burst of natural sweetness to any dish.
So go ahead, raid your pantry, visit your local farmer’s market, or pluck from your garden. Embrace the process, experiment with confidence, and prepare to delight your taste buds with the incredible flavors of your own handcrafted syrups!
- Cuisinart 1.5 Quart Saucepan w/Cover, Chef’s Classic Stainless Steel Cookware Collection, 719-16
- SENSARTE Nonstick Saucepan with Lid, 1.5 Quarts Small Pot with Swiss Granite Coating, Stay-cool Handle, Multipurpose Handy Sauce Pot Small Kitchen Cooking Pot, Induction Comptable, PFOA Free
- GreenLife 2 Quart Ceramic Nonstick Saucepan with Lid, PFAS-Free, Stay-Cool Handle, Multipurpose Kitchen Cooking Pot, Dishwasher & Oven Safe, Pink
FAQ
Q. What are the basic ingredients and steps for making a simple homemade syrup?
A. The most fundamental syrup involves just two ingredients: sugar and water, typically in a 1:1 ratio by volume for a standard simple syrup. The basic steps include combining the sugar and water in a saucepan, heating it over medium heat while stirring occasionally until the sugar completely dissolves, and then removing it from the heat. For flavored syrups, your chosen flavoring (fruit, herbs, spices, etc.) is often added during the heating process or steeped in the hot syrup afterward.
Q. How long do homemade syrups typically last, and what’s the best way to store them?
A. The shelf life of homemade syrups varies depending on their sugar concentration and ingredients. A basic simple syrup (1:1 sugar to water) can last about 2-4 weeks in the refrigerator. Higher sugar concentration syrups (like a 2:1 “rich” simple syrup) or those made with ingredients high in natural preservatives (like citrus) may last longer, up to 1-2 months. Syrups containing fresh fruit or dairy will have a shorter shelf life, usually 1-2 weeks. Always store homemade syrups in clean, airtight glass bottles or jars in the refrigerator to prevent spoilage and maintain freshness.
Q. Can I use sweeteners other than granulated sugar, such as honey, maple syrup, or alternative sugars, to make homemade syrups?
A. Yes, you can absolutely experiment with different sweeteners. Honey, maple syrup, agave nectar, and brown sugar can all be used to make unique syrups, each imparting its distinct flavor profile. Be aware that these alternatives may affect the syrup’s consistency and sweetness level, so you might need to adjust ratios. For example, honey and maple syrup are already liquid and can be used directly or diluted slightly, while alternative granular sugars like coconut sugar or turbinado will dissolve similarly to white sugar but add their own caramel notes.
Q. What are some common problems encountered when making syrups, such as crystallization or mold, and how can I prevent them?
A. Crystallization typically occurs when sugar molecules re-form into crystals. To prevent this, ensure all sugar is completely dissolved before you stop stirring or remove from heat. Adding a small amount of acid, like a teaspoon of lemon juice or cream of tartar per cup of sugar, can also help inhibit crystallization. Mold, on the other hand, is usually a sign of improper sterilization or contamination. Always use thoroughly cleaned and sterilized bottles or jars for storage, ensure the syrup is completely cooled before sealing, and store it in the refrigerator to minimize mold growth. Discard any syrup showing signs of mold immediately.
Q. What are the best ways to infuse flavors into homemade syrups, and what kind of flavorings work well?
A. The best way to infuse flavors depends on the ingredient. For fresh fruits (berries, citrus zest), herbs (mint, basil, rosemary), or whole spices (cinnamon sticks, star anise), simmering them gently with the sugar and water for 5-10 minutes, then allowing them to steep off the heat for 30 minutes to several hours (or even overnight in the fridge) before straining, works wonderfully. For delicate flavors or extracts (vanilla, almond), add them after the syrup has cooled to preserve their potency. Dried spices can also be gently toasted before simmering for deeper flavor.
Q. Besides drinks and cocktails, what are other creative uses for homemade syrups in the kitchen?
A. Homemade syrups are incredibly versatile! Beyond beverages, they can elevate your culinary creations. Drizzle them over pancakes, waffles, or French toast. Use them to sweeten and flavor plain yogurt, oatmeal, or overnight oats. They make fantastic glazes for baked goods like cakes, muffins, or even roasted vegetables (e.g., a balsamic-fig syrup on Brussels sprouts). Syrups can also be incorporated into salad dressings, marinades for meats, or as a component in homemade ice cream, sorbet, or popsicles.
Q. Is it necessary to sterilize bottles or jars before storing homemade syrups, and what’s the recommended method?
A. Yes, it is highly recommended to sterilize your bottles or jars before storing homemade syrups. This crucial step helps eliminate bacteria, yeasts, and mold spores that can cause your syrup to spoil quickly. A common and effective method is to wash the bottles/jars thoroughly with hot soapy water, rinse well, and then either boil them in a large pot of water for at least 10 minutes (ensuring they are fully submerged) or sterilize them in a preheated oven at 275°F (135°C) for 15-20 minutes. Allow them to cool completely before filling with cooled syrup.