Sweet Success: The Best Tips for Baking Perfect Cookies Every Time!
- NutriChef 3-Piece Nonstick Kitchen Oven Baking Pans – Premium & Stylish Non-Stick Steel, Commercial Grade Restaurant Quality Metal Bakeware with Red Silicone Handles – Easy to Clean, NCSBS3S
- Commercial Quality Baking Sheet Pan Set, Natural Aluminum Cookie Sheet, Umite Chef Warp Resistant Nonstick Baker’s Half Sheet Pan, Large Thick Cookie Tray Pans for Baking, Roasting(2 Pack, 18X13In)
- GoodCook Everyday Nonstick Carbon Steel Baking Sheet Set, 3 Pack – Small 13” x 9”, Medium 15” x 10”, Large 17” x 11” – Carbon Steel Cooking Pans, Cookie Sheet Bakeware Set
There’s nothing quite like the aroma of freshly baked cookies filling your home. But if your cookies sometimes turn out flat, crumbly, or just not quite right, don’t worry! Baking perfect cookies is an art and a science, and with a few key tips, you’ll be churning out bakery-worthy treats that are chewy, soft, or perfectly crispy – exactly how you like them.
This ultimate guide will walk you through the essential steps, common pitfalls, and secret techniques to ensure cookie perfection every single time.
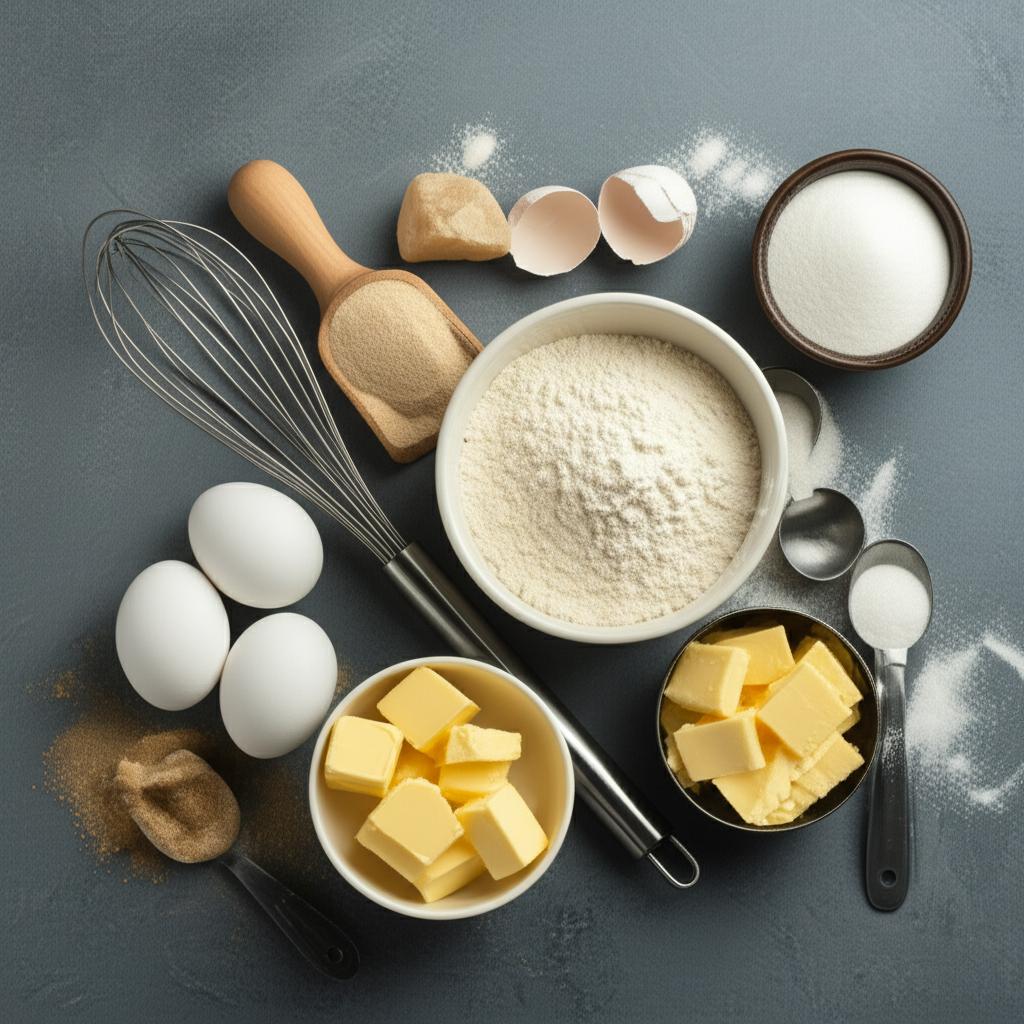
The Foundation: Mastering Your Ingredients
Before you even turn on the oven, the quality and preparation of your ingredients are paramount.
-
Start with Fresh, Quality Ingredients**:
- Flour, sugar, butter, eggs, vanilla extract – these are the building blocks. Using fresh ingredients makes a noticeable difference in taste and texture.
- Butter and Eggs at Room Temperature: This is a game-changer** for texture.
- Room temperature butter creams together with sugar much more effectively, creating tiny air pockets that lead to a lighter, more tender cookie. If it’s too cold, it won’t cream properly. If it’s melted, your cookies will spread excessively.
- Room temperature eggs emulsify better with the butter and sugar mixture, resulting in a smoother, more uniform dough.
-
Measure Precisely**:
- Flour: Too much flour leads to dry, crumbly cookies. Too little can make them spread too much. Always spoon your flour into the measuring cup and then level it off with a straight edge (like the back of a knife). Never scoop directly from the bag, as this compacts the flour, adding too much.
- Leavening Agents (Baking Soda/Powder): Ensure they are fresh! If they’ve been open for a long time, they might lose their potency, leading to flat cookies. Test baking soda by mixing a little with vinegar (it should fizz) and baking powder with hot water (it should bubble).
The Mixing Magic: Creating the Perfect Dough
This stage is crucial for developing the right texture.
-
Cream Butter and Sugar Properly**:
- In a stand mixer or with a hand mixer, cream your room temperature butter and sugars (granulated and brown) together on medium speed until the mixture is light, fluffy, and pale in color. This process incorporates air, which helps with the cookie’s rise and texture. Scrape down the sides of the bowl frequently.
-
Incorporate Eggs One at a Time**:
- Add eggs one at a time, mixing well after each addition until fully incorporated. This ensures the mixture remains emulsified and smooth.
-
Add Dry Ingredients Gradually**:
- Once your wet ingredients are combined, gradually add your dry ingredients (flour, baking soda/powder, salt).
- Mix JUST until combined. This is perhaps one of the most critical steps for a tender cookie. Overmixing develops the gluten in the flour**, leading to tough, chewy, or even rubbery cookies. As soon as you see no more streaks of flour, stop mixing!
-
Fold in Your Mix-ins:
- Gently fold in chocolate chips, nuts, or other additions by hand with a spatula. This prevents further overmixing of the dough.
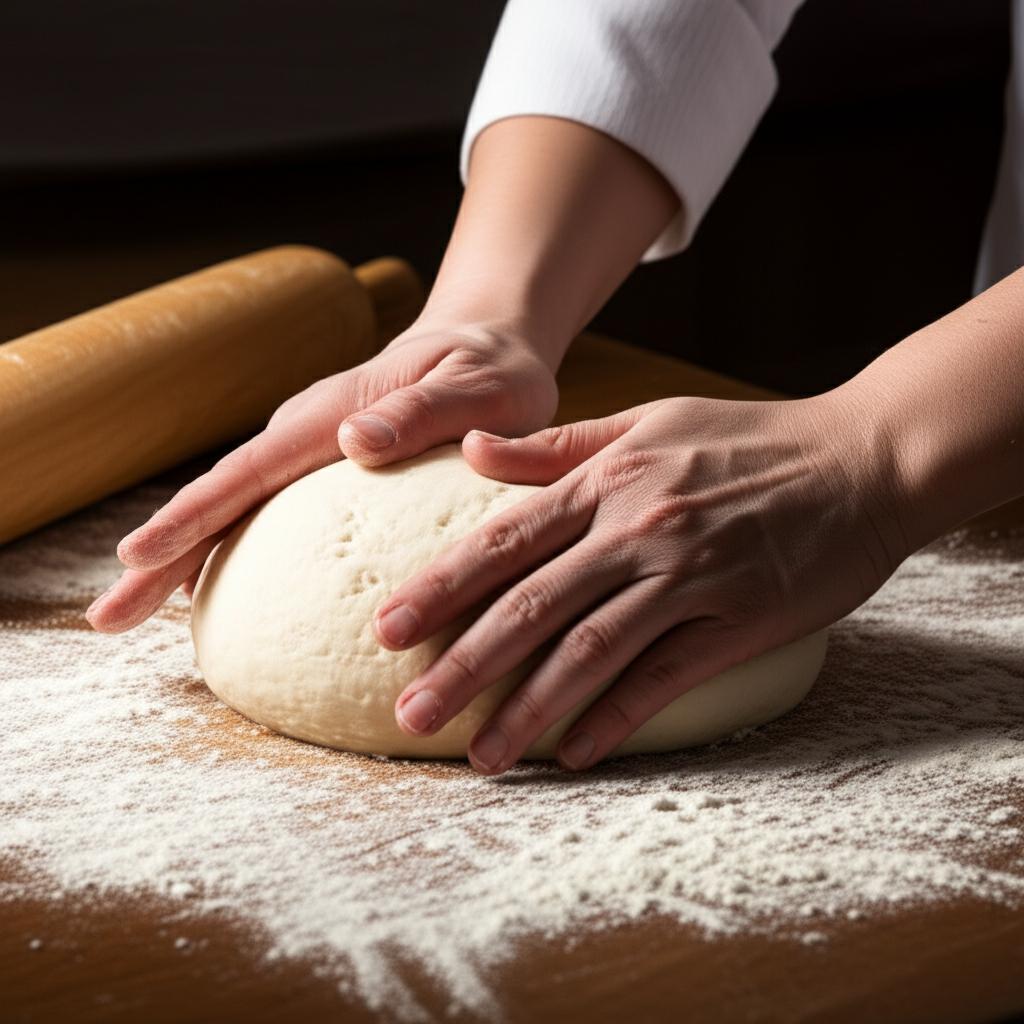
The Secret Weapon: The Chill Factor
This step might test your patience, but it’s absolutely worth it.
- Chill Your Dough for at Least 30 Minutes**:
- Ideally, chill your cookie dough for at least 2-3 hours, or even overnight. This step is a game-changer for several reasons:
- Prevents Spreading: Chilled butter is solid, which means it melts slower in the oven, keeping your cookies from spreading into flat puddles.
- Deepens Flavor: Chilling allows the flour to fully hydrate, the flavors to meld, and the sugars to absorb into the dough, resulting in a richer, more developed taste.
- Better Texture: It leads to a chewier, more satisfying cookie.
- You can even chill dough for several days or freeze it for later use!
- Ideally, chill your cookie dough for at least 2-3 hours, or even overnight. This step is a game-changer for several reasons:
Shaping & Spacing: Uniformity for Success
Even baking comes down to consistency.
-
Use a Cookie Scoop**:
- A cookie scoop (or disher) is your best friend for uniform cookies. Not only does it make portioning quick and easy, but it ensures that all your cookies are the same size, which means they’ll bake evenly and finish at the same time.
-
Properly Space Your Cookies:
- Place cookie dough balls about 2 inches apart on your baking sheet. Cookies will spread, and giving them enough room prevents them from merging into one giant cookie blob.
-
Use Parchment Paper or Silicone Baking Mats**:
- Always line your baking sheets with parchment paper or a silicone baking mat. This prevents sticking, promotes even browning, and makes cleanup a breeze. Do not grease your pan directly unless the recipe specifically calls for it, as this can cause cookies to spread too much.
The Oven & Beyond: Baking & Cooling
The final stretch requires attention to detail.
-
Preheat Your Oven Fully**:
- Don’t rush this! Your oven needs time to reach and stabilize at the correct temperature. Baking in a cool oven can lead to excessive spreading and uneven baking.
- Invest in an Oven Thermometer: Many oven temperatures are inaccurate. An inexpensive oven thermometer will give you a precise reading and ensure your oven is truly at the temperature you set. This is a must-have** for consistent baking.
-
Bake One Tray at a Time**:
- For the most consistent results, bake one tray of cookies at a time on the middle rack. Baking multiple trays can cause uneven heat distribution and lead to varying results.
-
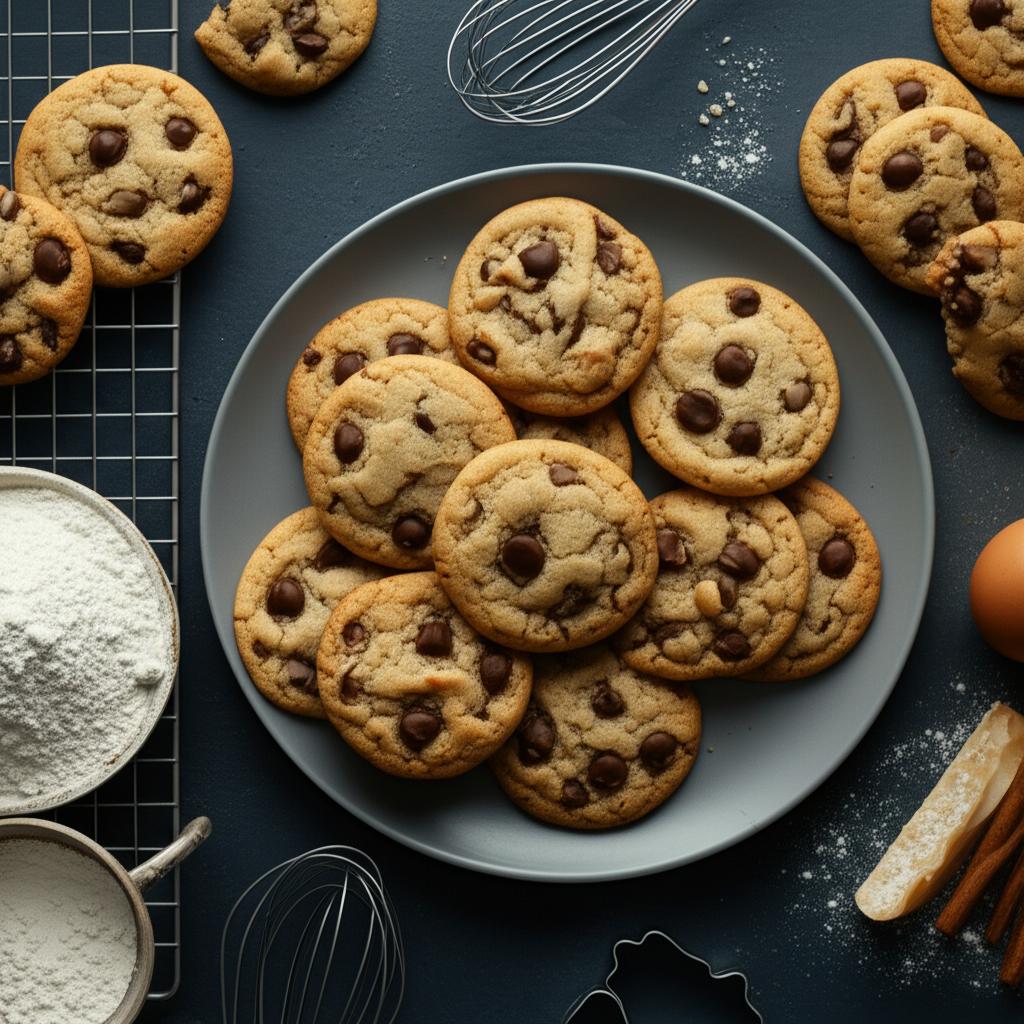
Don’t Overbake**:
- Most cookies are done when the edges are lightly golden brown and the centers still look slightly soft or underbaked. They will continue to cook and set as they cool on the baking sheet.
- When in doubt, slightly underbake rather than overbake. Overbaked cookies are dry and crumbly.
-
The Cooling Process:
- Leave cookies on the baking sheet for 2-5 minutes after removing them from the oven. This allows them to firm up slightly and finish cooking.
- Then, transfer them to a wire cooling rack to cool completely. Cooling on a rack allows air to circulate, preventing the bottoms from becoming soggy.
Common Mistakes to Avoid!
- Using cold butter or eggs: Leads to inconsistent texture and spreading. Always use room temperature.
- Not measuring flour correctly: Results in dry, tough cookies. Spoon and level!
- Overmixing the dough: Develops gluten, leading to tough, cakey cookies. Mix just until combined.
- Skipping the chilling step: Causes cookies to spread excessively and lack depth of flavor. Don’t skip it!
- Baking on unlined or greased sheets: Leads to sticking and uneven baking. Use parchment paper or silicone mats.
- Not preheating the oven fully (or having an inaccurate oven): Causes cookies to spread and bake unevenly. Always preheat and consider an oven thermometer.
- Overbaking: The most common culprit for dry, hard cookies. Pull them when the centers still look soft.
Bonus Tips for Next-Level Cookies
- A Pinch of Salt: Don’t skip the salt in your recipe! It balances the sweetness and enhances the flavor of your cookies. A touch of flaky sea salt on top of chocolate chip cookies before baking is divine.
- Experiment with Sugars: Different sugars yield different textures. More brown sugar generally results in a chewier, softer cookie, while more granulated sugar can lead to a crispier texture.
- Toast Your Nuts/Flour: For a deeper, nuttier flavor, lightly toast your nuts before adding them. Some bakers even lightly toast their flour for an added dimension of flavor!
- The Power of Resting: Just like dough, a little resting time after baking can also make a difference. Letting cookies sit overnight (if you can resist!) can sometimes deepen their flavor.
- Quality Vanilla: A good quality vanilla extract (or even vanilla bean paste) significantly enhances the overall flavor profile.
Baking perfect cookies is an enjoyable and rewarding journey. By understanding the why behind each step and avoiding common pitfalls, you’ll gain the confidence to bake batch after batch of delicious, consistently perfect cookies.
So, go ahead, gather your ingredients, and get ready to fill your home with the irresistible scent of sweet, homemade perfection! Happy baking!
- NutriChef 3-Piece Nonstick Kitchen Oven Baking Pans – Premium & Stylish Non-Stick Steel, Commercial Grade Restaurant Quality Metal Bakeware with Red Silicone Handles – Easy to Clean, NCSBS3S
- Commercial Quality Baking Sheet Pan Set, Natural Aluminum Cookie Sheet, Umite Chef Warp Resistant Nonstick Baker’s Half Sheet Pan, Large Thick Cookie Tray Pans for Baking, Roasting(2 Pack, 18X13In)
- GoodCook Everyday Nonstick Carbon Steel Baking Sheet Set, 3 Pack – Small 13” x 9”, Medium 15” x 10”, Large 17” x 11” – Carbon Steel Cooking Pans, Cookie Sheet Bakeware Set
FAQ
Q. My cookies always spread too much. What am I doing wrong?
A. This is a very common issue! The primary culprits are often butter that is too warm (it should be cool room temperature, not melted or greasy), not enough flour (measure accurately!), or dough that hasn’t been chilled sufficiently. Chilling the dough solidifies the butter, preventing excessive spreading in the oven. Also, ensure your oven temperature is accurate; a too-low temperature can contribute to spreading.
Q. How can I achieve that perfect chewy texture in my cookies?
A. For wonderfully chewy cookies, use a higher ratio of brown sugar to white sugar, as brown sugar contains molasses which adds moisture and contributes to chewiness. Slightly underbaking them also helps; remove them from the oven when the edges are set and golden, but the centers still look a little soft. They will continue to set as they cool on the baking sheet. Using an extra egg yolk can also contribute to a chewier texture.
Q. What’s the best way to tell when my cookies are perfectly baked?
A. Look for golden-brown edges and centers that appear set but not hard. For many cookie types, the center might still look slightly underdone and puffy when you first pull them out of the oven. This is usually ideal, as they continue to cook from residual heat on the hot baking sheet. If they look completely firm and dark brown, they are likely overbaked.
Q. Is it really necessary to chill cookie dough before baking?
A. While not always strictly necessary for every recipe, chilling cookie dough is highly recommended for most, especially drop cookies. It solidifies the fats, which helps prevent spreading. More importantly, it allows the flour to fully hydrate and the flavors to meld and deepen, resulting in a richer, more complex taste and improved texture. Even 30 minutes can make a difference, but overnight chilling often yields the best results.
Q. My cookies are often dry and crumbly. How can I fix this?
A. Dry and crumbly cookies are typically a sign of overbaking or using too much flour. Measure your flour accurately, preferably by weight if possible, or using the “spoon and level” method (spoon flour into the measuring cup, then level off the top with a straight edge) rather than scooping directly from the bag. And remember to pull them from the oven as soon as the edges are golden and the centers are just set; they will firm up as they cool.
Q. How can I ensure my cookies bake evenly on all sides?
A. Uneven baking is often due to hot spots in your oven. To combat this, rotate your baking sheets halfway through the baking time. For example, if you have one sheet, turn it 180 degrees. If you have two sheets on different racks, switch their positions and rotate them. Also, make sure your oven is fully preheated to the correct temperature before you put the cookies in, and consider investing in an oven thermometer to verify its accuracy.