Fuel Your Day: The Ultimate Guide to Healthy Homemade Energy Bars
- Amazon Basics Digital Kitchen Scale with LCD Display, Batteries Included, Weighs up to 11 pounds, Black and Stainless Steel
- Etekcity Food Kitchen Scale, Digital Grams and Ounces for Weight Loss, Baking, Cooking, Keto and Meal Prep, LCD Display, Medium, 304 Stainless Steel
- Ultrean Food Scale, Digital Kitchen Scale Weight Grams and Ounces for Baking Cooking and Meal Prep, 6 Units with Tare Function, 11lb (Batteries Included)
Are you constantly on the go, juggling work, family, and a healthy lifestyle? Do you find yourself reaching for convenient snacks, only to read the label and discover a long list of unfamiliar ingredients, added sugars, and artificial flavors? It’s a common dilemma! But what if you could create your own delicious, nutritious, and perfectly customized energy bars right in your own kitchen?
Homemade energy bars are the ultimate solution for anyone seeking a healthy on-the-go snack. They offer incredible versatility, save you money, and give you complete control over what fuels your body. Forget the mystery ingredients; embrace the power of whole foods!
This comprehensive guide will walk you through everything you need to know about making your own healthy homemade energy bars, from essential ingredients to expert tips and common pitfalls to avoid.
Why Go Homemade? The Power of Your Own Energy Bars
Before we dive into the “how-to,” let’s explore why making your own DIY energy bars is such a game-changer:
- Complete Control Over Ingredients: This is perhaps the biggest benefit. You decide what goes in and, more importantly, what stays out. No high-fructose corn syrup, artificial sweeteners, or preservatives. Just pure, wholesome goodness.
- Cost-Effective: Store-bought energy bars, especially those with “healthy” claims, can be surprisingly expensive. Making them at home, using bulk ingredients, significantly reduces your snack budget.
- Customization is Key: Allergies? Dietary preferences (vegan, gluten-free, nut-free)? Specific taste preferences? You can tailor every single aspect of your healthy snack bars to fit your needs perfectly.
- Fresher & More Flavorful: There’s nothing quite like the taste of freshly made food. Your homemade bars will burst with natural flavors that pre-packaged options often lack.
- Empowering & Fun: There’s a real sense of accomplishment in creating something delicious and healthy from scratch. It’s a rewarding culinary adventure!
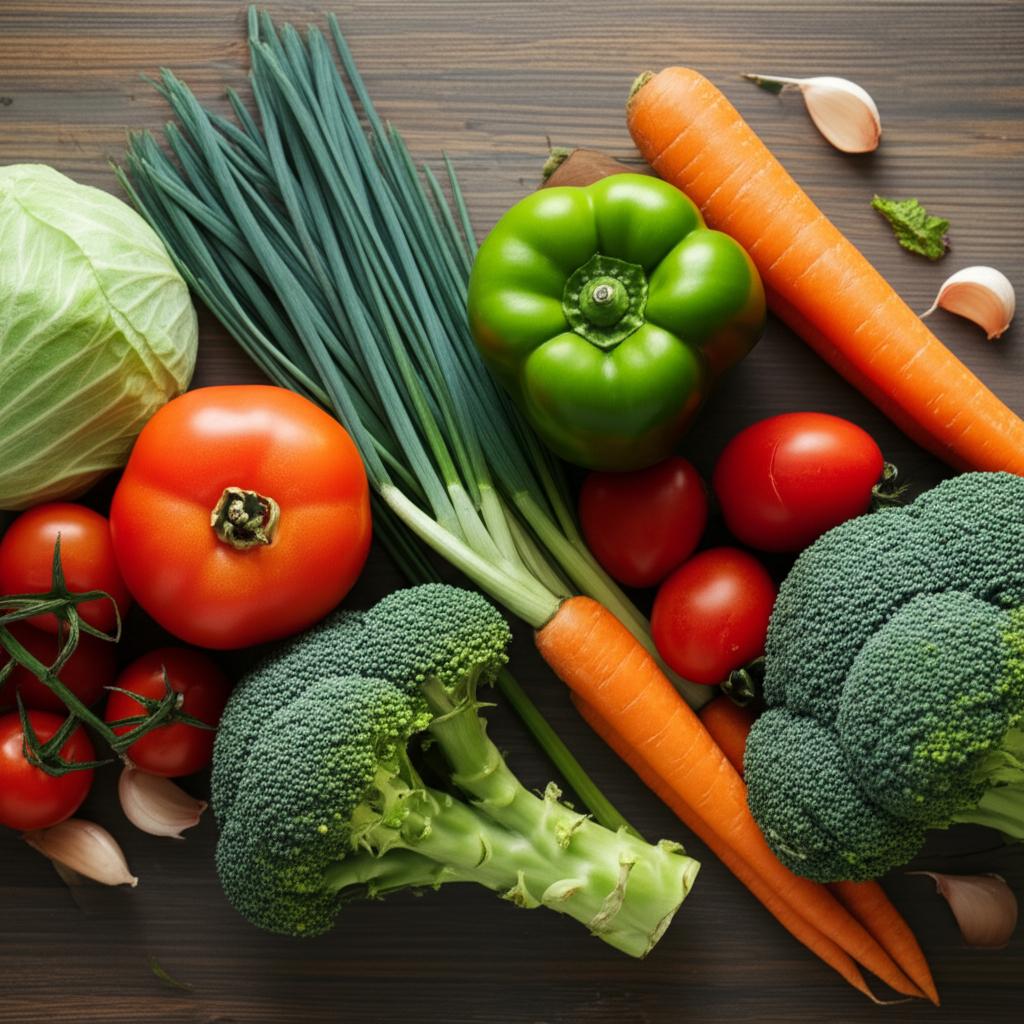
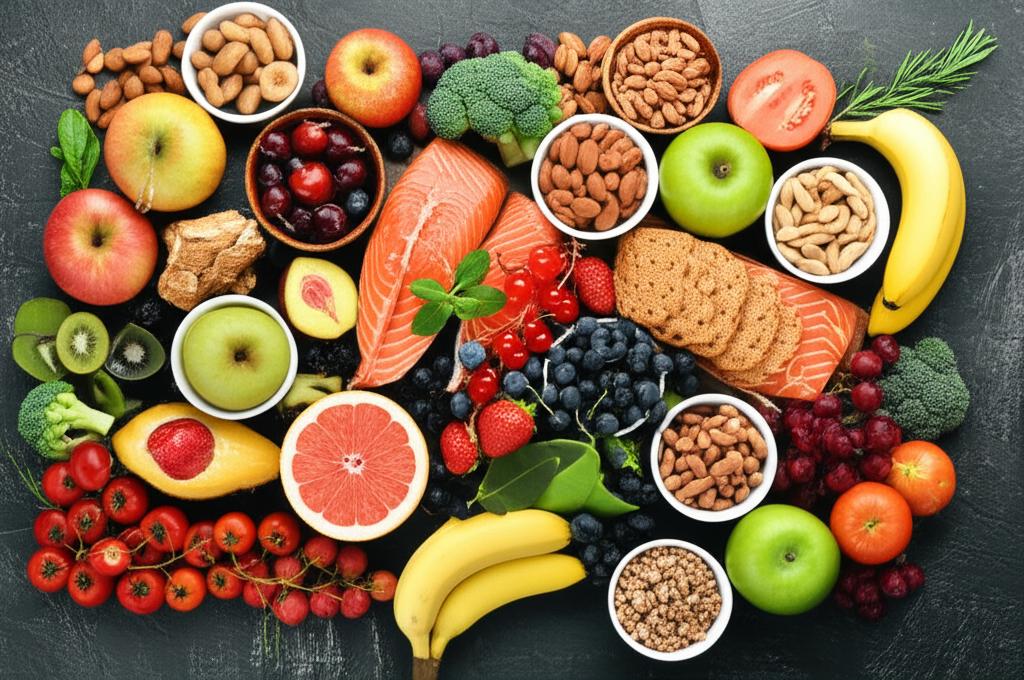
The Essential Ingredients for Your Homemade Energy Bars
The beauty of homemade energy bars lies in their simplicity. You typically need a few key categories of ingredients:
-
The Binding Agent: This is what holds everything together.
- Dates: Medjool dates are fantastic. They’re naturally sweet and incredibly sticky when processed, creating a perfect base.
- Nut Butter/Seed Butter: Peanut butter, almond butter, cashew butter, sunflower seed butter, or tahini all work wonderfully. They add healthy fats, protein, and help bind.
- Liquid Sweeteners: Honey, maple syrup, agave nectar, or brown rice syrup add sweetness and moisture.
-
Whole Grains & Fiber: These provide sustained energy and a satisfying texture.
- Rolled Oats: A classic choice, providing fiber and a chewy texture.
- Puffed Rice Cereal: Adds a nice crunch and lightness.
- Quinoa Flakes: A great way to add extra protein and nutrients.
-
Nuts & Seeds: For healthy fats, protein, crunch, and essential nutrients.
- Nuts: Almonds, walnuts, pecans, cashews, pistachios – choose your favorites!
- Seeds: Chia seeds, flax seeds (ground is best for absorption), hemp seeds, sunflower seeds, pumpkin seeds. These are nutritional powerhouses.
-
Dried Fruit: For natural sweetness, chewiness, and a boost of vitamins and antioxidants.
- Raisins, Cranberries, Cherries, Blueberries: Small and easy to incorporate.
- Apricots, Figs, Prunes: Can be chopped for larger pieces and extra chew.
-
Flavor Boosters & Optional Add-ins: Get creative here!
- Spices: Cinnamon, nutmeg, ginger, cardamom, a pinch of salt (enhances sweetness!).
- Extracts: Vanilla extract, almond extract.
- Cocoa Powder/Cacao Nibs: For a chocolatey twist.
- Shredded Coconut: Adds texture and tropical flavor.
- Protein Powder: If you’re looking for an extra protein punch (whey, casein, or plant-based protein like pea or rice protein).
- Zest: Lemon or orange zest for a bright, fresh flavor.
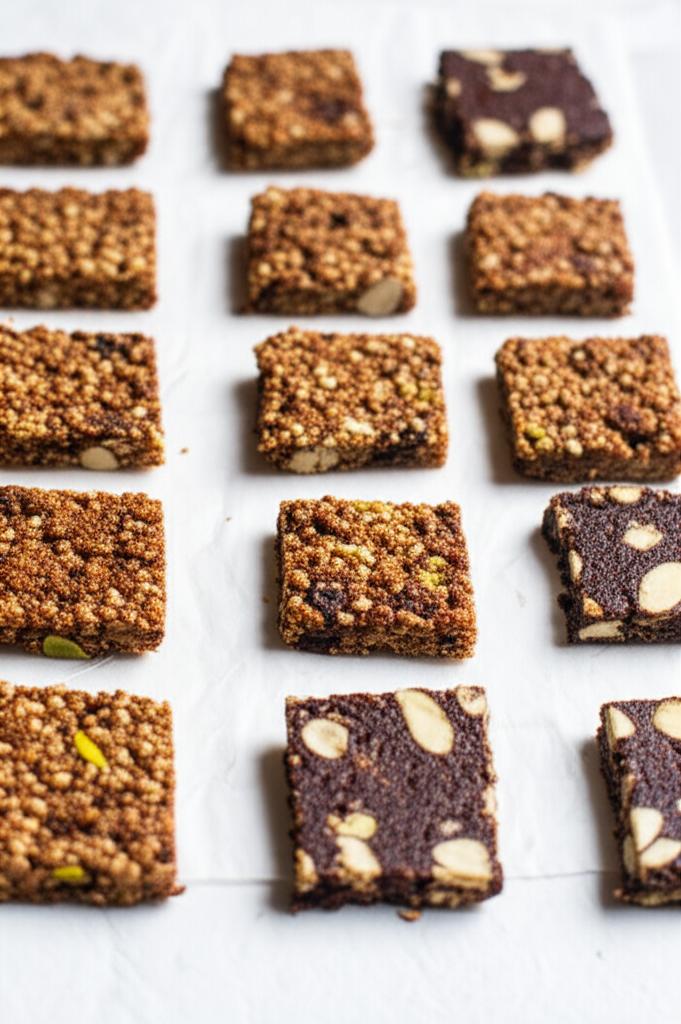
The Simple Steps to Perfect Homemade Energy Bars
Here’s a basic, versatile no-bake energy bar recipe that you can adapt to your heart’s content. This method typically uses a food processor.
Yields: 8-12 bars | Prep time: 15-20 minutes | Chill time: 1-2 hours
What you’ll need:
* A food processor (highly recommended for best results)
* A mixing bowl
* An 8×8 or 9×9 inch baking pan, lined with parchment paper
Basic Ingredient Ratios (Adjust to your liking!):
* 1 cup (about 15-20) pitted Medjool dates, packed
* ½ cup nut butter (e.g., almond butter, peanut butter)
* 2 tablespoons liquid sweetener (e.g., maple syrup, honey)
* 2 cups rolled oats
* ½ cup mixed nuts/seeds (e.g., almonds, chia seeds)
* ½ cup dried fruit (e.g., cranberries, chopped apricots)
* Optional: 1 scoop protein powder, 1 tsp vanilla extract, ½ tsp cinnamon
Instructions:
-
Prepare the Wet Ingredients:
- In your food processor, combine the pitted dates, nut butter, and liquid sweetener.
- Process until a thick, sticky paste forms. It should be very well combined and resemble a dough. If it’s too dry, add a tiny bit more liquid sweetener or a tablespoon of water/milk until it comes together.
-
Combine Dry Ingredients:
- In a large mixing bowl, add the rolled oats, mixed nuts/seeds, dried fruit, and any optional dry ingredients like protein powder or spices. Stir well to combine evenly.
-
Mix Wet and Dry:
- Add the wet date mixture from the food processor to the dry ingredients in the mixing bowl.
- Using your hands (this is best!), a sturdy spoon, or a spatula, mix everything together thoroughly. You’ll need to really work it until all the dry ingredients are coated and sticky, forming a cohesive “dough.” It should hold together when you press it firmly.
-
Press into Pan:
- Transfer the mixture to your parchment-lined baking pan.
- Press the mixture down firmly and evenly into the pan. Use the back of a spoon, your hands, or another piece of parchment paper on top to get it really compact and smooth. The firmer you press, the less crumbly your bars will be.
-
Chill:
- Place the pan in the refrigerator for at least 1-2 hours (or the freezer for 30 minutes) to allow the bars to firm up completely. This is a crucial step for clean cuts.
-
Cut & Store:
- Once thoroughly chilled, lift the entire block out of the pan using the parchment paper.
- Cut into your desired bar size using a sharp knife. A standard 8×8 pan yields 9-12 bars.
- Your healthy homemade energy bars are now ready!
Tips for Customization & Success
-
Experiment with Flavors:
- Chocoholic’s Dream: Add cocoa powder to the wet mixture and mini chocolate chips to the dry.
- Tropical Twist: Use dried mango, pineapple, and shredded coconut.
- Berry Burst: Mix in various dried berries and a touch of lemon zest.
- Spiced Fall: Add extra cinnamon, nutmeg, ginger, and perhaps some chopped dried apples.
-
Adjust Sweetness: Taste your mixture before pressing. If you prefer it sweeter, add a little more liquid sweetener or more dried fruit.
-
Texture Control:
- Too Crumbly? Add a tablespoon of water, milk, or a little more liquid sweetener/nut butter until it sticks.
- Too Sticky? Add a bit more oats or a handful of extra nuts/seeds.
- For a smoother texture, process some of the oats and nuts/seeds with the wet ingredients initially, then stir in the remaining whole pieces.
-
Baking vs. No-Bake: This recipe is no-bake, which is super easy! If you prefer a slightly crispier, more “baked” texture, you can bake them at 300°F (150°C) for 15-20 minutes after pressing, before chilling. Let them cool completely before chilling.
-
Nut-Free Options: For school lunches or nut allergies, use sunflower seed butter or tahini as your binder, and swap out nuts for seeds like pumpkin, sunflower, and hemp.
Common Mistakes to Avoid
Even with simple homemade energy bar recipes, a few pitfalls can lead to less-than-perfect results.
- Not Processing Dates Enough: If your dates aren’t broken down into a smooth, sticky paste, your bars won’t bind properly and will be crumbly. Ensure they are fully processed.
- Not Pressing Firmly Enough: This is a big one! If the mixture isn’t compacted tightly into the pan, your bars will fall apart when cut or eaten. Press, press, press!
- Not Chilling Long Enough: Patience is key. Cutting warm or soft bars will result in a messy, crumbling disaster. Give them ample time to firm up in the fridge.
- Adding Too Much Liquid: While a little extra liquid can help bind, too much will make your bars overly sticky, greasy, or soft. Add liquids gradually.
- Over-Processing Nuts: If you add whole nuts to the food processor with the wet ingredients and process too long, they can turn into nut butter, releasing too much oil and making your bars greasy. Add whole nuts/seeds to the dry mixture or pulse briefly.
Storing Your Energy Bar Creations
Proper storage ensures your healthy on-the-go snacks stay fresh and delicious.
- Airtight Container: Always store your homemade energy bars in an airtight container to prevent them from drying out or absorbing odors.
- Refrigerator: For optimal freshness, especially given the natural ingredients and lack of preservatives, store your bars in the refrigerator for up to 1-2 weeks.
- Freezer: For longer storage, individually wrap each bar in parchment paper or plastic wrap, then place them in a freezer-safe bag or container. They will last in the freezer for up to 2-3 months. Thaw at room temperature for 15-30 minutes before enjoying.
- On the Go: When packing for work or school, if they contain ingredients prone to melting (like chocolate chips in warm weather) or are very soft, wrap them and consider a small ice pack or insulated bag.
Conclusion: Fuel Your Body the Homemade Way!
Homemade energy bars are more than just a snack; they’re a commitment to a healthier, more mindful way of eating. They empower you to take control of your nutrition, enjoy incredible flavors, and save money, all while providing the sustained energy you need to power through your day.
So, ditch the overpriced, ingredient-laden store-bought options. Gather your favorite whole ingredients, get creative in the kitchen, and start crafting your own batch of healthy homemade energy bars today. Your taste buds and your body will thank you!
Happy snacking!
- Amazon Basics Digital Kitchen Scale with LCD Display, Batteries Included, Weighs up to 11 pounds, Black and Stainless Steel
- Etekcity Food Kitchen Scale, Digital Grams and Ounces for Weight Loss, Baking, Cooking, Keto and Meal Prep, LCD Display, Medium, 304 Stainless Steel
- Ultrean Food Scale, Digital Kitchen Scale Weight Grams and Ounces for Baking Cooking and Meal Prep, 6 Units with Tare Function, 11lb (Batteries Included)
FAQ
Q. What are the main advantages of making energy bars at home compared to buying them from a store?
A. Homemade energy bars offer complete control over ingredients, allowing you to avoid artificial additives, excessive sugars, and unhealthy fats often found in commercial versions. You can customize them to your taste, dietary needs, and often at a lower cost per serving.
Q. What are some essential base ingredients for a healthy homemade energy bar recipe?
A. Common healthy bases include rolled oats, various nuts (like almonds, cashews, walnuts), seeds (chia, flax, pumpkin), dried fruits (dates, apricots, cranberries), and a natural binder such as nut butter (peanut, almond), honey, or maple syrup.
Q. How can I customize my energy bars to fit specific dietary needs, such as vegan or gluten-free?
A. For vegan bars, use plant-based binders like maple syrup, agave nectar, or brown rice syrup instead of honey, and ensure any added protein powder is plant-based. For gluten-free, use certified gluten-free oats and verify all other ingredients are free from gluten cross-contamination.
Q. What’s the best way to store homemade energy bars to ensure they stay fresh and last longer?
A. Store your homemade energy bars in an airtight container. They can typically last at room temperature for up to a week, in the refrigerator for 2-3 weeks, or frozen for up to 2-3 months. Freezing is excellent for meal prepping larger batches.
Q. Are homemade energy bars always healthier than store-bought ones, and how can I control their nutritional content?
A. Generally, yes, because you control the ingredients and can limit added sugars and unhealthy fats. To control nutrition, choose wholesome ingredients, use natural sweeteners sparingly, add healthy fats from nuts and seeds, and include sources of fiber and protein to maximize their health benefits.
Q. Can I include protein powder or other supplements in my homemade energy bars for an extra boost?
A. Absolutely! Adding a scoop of your preferred protein powder (whey, casein, or plant-based) can significantly increase the protein content, making the bars more satiating and beneficial for muscle recovery. You can also incorporate superfood powders like spirulina, maca, or chia seeds for added nutrients.
Q. How do I prevent my homemade energy bars from crumbling or becoming too sticky?
A. The key is the right balance of wet and dry ingredients. If they are too crumbly, you likely need more binder (like nut butter or mashed dates) to help them stick together. If they are too sticky, try adding more dry ingredients like oats, nuts, or seeds. Chilling the bars thoroughly after pressing them into shape also helps them set firmly.