Tired of lukewarm lunches? Dreaming of enjoying a piping hot bowl of chili, a comforting soup, or a hearty pasta dish even when you’re miles from a microwave or stove? You’re not alone. For many of us, packing a nutritious and delicious hot meal for work, school, or an outdoor adventure often feels like a logistical nightmare. Cold sandwiches or sad, congealed leftovers just don’t cut it when you’re craving something warm and fulfilling.
Thankfully, there’s a simple, elegant solution that’s been a game-changer for countless individuals: the vacuum insulated food jar for hot meals. These remarkable containers are designed to keep your food at its optimal temperature for hours, ensuring that your lunch tastes just as good as it did when it left your kitchen. But with so many options out there, how do you pick the right one? And more importantly, how do you use it effectively to get the best results? Let’s dive deep into the world of hot food thermoses and discover everything you need to know.
What Exactly is a Vacuum Insulated Food Jar and How Does It Work?
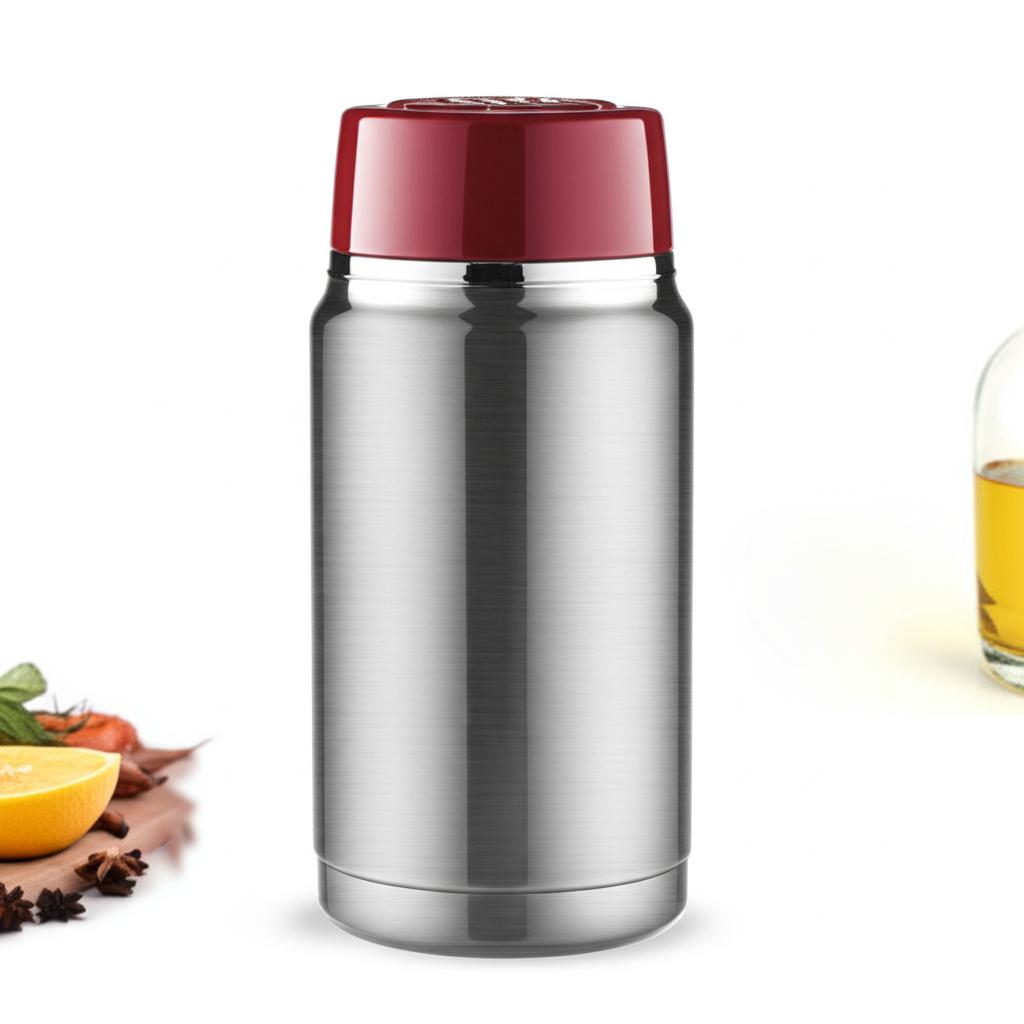
At its core, a vacuum insulated food jar is a marvel of simple physics. Imagine two containers, one placed inside the other, with a gap between them. This gap is where the magic happens. The air from this space is removed, creating a vacuum. Why is this important? Because heat energy travels primarily in three ways: conduction, convection, and radiation.
- Conduction: Heat transferring through direct contact.
- Convection: Heat transferring through the movement of fluids (like air or water).
- Radiation: Heat transferring through electromagnetic waves (like from the sun or a hot stove).
By creating a vacuum between the inner and outer walls of the food jar, there’s no medium (like air) for heat to transfer through by conduction or convection. The vacuum acts as an incredibly effective barrier, drastically slowing down heat loss. Most quality vacuum insulated food jars for hot meals are also made from double-wall stainless steel, which further helps reflect radiant heat, adding another layer of insulation. This innovative design means that the heat from your hot food has a much harder time escaping into the colder external environment, keeping your meal delightfully warm for many hours. It’s like a mini, personal oven that requires no power!
Why You Need a Hot Food Thermos: Beyond Just Warm Meals
While the primary benefit of a thermal food container is undeniably keeping your food hot, the advantages extend much further, impacting your health, wallet, and even your peace of mind.
1. Healthier Eating Habits
Packing your own meals gives you complete control over ingredients, portion sizes, and nutritional content. No more relying on greasy fast food or pricey, often unhealthy, cafeteria options. With a reliable insulated lunch box, you can bring wholesome, home-cooked meals, ensuring you’re fueling your body with exactly what it needs, regardless of where your day takes you. This is especially beneficial for those with dietary restrictions or specific health goals.
2. Significant Cost Savings
Eating out, even occasionally, adds up quickly. Think about how much you spend on a single lunch at a cafe or restaurant. Now multiply that by five days a week, four weeks a month. It’s staggering! Investing in a good quality food flask pays for itself many times over in saved lunch money, allowing you to reallocate those funds towards other goals or simply enjoy more disposable income.
3. Unbeatable Convenience
Picture this: it’s lunchtime, you’re busy, and there’s no microwave in sight. Instead of scrambling for alternatives, you simply open your food jar, and voila – a steaming hot meal awaits. This portable food warmer provides unparalleled convenience for busy professionals, students, parents, and outdoor enthusiasts. It frees you from the tyranny of needing a kitchen appliance and lets you eat what you want, when you want, wherever you are.
4. Environmental Friendliness
By regularly packing your own meals in a reusable container, you’re actively reducing your reliance on disposable plastic containers, single-use bags, and takeout packaging. This small change contributes positively to reducing waste and lessening your environmental footprint, making you a part of the solution rather than the problem.
5. Food Safety and Quality
Knowing your food has been stored safely at a proper temperature provides peace of mind. For hot foods, keeping them above 140°F (60°C) is crucial to prevent bacterial growth. A quality vacuum insulated food jar for hot meals excels at this, maintaining safe temperatures for extended periods, far better than traditional lunch boxes. This ensures your meal is not only delicious but also safe to eat.
Key Features to Look For When Buying a Food Jar
Not all food jars are created equal. To ensure you’re getting the best value and performance, pay attention to these crucial features:
1. Material Quality: Stainless Steel is King
The gold standard for food jars is 18/8 food-grade stainless steel (also known as 304 stainless steel). This material is highly durable, resistant to rust and corrosion, and most importantly, it won’t leach chemicals into your food. Avoid jars made with plastics that aren’t clearly labeled BPA-free, as these can pose health risks. Stainless steel also doesn’t retain flavors or odors, so your chili won’t taste like last week’s curry.
2. Insulation Performance: How Long Does It Keep Food Hot?
Manufacturers often list how long their jars keep food hot or cold. Look for claims of 5-8 hours for hot food. While these are estimates (and depend on how you pack your food), they give you a good baseline. Reputable brands often have better temperature retention due to superior vacuum sealing processes and thicker stainless steel walls. Read reviews to see real-world performance.
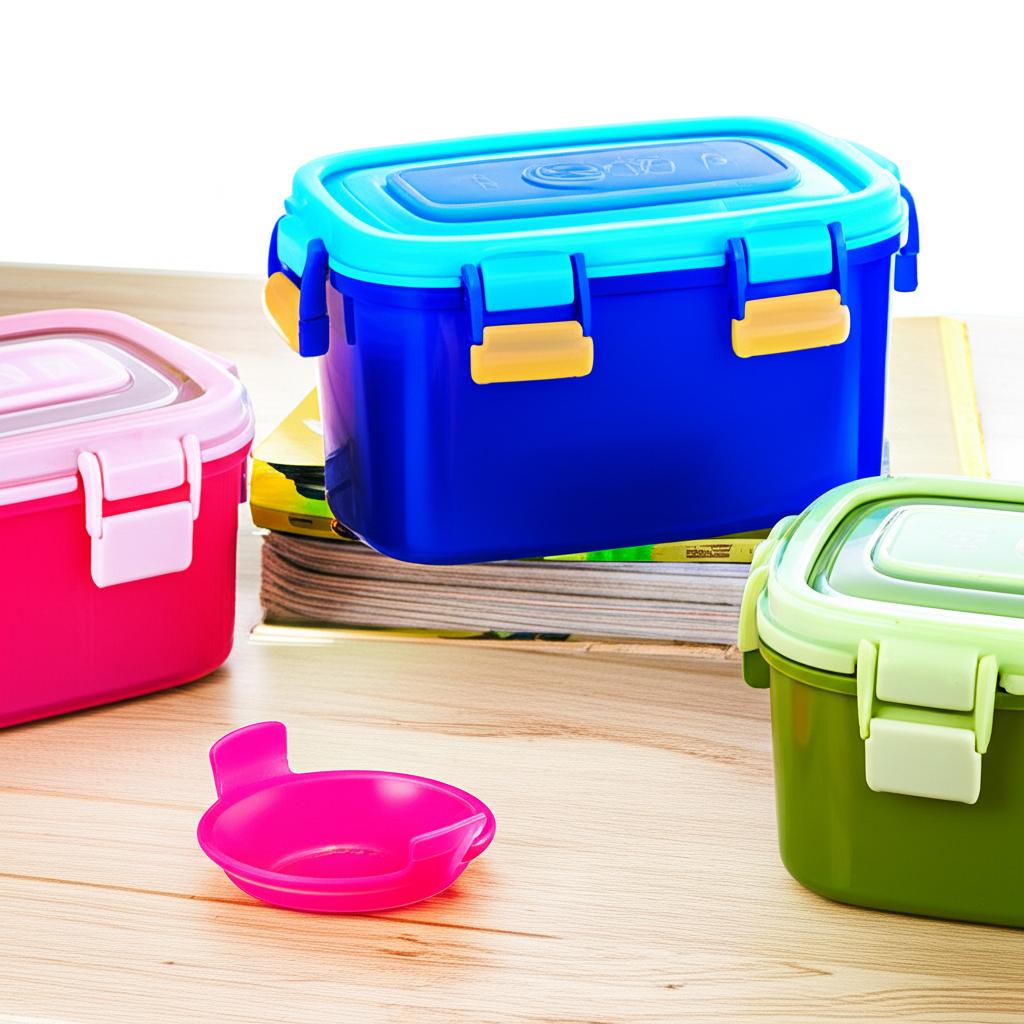
3. Capacity: Size Matters
Food jars come in various sizes, typically ranging from 10 ounces (for small snacks or baby food) up to 24-32 ounces (for hearty adult meals or sharing).
* Small (10-14 oz): Great for kids’ lunches, side dishes, or a small portion of soup.
* Medium (16-20 oz): Ideal for most adult single servings of soup, pasta, or chili. This is often the sweet spot for daily work or school lunches.
* Large (24-32 oz+): Perfect for those with bigger appetites, carrying enough for two servings, or for outdoor activities where a substantial meal is needed.
Consider your typical meal size and who will be using the jar most often.
4. Lid Design: Leak-Proof and Easy to Open
A leaky lid is a nightmare! Ensure the lid has a strong, secure seal, preferably with silicone gaskets. A good seal prevents spills and helps maintain temperature. Some lids also feature a pressure release button, which is incredibly handy. Hot contents can create a vacuum inside, making the lid difficult to open. A release button equalizes the pressure, making opening effortless. Screw-top lids are generally more reliable than simple snap-on lids for insulated jars.
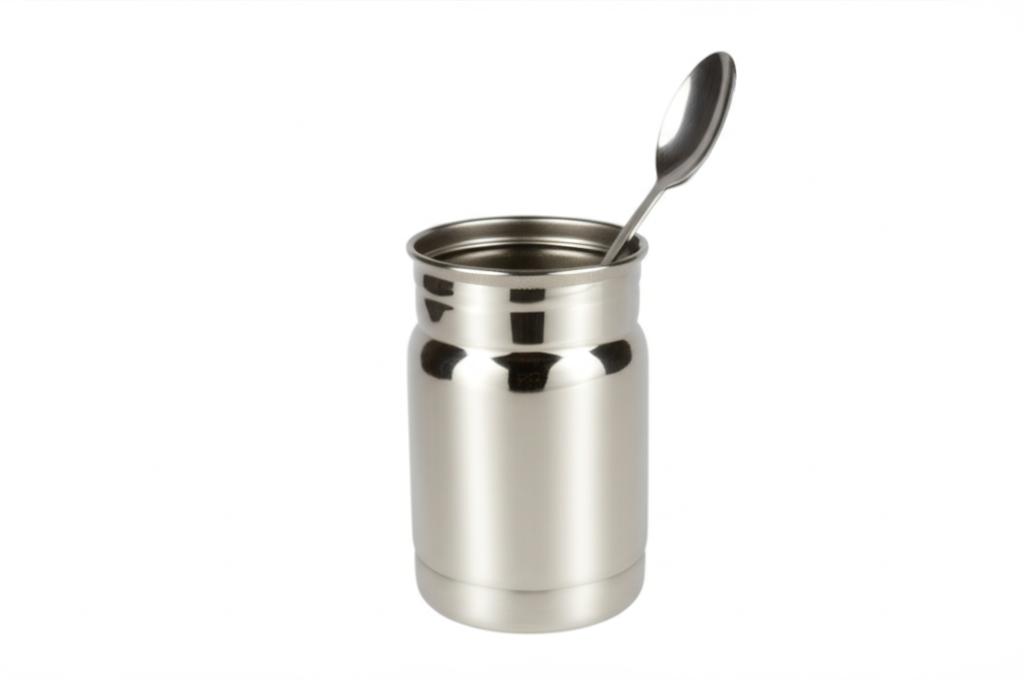
5. Wide Mouth Opening: For Easy Eating and Cleaning
A wide mouth opening is a non-negotiable feature. It allows you to:
* Easily fill the jar with chunky soups, pasta, or casseroles.
* Eat directly from the jar with a regular spoon or fork.
* Thoroughly clean the interior, reaching every nook and cranny. Narrow openings are a pain to clean and fill.
6. Portability and Durability: Built for Life on the Go
Check for features like a non-slip base, a comfortable handle, or a compact design that fits easily into your bag. A durable exterior coating can protect against dents and scratches, especially if you’re taking it on outdoor adventures.
7. Extra Features: Think Convenience
Some food jars come with thoughtful additions:
* Built-in folding spork: Super convenient for immediate use.
* Separate compartments: Some larger jars might have a top compartment for a side dish that doesn’t need to be kept hot.
* Rubberized grip: Helps prevent drops.
Top Uses for Your Stainless Steel Food Jar
The versatility of a stainless steel food jar is truly impressive. Here’s where it shines:
- Work Lunches: Say goodbye to sad desk salads and microwave lines. Enjoy your favorite home-cooked meals.
- School Meals: Kids love hot lunches! Send them off with soup, pasta, or even mac and cheese that stays warm until lunchtime.
- Outdoor Adventures: Hiking, camping, fishing, or a day at the beach – a hot meal in the wilderness feels incredibly comforting.
- Travel: Long car rides or train journeys become much more enjoyable with a pre-packed warm meal.
- Picnics: Elevate your picnic game by bringing a hot dish alongside your cold sandwiches.
- Special Diets: Easily manage gluten-free, dairy-free, or other specific dietary needs by preparing meals at home.
- Baby Food: Perfect for keeping purees or warm formula at the right temperature for little ones while on the go.
Maximizing Heat Retention: Tips and Best Practices
Getting the most out of your vacuum insulated food jar for hot meals isn’t just about buying a good product; it’s also about how you use it. Follow these tips to ensure your food stays piping hot for as long as possible.
1. The Golden Rule: Preheating is Essential!
This is the single most important step for maximizing heat retention.
* Method: Before adding your food, fill the entire jar with boiling hot water (not just hot tap water).
* Soak Time: Let it sit, with the lid on, for 5-10 minutes.
* Empty: Pour out the hot water just before adding your food.
This process heats the inner walls of the jar, so when you add your hot food, the jar itself doesn’t “steal” heat from your meal trying to warm up. Think of it like preheating an oven!
2. Pack Your Food as Hot as Possible
The hotter the food when it goes in, the longer it will stay hot. Reheat your food thoroughly on the stove or in a microwave until it’s steaming hot, almost boiling for soups and stews, before transferring it to the preheated jar. Don’t put lukewarm food in and expect it to magically get hotter or stay hot for long.
3. Fill It Up!
A fuller jar retains heat better than a partially filled one. The less air space inside, the less medium there is for heat to escape through. Try to fill your food jar as completely as possible, leaving just enough room for the lid to screw on securely. If you can’t fill it completely, consider using a smaller capacity jar for that meal.
4. Pack Solid Items Over Soups for Longer Heat Retention
Generally, dense, solid foods like stews, chili, or pasta with a thick sauce will retain heat longer than watery soups or broths. This is because water has a higher specific heat capacity, meaning it loses heat more quickly than solid matter.
5. Open Strategically
Avoid opening the jar repeatedly to check on your food. Each time you open it, you let out a significant amount of heat. Try to open it only when you’re ready to eat.
6. Store Smartly
Keep your food jar in a place that’s not too cold. If you’re outdoors, keep it in your backpack or wrapped in a towel. The colder the external environment, the faster heat will dissipate, even with excellent insulation.
Common Mistakes to Avoid When Using Your Food Jar
Even with the best intentions, it’s easy to make a few common blunders that compromise your food jar’s performance. Steer clear of these pitfalls:
1. Skipping the Preheating Step
As mentioned, this is the number one mistake. Without preheating, a significant portion of your food’s initial heat will be absorbed by the cold stainless steel walls, drastically reducing how long it stays warm. Don’t skip it!
2. Not Filling the Jar Completely
A half-empty jar means more air space, and air is a medium for heat transfer (even if it’s slowed by the vacuum). More air equals faster heat loss. Always try to match your jar size to your meal portion.
3. Putting Lukewarm or Cold Food Inside
A food jar is for retaining heat, not generating it. If you put cold or barely warm food in, it will stay cold or barely warm. Ensure your food is steaming hot before it goes in.
4. Using It in the Microwave or Freezer
Never put your vacuum insulated food jar in a microwave. The metal will cause sparks and can damage both the jar and the microwave. Similarly, avoid putting it in the freezer, as extreme cold can damage the vacuum seal. These jars are designed for temperature retention, not creation or extreme chilling.
5. Improper Cleaning
Leaving food residue can lead to odors, bacteria, and a generally unpleasant experience. While many stainless steel jars are technically dishwasher safe, handwashing is often recommended to protect the vacuum seal and exterior finish. Use a bottle brush for thorough cleaning of the interior. Avoid abrasive cleaners or scrubbers that can scratch the finish. Ensure the lid and silicone gaskets are also thoroughly cleaned and dried to prevent mold or mildew.
6. Leaving Food in for Too Long
While these jars are excellent at temperature retention, no container can keep food at a safe temperature indefinitely. For food safety, most experts recommend consuming hot food within 6-8 hours of packing it. Beyond that, the temperature might drop into the “danger zone” (between 40°F and 140°F / 4°C and 60°C) where bacteria can multiply rapidly.
7. Over-tightening or Cross-threading the Lid
While you want a secure seal, over-tightening can make the lid extremely difficult to open later, especially if a vacuum forms. Cross-threading can damage the lid or the jar, compromising the seal and making it prone to leaks. Always align the lid properly before screwing it on.
FAQ: Your Burning Questions About Food Jars Answered
Got more questions? We’ve got answers!
Q1: Can I put cold food in a vacuum insulated food jar?
A1: Absolutely! While the primary focus here is on hot meals, these jars are equally effective at keeping food cold. Just like with hot food, pre-chill the jar with ice water for 5-10 minutes before adding your cold items. Perfect for yogurt, fruit salads, or cold pasta dishes.
Q2: How do I remove stubborn smells from my food jar?
A2: For lingering odors, try filling the jar with a mixture of warm water and a tablespoon of baking soda. Let it sit overnight, then rinse thoroughly. A splash of white vinegar can also work wonders. Ensure the lid and gaskets are also cleaned.
Q3: Is it safe to carry soup in my backpack with a food jar?
A3: Yes, as long as your food jar is genuinely leak-proof. Always test it at home by filling it with water, sealing it, and shaking it upside down over a sink. A quality, leak-proof vacuum insulated food jar for hot meals should give you peace of mind.
Q4: My food jar is difficult to open. What can I do?
A4: Hot food can create a vacuum seal that makes the lid hard to twist. Many modern food jars have a pressure release button on the lid – simply press it to equalize the pressure. If yours doesn’t, try running the lid under warm (not hot) water for a few seconds to expand the metal slightly, or use a rubber jar opener for extra grip.
Q5: Can I put carbonated drinks in my food jar?
A5: It’s generally not recommended. The pressure from carbonation can build up inside the sealed jar, potentially making it explode or causing the lid to pop off unexpectedly, creating a messy and potentially dangerous situation.
Q6: How long do vacuum insulated food jars typically last?
A6: With proper care, a high-quality stainless steel food jar can last for many years, even a decade or more. The main components that might wear out are the silicone gaskets in the lid, which can usually be replaced.
Q7: Do I need a special brush to clean my food jar?
A7: A long-handled bottle brush is highly recommended for thorough cleaning, especially if your jar has a deep or somewhat narrower opening, even if it’s “wide mouth.” This ensures you can scrub the bottom and sides effectively.
Q8: Can I heat food directly in the food jar on a stove?
A8: Absolutely not. Food jars are designed for insulation, not direct heating. Placing it on a stove burner will damage the vacuum seal, ruining its insulation properties, and could be dangerous.
Q9: What types of food are best for a food jar?
A9: Soups, stews, chili, pasta with sauce, rice dishes, oatmeal, mashed potatoes, and even hot cereals are all excellent choices. Anything that holds heat well and isn’t too dry generally works best.
Q10: Are all vacuum insulated food jars BPA-free?
A10: Most reputable brands of stainless steel food jars are BPA-free, especially for the parts that come into contact with food. However, it’s always best to check the product description or packaging to confirm, especially if there are plastic components in the lid or internal containers.
Conclusion
A vacuum insulated food jar for hot meals isn’t just another kitchen gadget; it’s an investment in your health, your wallet, and your overall well-being. By allowing you to enjoy delicious, hot, home-cooked meals anywhere, anytime, it truly revolutionizes your lunch routine. Remember to choose a quality product, embrace the art of preheating, and follow our best practices, and you’ll be set to enjoy warm, comforting food on the go for years to come. Say goodbye to lukewarm disappointments and hello to piping hot perfection!