Ever found yourself staring at a frying pan, wondering if it’s hot enough for that perfectly seared steak or scrambled eggs that don’t stick? Or perhaps you’ve ended up with a burnt crust on the outside and raw food on the inside because you guessed wrong? You’re not alone. Achieving the ideal cooking temperature is often more art than science in many home kitchens, leading to inconsistent results, frustration, and sometimes, a lot of scrubbing. But what if there was a simple, intuitive way to know precisely when your pan is ready to cook? Enter the humble yet revolutionary non-stick frying pan with a heat indicator.
This isn’t just another piece of cookware; it’s a kitchen game-changer designed to take the guesswork out of preheating, ensuring your food cooks evenly, perfectly, and most importantly, stress-free. From delicate pancakes to robust stir-fries, having the right temperature is key to unlocking the full potential of your ingredients. In this comprehensive guide, we’ll dive deep into why a non-stick frying pan with a heat indicator isn’t just a convenient gadget, but a fundamental tool for healthier, tastier, and more efficient cooking. We’ll explore its benefits, the science behind its smart design, what to look for when buying one, and how to keep it in prime condition for years to come. Get ready to transform your cooking experience from guesswork to gourmet!
What Exactly is a Non-Stick Frying Pan with a Heat Indicator?
At its core, a non-stick frying pan with a heat indicator is a piece of kitchen cookware designed with two primary features: a non-stick cooking surface and a visual indicator that signals when the pan has reached its optimal cooking temperature.
The non-stick surface is usually achieved through a specialized coating applied to the pan’s interior. This coating, often made from materials like PTFE (Teflon), ceramic, or silicone, creates a low-friction barrier that prevents food from adhering to the pan. This means less oil or butter is needed for cooking, making meals healthier, and cleanup becomes incredibly easy – usually just a quick wipe!
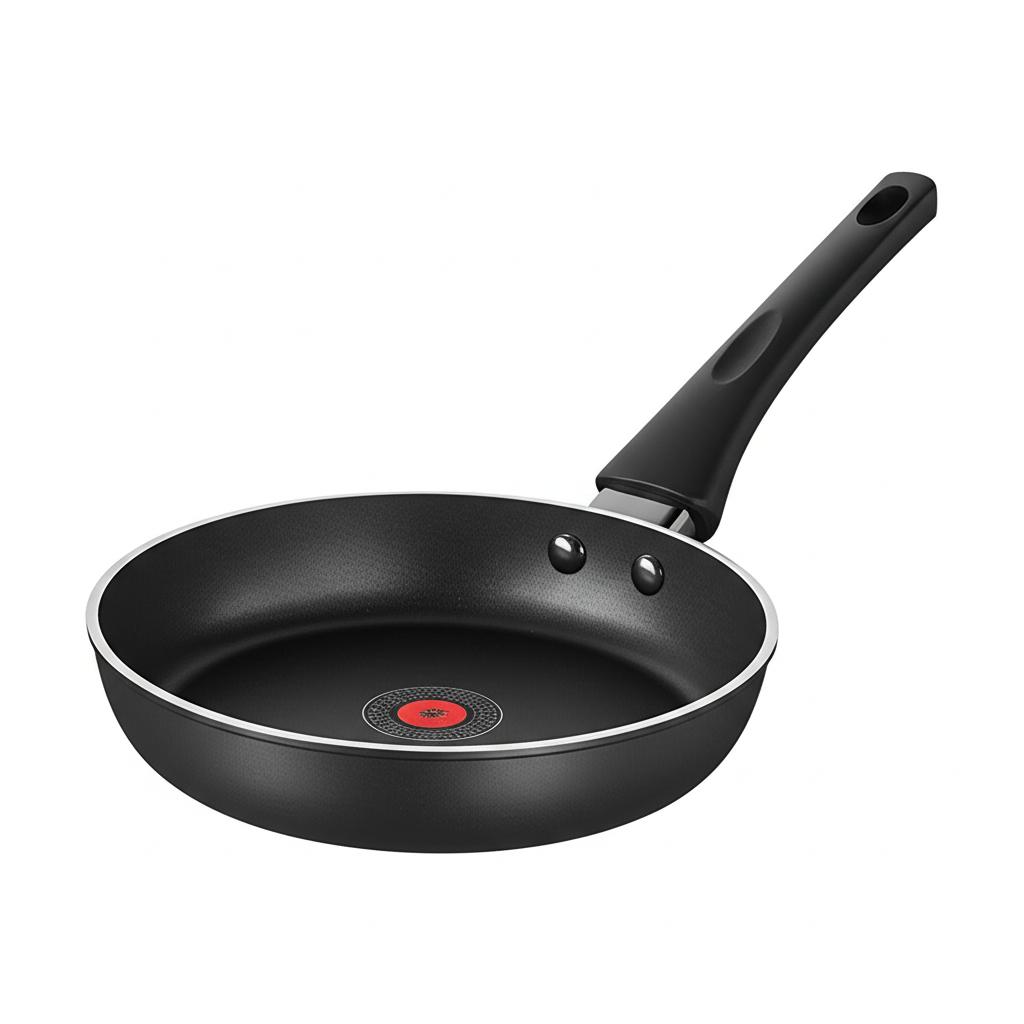
The heat indicator is the star of the show. It’s typically a thermo-sensitive spot or ring, often red or black, located either in the center of the pan’s cooking surface or sometimes on the handle. This spot changes color, disappears, or displays a symbol when the pan reaches a specific temperature, usually around 350-400°F (175-205°C), which is ideal for most searing, sautéing, and frying tasks. It’s a simple, ingenious solution to a common cooking dilemma, providing a visual cue that eliminates the need for guesswork, water droplets, or smoke signals to judge pan readiness.
Why the Heat Indicator is a True Game-Changer for Home Cooks
The addition of a heat indicator to a non-stick frying pan might seem like a small detail, but its impact on cooking consistency and convenience is immense. Here’s why it’s becoming an indispensable tool in modern kitchens:
1. Perfect Preheating, Every Time
This is the primary benefit. Most recipes call for preheated pans, but few specify how to know when it’s properly preheated. Too cold, and food sticks, soaks up oil, and steams instead of browns. Too hot, and food burns on the outside while remaining undercooked internally. The heat indicator takes away this guesswork, signaling precisely when the pan is at the optimal temperature for cooking, ensuring consistent results.
2. Enhanced Food Quality and Flavor
When your pan is at the right temperature, food cooks more evenly. This leads to:
* Superior Searing: Proteins like chicken breasts, steaks, and fish develop a beautiful, flavorful crust.
* Fluffy Eggs: Eggs cook without sticking and become wonderfully light and airy.
* Crispy Vegetables: Veggies achieve that perfect tender-crisp texture without becoming soggy.
* Reduced Oil Absorption: Food quickly forms a crust, preventing it from soaking up excessive oil, which means healthier and less greasy meals.
3. Healthier Cooking Habits
Because the non-stick surface already reduces the need for large amounts of oil or butter, pairing it with precise temperature control further enhances this benefit. You’re less likely to burn oils, which can degrade their healthy properties and create harmful compounds. Plus, perfectly cooked food often tastes better with less added fat.
4. Extended Pan Lifespan
Overheating is one of the biggest culprits behind the premature demise of non-stick pans. Extreme temperatures can break down the non-stick coating, causing it to degrade, peel, or lose its effectiveness. The heat indicator helps you avoid this common mistake, guiding you to the correct temperature range and thus preserving the integrity of the non-stick surface, prolonging your pan’s life.
5. Increased Safety and Confidence
No more burnt fingers from touching the pan or oil splattering due to incorrect temperatures. The visual cue provides a clear, safe signal. This builds confidence, especially for novice cooks, empowering them to tackle more complex dishes without fear of ruining them or causing kitchen accidents.
6. Energy Efficiency
By reaching the ideal temperature efficiently and without guesswork, you reduce the time your pan spends on the heat without food, potentially saving a bit on energy bills over time.
In essence, a non-stick frying pan with a heat indicator transforms the cooking process from a series of educated guesses into a precise, enjoyable, and consistent culinary art.
Key Features to Look For When Buying
Choosing the right non-stick frying pan with a heat indicator involves more than just picking the first one you see. Consider these crucial features to ensure you get a durable, efficient, and long-lasting piece of cookware that suits your cooking needs:
1. Non-Stick Coating Type
The quality and type of non-stick coating are paramount for performance and safety.
* PTFE (Polytetrafluoroethylene): Often sold under brand names like Teflon, this is the most common non-stick coating. Modern PTFE coatings are generally safe for cooking, especially when used below 500°F (260°C). Look for “PFOA-free” labels, as PFOA (Perfluorooctanoic acid) was a chemical formerly used in the manufacturing process, now largely phased out due to health concerns. PTFE offers excellent food release and is easy to clean.
* Ceramic: These coatings are typically made from inorganic materials, often silicon-based, and are generally considered a “greener” alternative as they are usually free of PTFE and PFOA. They offer good non-stick properties and can often withstand higher temperatures than traditional PTFE, but their non-stick effectiveness may degrade faster over time.
* Silicone: Less common for frying pans but used in some bakeware. Offers good non-stick but generally not suitable for high-heat frying.
* Hard Anodized Aluminum with Non-stick: Aluminum pans that have undergone an electrochemical process to harden the surface, making it more durable, scratch-resistant, and non-porous. A non-stick coating is then applied. These offer excellent heat distribution and durability.
2. Heat Indicator Technology
Different brands use various types of heat indicators.
* Thermo-Spot (Tefal): The most famous example, where a red dot or ring changes color or pattern when the pan is optimally preheated.
* Thermo-Chromic Paint/Ink: Some pans use specialized paints that change color at specific temperatures.
* Built-in Sensors: More advanced (and often more expensive) pans might have subtle sensors that light up or display a temperature reading.
Ensure the indicator is clear, easy to see, and reliable.
3. Material and Construction
The pan’s base material influences heat distribution and durability.
* Aluminum: Lightweight, heats up quickly and evenly. Often the most affordable option. Good for everyday use.
* Stainless Steel Core with Aluminum/Copper: Some pans have a multi-clad construction (e.g., aluminum core with stainless steel exterior). This combines the even heating of aluminum with the durability and induction compatibility of stainless steel. These are typically heavier and more expensive.
* Cast Iron with Non-stick Coating: Less common, but some brands offer cast iron pans with non-stick coatings. These are very heavy but retain heat exceptionally well.
4. Size and Shape
Consider what you’ll be cooking most often.
* Sizes: Common sizes range from 8 inches (good for single servings, eggs) to 12 inches or more (suitable for family meals, larger quantities).
* Shape: Look for sloped sides for easy flipping and tossing. Deeper pans are better for saucier dishes.
5. Handle Design
A comfortable and secure handle is essential for safety and ease of use.
* Material: Silicone, bakelite, or stainless steel are common. Stainless steel handles are often oven-safe.
* Attachment: Riveted handles are generally more secure and durable than screw-on handles.
* Ergonomics: Ensure the handle feels balanced and comfortable in your hand. Stay-cool handles are a significant plus.
6. Induction Compatibility
If you have an induction stovetop, your pan must have a magnetic base. Look for symbols like a coil or “induction compatible” on the packaging. Many multi-clad or stainless steel-based non-stick pans are induction-ready.
7. Oven Safety
Check the maximum oven temperature rating if you plan to transfer your pan from the stovetop to the oven (e.g., for finishing a frittata or searing meat then roasting). Handles made of bakelite or plastic may not be oven-safe.
8. Lids
Some pans come with matching lids, which are great for simmering, steaming, or keeping food warm. Look for tempered glass lids so you can monitor cooking without lifting.
9. Price and Warranty
Quality often comes at a price, but there are excellent options across various budgets. Check for warranties; reputable brands usually offer at least a one-year warranty against manufacturing defects.
By considering these features, you can make an informed decision and invest in a high-quality non-stick frying pan with a heat indicator that will serve you well for years of delicious cooking.
Tips and Best Practices for Your Non-Stick Frying Pan with Heat Indicator
To get the most out of your non-stick frying pan with a heat indicator and ensure its longevity, follow these essential tips and best practices:
1. Before First Use
- Wash Thoroughly: Hand wash your new pan with warm, soapy water and a soft sponge. Rinse and dry completely.
- Season (Optional but Recommended for some non-stick): While not all non-stick pans require seasoning, some manufacturers recommend it, especially for ceramic coatings. Lightly coat the cooking surface with a teaspoon of cooking oil (like vegetable or canola oil). Heat on low for 30-60 seconds, then wipe off excess oil with a paper towel. This can help improve initial non-stick properties.
2. Proper Preheating is Key
- Listen to the Indicator: This is why you bought the pan! Place the empty pan on a medium heat setting. Wait for the heat indicator to signal that the pan has reached its optimal cooking temperature. Don’t rush it.
- Don’t Overheat: Once the indicator signals readiness, reduce the heat slightly before adding food, especially if cooking something delicate. Prolonged extreme high heat can damage the non-stick coating.
3. Cooking with Care
- Use Low to Medium Heat: Non-stick pans are designed for efficient cooking at lower temperatures than traditional stainless steel or cast iron. Most cooking, especially with a heat indicator, will be done on medium or medium-low. High heat can damage the coating and burn food.
- Use Minimal Oil: One of the benefits of non-stick is needing less fat. A thin coat of oil or butter is usually sufficient for flavor and to aid browning.
- Choose the Right Utensils: Absolutely crucial! Only use silicone, wooden, or heat-resistant plastic utensils. Metal utensils will scratch and damage the non-stick coating, rendering your pan useless.
- Avoid Aerosol Sprays: Many cooking sprays contain propellants and additives that can leave a sticky residue on the non-stick surface, which is difficult to remove and can degrade the coating over time. Use liquid oil in a pour bottle or spray pump instead.
4. Cleaning and Maintenance
- Cool Down First: Always allow your pan to cool completely before washing. Plunging a hot pan into cold water can cause “thermal shock,” leading to warping and damage to the non-stick coating.
- Hand Wash Recommended: Even if a pan is “dishwasher safe,” hand washing is always recommended for non-stick cookware. Dishwasher detergents can be abrasive and harsh, eventually degrading the non-stick surface.
- Soft Sponge and Mild Soap: Use warm, soapy water and a soft sponge or cloth. Avoid abrasive scrubbers, steel wool, or harsh chemical cleaners.
- Stubborn Residue: If food is stuck (which shouldn’t happen often with proper use!), fill the pan with warm water and a little dish soap, let it soak for 15-20 minutes, then gently clean with a soft sponge.
5. Proper Storage
- Protect the Coating: To prevent scratches, avoid stacking other pots and pans directly inside your non-stick pan without protection.
- Pan Protectors: Use felt pan protectors, paper towels, or soft cloths between pans when stacking them.
- Hang if Possible: If you have the space, hanging your pans can be an excellent way to prevent damage.
By adhering to these simple yet effective practices, your non-stick frying pan with heat indicator will remain a reliable, high-performing kitchen companion for many years, helping you achieve consistently delicious results.
Common Mistakes to Avoid with Your Non-Stick Frying Pan
Even with the best intentions, it’s easy to fall into habits that can drastically shorten the lifespan and effectiveness of your non-stick frying pan. Being aware of these common pitfalls can save you money and culinary frustration.
1. Using Metal Utensils
The cardinal sin of non-stick cookware! Metal spatulas, spoons, forks, or whisks will scratch, gouge, and ultimately destroy your non-stick coating. This not only makes the pan lose its non-stick properties but can also release tiny particles into your food. Always, always use silicone, wooden, or heat-resistant plastic tools.
2. Overheating the Pan
While the heat indicator helps, it’s still possible to overheat your pan if you leave it on high heat for too long after the indicator signals readiness, especially if it’s empty. Extreme high temperatures (above 500-570°F or 260-300°C) can cause the non-stick coating (especially PTFE) to degrade, release fumes, and lose its effectiveness. Stick to low to medium heat for most cooking. If the pan starts to smoke or smell, it’s too hot.
3. Preheating on High Heat
Some cooks blast their pans on high heat to speed up preheating. This is a bad idea for non-stick. It can cause thermal shock to the pan’s material, leading to warping. It also makes it very easy to overshoot the ideal temperature, damaging the coating. Always preheat on medium heat, letting the heat indicator guide you.
4. Not Letting the Pan Cool Before Washing (Thermal Shock)
Dropping a hot pan directly into cold water is a common mistake. The sudden temperature change can warp the pan’s base, which can lead to uneven heating and a wobbly pan that doesn’t sit flat on your stovetop. Always allow the pan to cool naturally on the stovetop or a heat-safe surface before washing.
5. Using Abrasive Cleaners or Scouring Pads
Harsh detergents, powdered cleansers, steel wool, or rough scouring pads will scratch and degrade the non-stick surface. Stick to mild dish soap and a soft sponge or cloth for cleaning. For stuck-on food, soaking is your best friend, not aggressive scrubbing.
6. Using Aerosol Cooking Sprays
As mentioned earlier, many aerosol cooking sprays contain chemical propellants and silicone that can bake onto the non-stick surface over time, creating a sticky, gummy residue that’s incredibly difficult to remove and degrades the non-stick properties. Instead, use a small amount of liquid oil applied with a paper towel or a non-aerosol oil mister.
7. Stacking Without Protection
Throwing other pots and pans directly on top of your non-stick pan in the cupboard is a sure way to scratch the delicate coating. Always use pan protectors (felt pads), paper towels, or even a soft dishcloth between stacked pans.
8. Cutting Food in the Pan
Using a knife or other sharp implement to cut food directly in the pan will inevitably scratch the non-stick surface. Always transfer food to a cutting board.
By avoiding these common mistakes, you can significantly extend the life and maintain the performance of your non-stick frying pan with a heat indicator, ensuring it continues to deliver perfectly cooked, easy-release meals for years to come.
Frequently Asked Questions About Non-Stick Frying Pans with Heat Indicators
Here are some common questions people have about non-stick frying pans equipped with heat indicators:
1. How does the heat indicator on the frying pan actually work?
Most heat indicators use thermo-chromic ink or paint. This special material changes color, pattern, or becomes invisible when it reaches a specific temperature threshold, typically around 350-400°F (175-205°C). This change is a clear visual cue that your pan is optimally preheated for cooking.
2. Are non-stick coatings, especially PTFE (Teflon), safe for cooking?
Yes, modern non-stick coatings, particularly PTFE, are considered safe for everyday cooking when used correctly. The key is to avoid overheating the pan beyond recommended temperatures (typically below 500-570°F or 260-300°C). Most reputable brands now produce “PFOA-free” non-stick cookware, eliminating a chemical previously associated with manufacturing processes.
3. How long do non-stick frying pans with heat indicators typically last?
The lifespan varies greatly depending on the quality of the pan, frequency of use, and proper care. With proper use (no metal utensils, low-medium heat, handwashing), a good quality non-stick pan can last 3-5 years or even longer. Lower quality pans may show wear within a year. The heat indicator itself is generally designed to last for the life of the pan.
4. Can I put my non-stick pan with a heat indicator in the dishwasher?
While some manufacturers claim their pans are “dishwasher safe,” it’s almost always recommended to hand wash non-stick pans. Dishwasher detergents can be abrasive and harsh, and the high heat of a dishwasher can degrade the non-stick coating and potentially even damage the heat indicator over time, shortening the pan’s lifespan.
5. What kind of utensils should I use with this pan?
Only use silicone, wooden, or heat-resistant plastic utensils. Metal utensils will scratch and ruin the non-stick coating, making it lose its effectiveness and potentially compromising its safety.
6. My heat indicator isn’t changing color anymore. What’s wrong?
If your heat indicator is no longer changing color, it could be a sign of a few things:
* Overheating: Prolonged exposure to extremely high temperatures can sometimes damage the thermo-chromic material, making it lose its sensitivity.
* Wear and Tear: Over many years, like any component, it might simply wear out.
* Cleaning Residue: Less commonly, a stubborn film or residue might be covering it, preventing proper function (try a thorough but gentle cleaning).
If the pan is still functioning as a non-stick, you can continue using it, but you’ll lose the benefit of the indicator.
7. Can I use my non-stick frying pan with a heat indicator on an induction stove?
Only if the pan is specifically designed to be induction compatible. This means its base must be made of a magnetic material like magnetic stainless steel or cast iron. Look for an “induction compatible” symbol (often a coil or zig-zag pattern) on the packaging or the bottom of the pan.
8. What’s the ideal temperature range for the heat indicator to signal?
Most heat indicators are calibrated to signal readiness at temperatures between 350-400°F (175-205°C). This range is considered ideal for most searing, sautéing, and frying tasks, allowing for proper browning without burning.
9. Can I put this pan in the oven?
It depends on the pan’s construction, particularly the handle material. Pans with bakelite or plastic handles usually have a lower oven-safe temperature limit (e.g., up to 350°F/175°C) or are not oven-safe at all. Pans with stainless steel handles can often withstand much higher oven temperatures (e.g., up to 500°F/260°C). Always check the manufacturer’s instructions for the specific oven-safe temperature for your pan.
10. My non-stick pan started sticking. Can I fix it?
Once a non-stick coating is truly compromised by scratches, excessive wear, or severe overheating, it’s generally not fixable. The pan has reached the end of its non-stick life. However, sometimes a pan might seem sticky due to built-up residue from cooking sprays or carbonized food. A thorough cleaning (soaking, then gentle scrubbing with baking soda paste) might sometimes restore some function, but if the coating is visibly damaged, it’s time for a replacement.
Conclusion: Elevate Your Cooking with Smart Cookware
The days of guessing if your pan is hot enough are officially over. A non-stick frying pan with a heat indicator isn’t just a fancy gadget; it’s a meticulously designed piece of cookware that brings precision, convenience, and consistency to your kitchen. By taking the guesswork out of preheating, it empowers you to achieve perfectly seared meats, flawlessly cooked eggs, and beautifully browned vegetables, every single time.
Beyond the immediate satisfaction of perfectly cooked food, investing in such a pan encourages healthier cooking habits by reducing the need for excess oils, extends the lifespan of your cookware by preventing accidental overheating, and ultimately saves you time and effort on cleanup.
Remember, the key to unlocking the full potential of this innovative pan lies in understanding its features and following best practices for care and maintenance. Choose wisely, treat it with respect, and this remarkable non-stick frying pan with a heat indicator will undoubtedly become one of the most valued and utilized tools in your culinary arsenal, making every meal a masterpiece. Happy cooking!