Baking with Chocolate: Indulge Your Sweet Tooth & Master Decadent Desserts!
- Fimary Chocolate Bar Mold – Non-Stick Chocolate Molds, Food Grade Silicone Deep Mold for Dubai Pistachio, Candy, Snacks
- Husfunov Chocolate Bar Mold,Non-Stick Chocolate Molds, 100% Food Grade Silicone Deep Mold for Dubai Pistachio Rod, Candy, Snacks, Knafeh Pistachio Rod and More(10 Snap)
- Fimary Chocolate Bar Mold – Non-Stick Silicone Chocolate Molds, Food Grade Dubai Deep Chocolate Bar Mold for Milk Pistachio – Set of 2
There’s something undeniably magical about baking with chocolate. The rich aroma filling your kitchen, the glossy melted pools transforming into decadent creations, and that first irresistible bite of a homemade chocolate treat – it’s pure bliss! Whether you’re dreaming of fudgy brownies, chewy cookies, or a sophisticated chocolate cake, mastering the art of chocolate baking is simpler than you think.
This comprehensive guide will help you confidently indulge your sweet tooth by unlocking the secrets to perfect chocolate creations, from understanding your ingredients to avoiding common pitfalls. Get ready to bake!
The Heart of the Matter: Understanding Your Chocolate
Before you even preheat your oven, understanding the types of chocolate and their roles in baking is crucial. Not all chocolate is created equal, and choosing the right one can make all the difference in your final product’s flavor and texture.
- Unsweetened Chocolate (Baking Chocolate): Contains 100% cocoa solids with no added sugar. It’s intensely bitter and primarily used in recipes where a significant amount of sugar is added elsewhere to balance its strong flavor. Think rich brownies or dense chocolate cakes.
- Bittersweet Chocolate: Typically contains 60-80% cocoa solids. It has a deep, complex flavor with less sweetness than semi-sweet. Ideal for sophisticated desserts where you want a pronounced chocolate taste without excessive sweetness.
- Semi-Sweet Chocolate: Usually contains 35-60% cocoa solids. It’s versatile and slightly sweeter than bittersweet, making it a popular choice for cookies, chocolate chips, and general baking.
- Milk Chocolate: Contains 10-20% cocoa solids, plus milk solids and more sugar. It’s creamy, sweet, and mild, perfect for recipes where you desire a softer chocolate flavor, like milk chocolate chip cookies or candies.
- White Chocolate: Technically not chocolate, as it contains no cocoa solids. It’s made from cocoa butter, sugar, and milk solids. It has a sweet, milky, vanilla-like flavor and melts beautifully.
- Cocoa Powder: This is dried and powdered cocoa solids, with the cocoa butter removed.
- Natural Cocoa Powder: Lighter in color, more acidic, and reacts with baking soda to create lift.
- Dutch-Process Cocoa Powder: Darker, less acidic, and often used with baking powder. It provides a smoother, less bitter chocolate flavor.
Tip: While we won’t name brands, remember that better quality chocolate generally means better results. Invest in chocolate you enjoy eating on its own!
Mastering the Melt: Your Foundation for Success
Many chocolate baking recipes call for melted chocolate. Getting this step right is paramount to preventing a lumpy, seized, or burnt mess. There are two primary, reliable methods:
Method 1: The Double Boiler (Bain-Marie)
This is the gentlest and safest method for melting chocolate, especially for larger quantities or delicate chocolate.
- Prepare Your Setup: Fill a medium saucepan with about 1-2 inches of water. Bring the water to a gentle simmer over medium-low heat – you don’t want a rolling boil.
- Chop Your Chocolate: Finely chop your chocolate into small, even pieces. The smaller the pieces, the faster and more evenly they will melt. Place the chopped chocolate in a heatproof bowl (glass or stainless steel works best).
- Create the Double Boiler: Place the bowl with the chocolate over the simmering water. Ensure the bottom of the bowl does not touch the water. The steam will gently heat the bowl and melt the chocolate.
- Stir & Melt: Stir the chocolate frequently with a rubber spatula or whisk. As it melts, it will become smooth and glossy.
- Remove from Heat: Once almost completely melted, remove the bowl from the heat. The residual heat will melt any remaining pieces as you continue to stir. Do not overcook!
Method 2: The Microwave
This method is quicker and convenient for smaller amounts, but requires more vigilance.
- Chop Your Chocolate: Just like with the double boiler, chop your chocolate finely into small pieces for even melting. Place them in a microwave-safe bowl.
- Microwave in Short Bursts: Microwave on 50% power (or medium) for 30-second intervals.
- Stir Between Bursts: After each interval, remove the bowl and stir thoroughly. The chocolate may not look melted, but stirring distributes the heat.
- Repeat: Continue microwaving in 15-20 second bursts (or even 10 seconds for the final stages), stirring after each, until the chocolate is smooth and glossy. Do not let it completely melt in the microwave; remove it when a few small lumps remain and stir until smooth.
Crucial Tips for Melting Chocolate:
- Keep it Dry: Even a single drop of water can cause chocolate to “seize” (become thick, grainy, and unworkable). Ensure your bowls, spatulas, and hands are completely dry.
- Low and Slow: Gentle, indirect heat is key. High heat will scorch or seize the chocolate.
- Don’t Rush: Patience is a virtue when melting chocolate.
- Stir Often: Frequent stirring promotes even melting and prevents hot spots.
- Remove Before Fully Melted: The residual heat will do the rest, preventing overheating.
Baking with Chocolate: Step-by-Step Goodness
Once your chocolate is perfectly melted, or you’re ready to incorporate chips or cocoa, here’s how to integrate it seamlessly into your chocolate baking recipes.
- Read the Recipe Thoroughly: This might seem obvious, but it’s the most important step. Understand when and how the chocolate should be added.
- Measure Accurately: Baking is a science. Use a kitchen scale for dry ingredients like flour and cocoa powder for the most precise results. Use proper measuring cups for liquids and leveling off for dry ingredients.
- Prepare Ingredients: Ensure all ingredients, especially eggs, butter, and dairy, are at room temperature unless the recipe specifically states otherwise. This helps them emulsify better, creating a smoother batter.
- Incorporate Melted Chocolate:
- Allow freshly melted chocolate to cool slightly before adding it to your batter, especially if adding to eggs or cold ingredients, to prevent cooking them.
- Gradually fold or whisk the melted chocolate into your wet ingredients until just combined. Overmixing can lead to tough baked goods.
- Adding Chips or Chunks:
- Toss chocolate chips or chunks with a tablespoon of flour before adding them to your batter. This helps prevent them from sinking to the bottom during baking.
- Gently fold them in at the very end of mixing.
- Using Cocoa Powder:
- Sift cocoa powder with other dry ingredients (flour, baking powder/soda, salt) to prevent lumps and ensure even distribution.
- If a recipe calls for whisking cocoa into hot liquid, do so until smooth before adding to the rest of the batter.
- Baking Time & Temperature: Always follow the recipe’s recommended baking time and temperature. Overbaking chocolate goods can dry them out and make them crumbly. Look for visual cues like edges pulling away or a set center.
- Cooling: Allow your chocolate baked goods to cool completely on a wire rack before cutting or serving, unless the recipe specifies otherwise. This allows the internal structure to set and prevents crumbling.
Common Chocolate Baking Mistakes to Avoid
Even experienced bakers can make these slip-ups. Being aware of them will significantly improve your chocolate baking success rate.
- 1. Overheating or Scorching Chocolate:
- Mistake: Using too high heat when melting, or leaving chocolate on the heat too long.
- Result: Chocolate becomes grainy, thick, or even burns, developing a bitter, unpleasant taste.
- Fix: Always use low, indirect heat (double boiler) or short, interrupted bursts (microwave) and stir constantly. Remove from heat just before fully melted.
- 2. Introducing Water to Melting Chocolate:
- Mistake: A single drop of water (or steam condensation) gets into your melting chocolate.
- Result: The chocolate “seizes,” turning into a thick, gritty, unworkable paste.
- Fix: Ensure all equipment is completely dry. When using a double boiler, make sure the bottom of the bowl doesn’t touch the water and condensation doesn’t drip in.
- 3. Using the Wrong Type of Chocolate:
- Mistake: Substituting unsweetened for semi-sweet, or milk chocolate for dark chocolate without adjusting the recipe.
- Result: The final product can be too sweet, not sweet enough, or have an unbalanced flavor and inconsistent texture.
- Fix: Always use the type of chocolate specified in the recipe. If you must substitute, understand the cocoa content and adjust sugar or other liquids accordingly (though this requires more advanced knowledge).
- 4. Overmixing the Batter:
- Mistake: Continuing to mix after chocolate, flour, or other dry ingredients have been added.
- Result: Develops the gluten in the flour, leading to tough, dry, or chewy (in a bad way) baked goods.
- Fix: Mix only until just combined. A few small streaks of flour are acceptable; they’ll disappear during baking.
- 5. Not Chilling Dough/Batter (When Required):
- Mistake: Rushing the process and not chilling cookie dough or certain chocolate batters.
- Result: Cookies spread too much, cakes may be too crumbly, or the flavors don’t develop properly.
- Fix: Follow chilling instructions explicitly. Chilling solidifies fats, deepens flavors, and improves texture.
Top Tips for Chocolate Baking Success
Beyond avoiding mistakes, these habits will elevate your chocolate dessert game:
- Invest in Good Quality Vanilla Extract: Vanilla enhances chocolate’s flavor profile beautifully.
- Add a Pinch of Salt: Even in sweet recipes, salt balances the sweetness and makes the chocolate flavor pop.
- Room Temperature Eggs & Butter: These emulsify better, creating a smoother, more uniform batter and a better texture.
- Don’t Overbake: This is crucial for fudgy brownies and moist cakes. A toothpick inserted should come out with moist crumbs, not wet batter, and the edges should look set.
- Taste as You Go (Where Safe!): For frostings or fillings, taste and adjust sweetness or flavor if needed.
- Proper Storage: Store your chocolate treats in an airtight container at room temperature or as specified by the recipe to maintain freshness and texture.
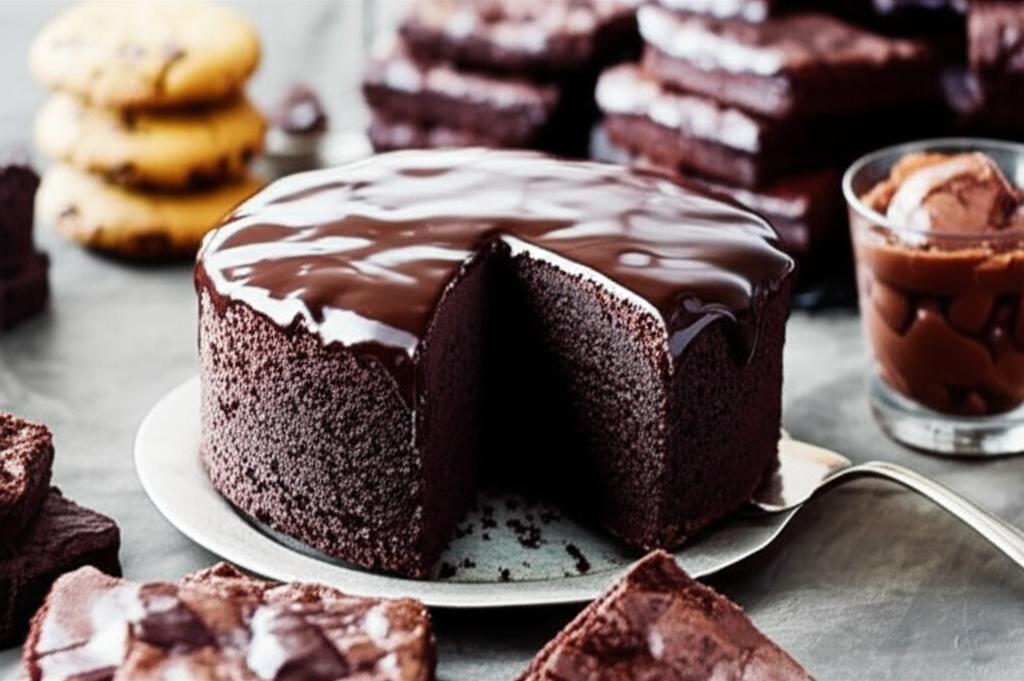
Indulge Your Sweet Tooth!
Baking with chocolate is an incredibly rewarding experience. With a little knowledge, attention to detail, and a dash of passion, you’ll be whipping up decadent chocolate desserts that impress everyone (especially yourself!) in no time. So, gather your ingredients, choose a recipe that excites you, and get ready to fill your home with the irresistible aroma of homemade chocolate goodness. Happy baking!
- Fimary Chocolate Bar Mold – Non-Stick Chocolate Molds, Food Grade Silicone Deep Mold for Dubai Pistachio, Candy, Snacks
- Husfunov Chocolate Bar Mold,Non-Stick Chocolate Molds, 100% Food Grade Silicone Deep Mold for Dubai Pistachio Rod, Candy, Snacks, Knafeh Pistachio Rod and More(10 Snap)
- Fimary Chocolate Bar Mold – Non-Stick Silicone Chocolate Molds, Food Grade Dubai Deep Chocolate Bar Mold for Milk Pistachio – Set of 2
FAQ
Q. What kind of chocolate is best for baking, and what’s the difference between them?
A. The “best” chocolate for baking largely depends on the recipe and desired flavor profile. Unsweetened chocolate contains no sugar and is very bitter, typically used in recipes where sugar is added separately. Bittersweet and semi-sweet chocolates are interchangeable for many recipes, containing varying percentages of cocoa solids (often 50-70%+ for bittersweet, 35-50% for semi-sweet) and sugar, offering a rich, balanced flavor. Milk chocolate is sweeter and contains milk solids, providing a milder, creamier taste. White chocolate, unique in that it contains no cocoa solids but is made from cocoa butter, sugar, and milk solids, offers a sweet, creamy flavor. High-quality bar chocolate often melts smoother and provides a superior flavor compared to chocolate chips, which contain stabilizers to help them maintain their shape during baking.
Q. What’s the best way to melt chocolate without it seizing or burning?
A. The safest methods for melting chocolate are using a double boiler or a microwave. For a double boiler, place chopped chocolate in a heatproof bowl set over a saucepan of simmering (not boiling) water, ensuring the bottom of the bowl does not touch the water. Stir gently until smooth. For the microwave, place chopped chocolate in a microwave-safe bowl and heat in 30-second intervals, stirring thoroughly after each interval, until it’s mostly melted. Then, stir continuously until the residual heat melts the remaining pieces and it becomes completely smooth. It’s crucial to avoid overheating, which can cause burning, and prevent any water (even a tiny drop) from coming into contact with the chocolate, as this will cause it to seize (become thick, clumpy, and unworkable).
Q. When should I use natural cocoa powder versus Dutch-process cocoa powder?
A. The choice between natural and Dutch-process cocoa powder impacts both flavor and leavening. Natural cocoa powder is acidic and has a lighter color with a sharper, sometimes fruity, chocolate flavor. It reacts with alkaline ingredients like baking soda, creating carbon dioxide for lift in baked goods. Dutch-process cocoa powder has been treated with an alkali to neutralize its acidity, resulting in a darker color, milder flavor, and less bitterness. Because it’s neutral, it typically needs to be paired with baking powder or used in recipes that don’t rely on baking soda for leavening. Using the wrong type can significantly alter the texture, rise, and overall flavor of your chocolate baked goods.
Q. My chocolate seized after I tried to melt it. Can I fix it, and what caused it?
A. Chocolate seizes when it comes into contact with even a tiny amount of water or when it’s severely overheated. This causes the cocoa solids to clump together. If your chocolate has seized, you might be able to rescue it by stirring in a tablespoon of neutral oil (like vegetable, canola, or grapeseed) or melted butter, one teaspoon at a time, until the mixture becomes smooth again. This works by coating the sugar and cocoa particles, allowing them to separate. While this can often restore a usable texture, it may slightly affect the final consistency or flavor of your baked goods. Prevention is key: ensure all your bowls and utensils are completely dry, and be mindful of steam when using a double boiler.
Q. How should I properly store chocolate baked goods to keep them fresh?
A. Proper storage varies depending on the type of chocolate baked good. Generally, items like cookies, brownies, and unfrosted cakes should be stored in an airtight container at room temperature for 3-5 days to maintain freshness. For baked goods with perishable fillings or frostings (such as cream cheese frosting, whipped cream, or fresh fruit), refrigeration is necessary, and they should typically be consumed within a few days. Many chocolate baked goods, including cookies and brownies, also freeze exceptionally well. Wrap them tightly in plastic wrap and then place them in an airtight container or freezer-safe bag for up to 2-3 months, allowing you to enjoy them at a later time.
Q. What is chocolate bloom, and is it safe to eat chocolate that has bloomed?
A. Chocolate bloom refers to a grayish-white film that can appear on the surface of chocolate. There are two main types: fat bloom and sugar bloom. Fat bloom occurs when the cocoa butter separates from the chocolate and rises to the surface, typically due to temperature fluctuations, then re-solidifies. Sugar bloom happens when moisture condenses on the chocolate’s surface, dissolves sugar crystals, and then evaporates, leaving behind larger, visible sugar crystals. While bloom affects the appearance and can sometimes make the chocolate’s texture crumbly, it is purely an aesthetic issue. Bloomed chocolate is perfectly safe to eat and can still be used for baking, as the bloom will typically melt away and integrate into the mixture during the heating process.
Q. Can I substitute different types of chocolate (e.g., milk for dark, or chips for a bar) in a recipe?
A. While substitutions are sometimes possible, they can significantly alter the outcome of your baked good. Swapping chocolate types (e.g., using milk chocolate instead of bittersweet) will change the sweetness level and overall flavor intensity. You may need to adjust other ingredients, like sugar, to compensate. Substituting chocolate chips for chopped bar chocolate can also affect the texture, as chips contain stabilizers that prevent them from melting as smoothly as bar chocolate. For best results, especially in recipes where chocolate is a prominent flavor or structural component, it’s recommended to use the type and form of chocolate specified in the recipe.