Canning & Preserving: Extend Your Harvest and Enjoy Freshness Year-Round!
- UrSpeedtekLive 30 Pack Mason Jars 8 oz with Regular Lids and Bands, Half Pint Canning Jars, Small Glass Jars for Honey Jelly Jam Crafts
- PINIWON Mason Jars 16 oz with Airtight Lids and Bands, 15 Pack Regular Mouth Canning Jars, Clear Glass Pint Jars for Canning, Pickling, Food Storage, DIY Projects, 24 Labels, Brush & String Included
- Miuyhji Wide Mouth Mason Jars 16 oz with Lids [6 Pack], Canning Jars with Metal Airtight Lids and Bands, 16 oz Glass Jars for Fermenting, Pickling, Freezing, Preserving, Meal Prep, Jar Décor
Imagine the peak of summer, your garden overflowing with ripe tomatoes, crisp beans, and juicy berries. Or perhaps you found an amazing deal on fresh produce at your local farmer’s market. What if you could capture that peak freshness and enjoy it months later, long after the season has passed? That’s the magic of canning and preserving!
Food preservation is an ancient art, but with modern, safe techniques, it’s never been easier or more rewarding to extend your harvest, reduce food waste, and enjoy delicious, homemade goodness year-round. This guide will walk you through the basics, focusing on canning, and provide you with essential tips to get started confidently.
Why Preserve Your Harvest? The Benefits Are Abundant!
Embracing the art of food preservation offers a bounty of advantages for you and your family:
- Savor Seasonal Flavors Year-Round: Lock in the vibrant taste and nutrients of produce at its peak.
- Reduce Food Waste: Transform excess fruits and vegetables into pantry staples instead of letting them spoil.
- Save Money: Buying produce in bulk when it’s in season and preserving it can be significantly cheaper than buying out-of-season produce or processed foods.
- Know What’s In Your Food: You control the ingredients, avoiding unwanted preservatives, excessive sugar, or sodium often found in store-bought options.
- Boost Self-Sufficiency: Gain a sense of accomplishment and security knowing you have a well-stocked pantry.
- Thoughtful Gifts: Homemade jams, jellies, and pickles make wonderful, personalized presents.
Understanding the Main Methods of Food Preservation
While this article will focus primarily on canning, it’s good to know the main ways you can preserve food:
- Canning: Sealing food in jars and heating them to create a vacuum seal, preserving food for long-term, shelf-stable storage. This involves two main methods:
- Water Bath Canning: For high-acid foods.
- Pressure Canning: For low-acid foods.
- Freezing: Storing food at very low temperatures to halt spoilage. One of the easiest methods.
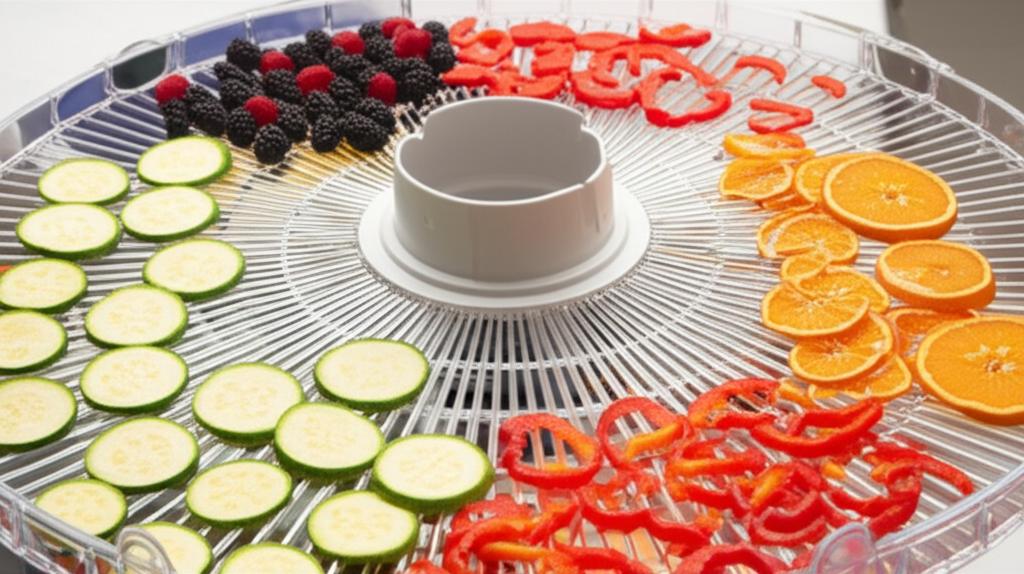
- Dehydrating: Removing moisture from food to inhibit microbial growth.
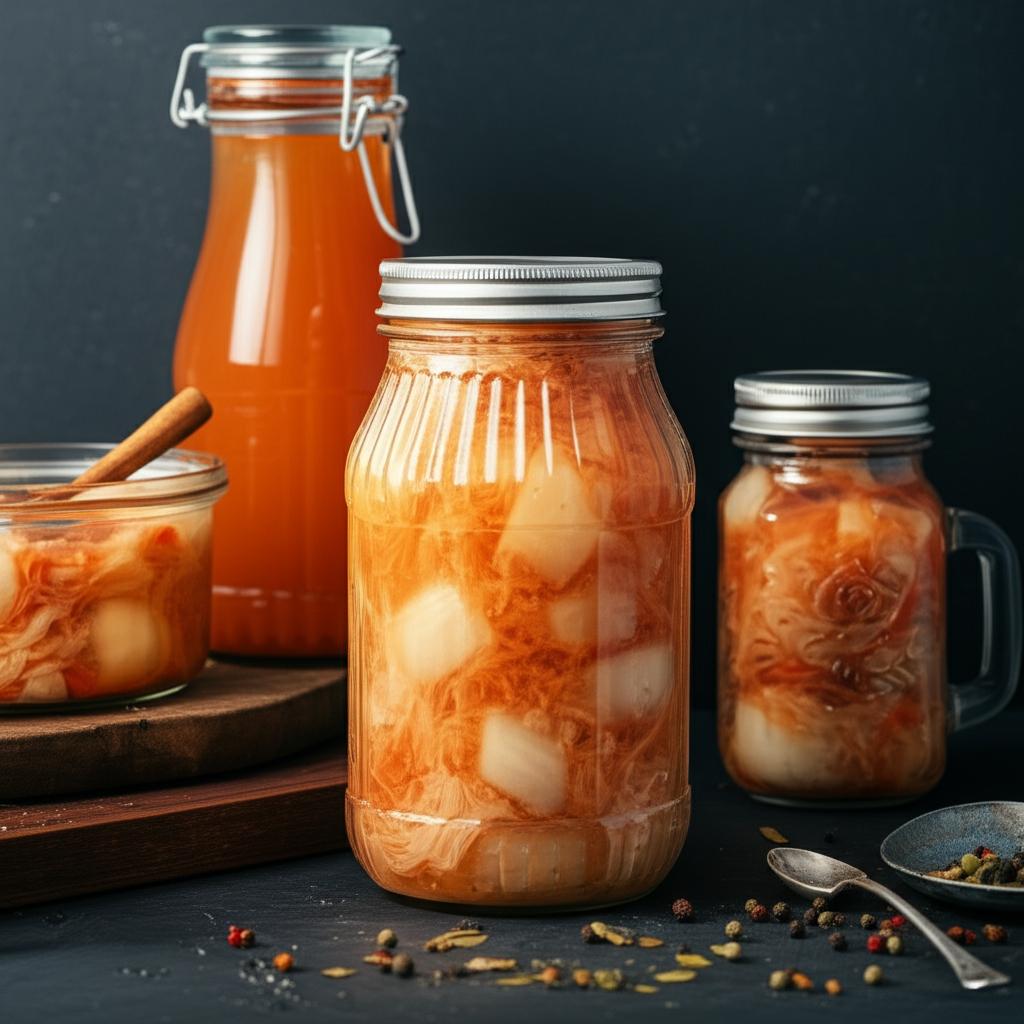
- Fermenting: Using beneficial microorganisms to transform food and create unique flavors and textures (e.g., sauerkraut, kimchi).
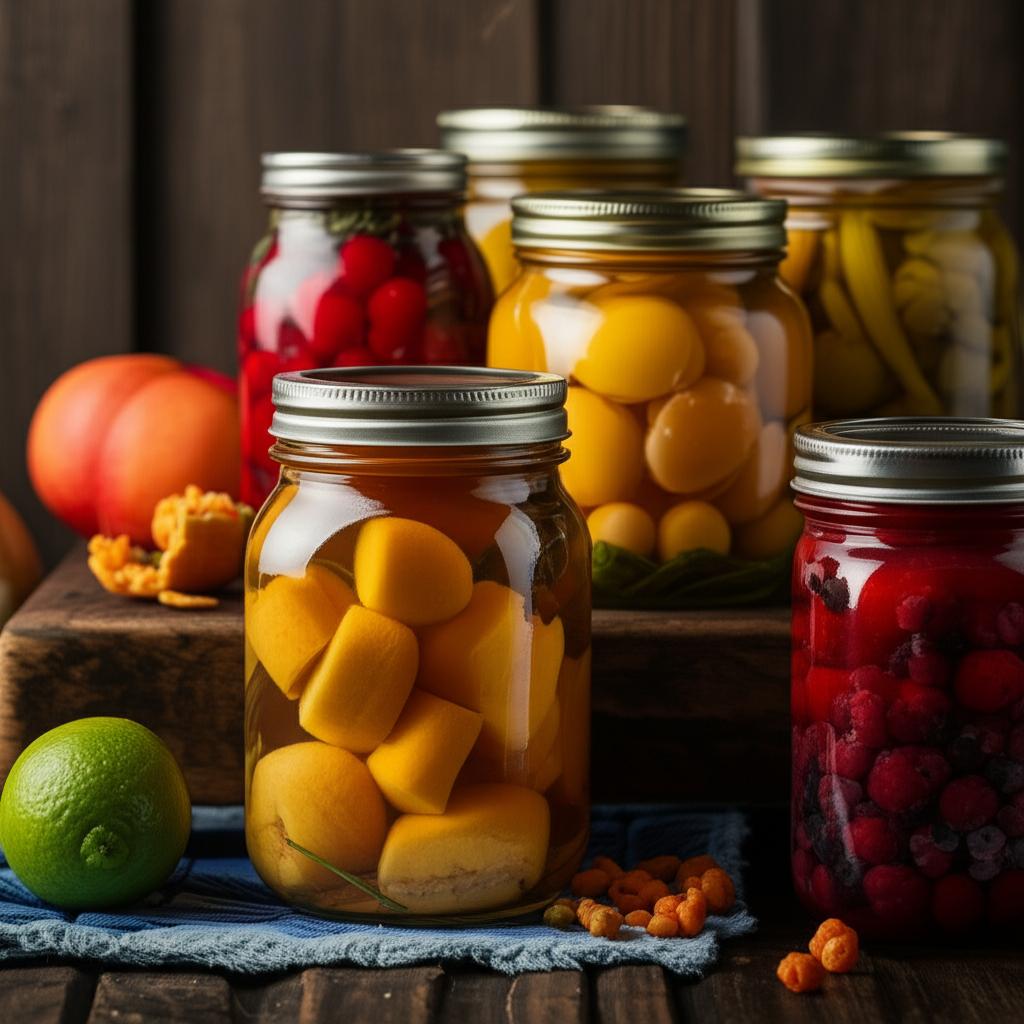
Diving Deep into Canning: Your Guide to Shelf-Stable Goodness
Canning is a fantastic way to create shelf-stable foods that can last for a year or more. It requires careful attention to detail, but with the right guidance, it’s incredibly rewarding.
Is Canning for You?
Canning does require a bit of an upfront investment in equipment and, more importantly, your time and attention to detail. It’s not difficult, but precision and following tested recipes are paramount for safety. If you’re ready for a rewarding kitchen adventure, then yes, canning is definitely for you!
Essential Equipment for Safe Canning (Generic & General Use)
Before you begin, gather these fundamental tools. Remember, always use equipment specifically designed for canning.
- Canning Jars: Only use glass canning jars designed for home canning. These come in various sizes (pint, quart, half-pint) and are made to withstand the high temperatures of processing. Never use old mayonnaise jars or similar food jars.
- Two-Piece Lids: This consists of a flat metal lid (with a sealing compound) and a metal screw band. Lids are for single-use only to ensure a proper seal. Screw bands can be reused.
- Large Stockpot (for Water Bath): Tall enough to cover jars by at least an inch of water, plus extra space for a rolling boil.
- Pressure Canner (for Pressure Canning): A specialized, heavy-duty pot with a lockable lid, pressure gauge (dial or weighted), and a vent. Do NOT confuse this with a pressure cooker.
- Jar Lifter: Essential for safely placing hot jars into and removing them from the canner.
- Canning Funnel: Helps fill jars without spilling, keeping jar rims clean.
- Headspace Tool/Bubble Remover: A non-metallic utensil to remove air bubbles from jars and measure headspace.
- Lid Wand (Magnetic): Helps lift lids from hot water without touching them.
- Tongs: Useful for general handling.
- Clean Kitchen Towels: For wiping jar rims and general clean-up.
Water Bath Canning: For High-Acid Foods
Water bath canning is suitable for high-acid foods, meaning foods with a pH of 4.6 or lower. This includes most fruits, fruit jams, jellies, fruit butters, pickles, relishes, and tomatoes (often with added acid like lemon juice or citric acid). The high acidity, combined with proper heat processing, prevents the growth of harmful bacteria, including Clostridium botulinum.
Step-by-Step Water Bath Canning:
-
Prepare Your Jars & Lids:
- Wash jars, screw bands, and new flat lids in hot, soapy water, rinse well.
- Jars: Keep empty jars hot to prevent thermal shock when filling with hot food. You can do this by placing them in the water bath canner filled with hot water, or in a dishwasher on a sanitize cycle.
- Lids: Simmer (do not boil) new flat lids in hot water according to manufacturer instructions. This softens the sealing compound. Screw bands do not need to be heated.
-
Prepare Your Food:
- Always use a tested, reliable canning recipe from reputable sources like the National Center for Home Food Preservation (NCHFP), university extension offices, or trusted canning cookbooks.
- Prepare your chosen recipe (e.g., jam, pickles, tomato sauce). Ensure it’s ready and hot if the recipe calls for hot packing.
-
Fill the Jars:
- Place a canning funnel on top of a hot jar.
- Ladle hot food into the hot jar, leaving the specified headspace (the empty space between the food and the top of the jar rim). Headspace is crucial for a proper seal.
- Typically: 1/4 inch for jams, jellies, and juices; 1/2 inch for fruits and tomatoes; 1 inch for vegetables and meats (if water-bath canning high-acid pickled veggies). Refer to your recipe!
-
Remove Air Bubbles:
- Slide a non-metallic utensil (like a plastic knife or a headspace tool) down the inside of the jar between the food and the glass to release any trapped air bubbles. Add more food if necessary to maintain headspace.
-
Wipe Jar Rims Clean:
- Using a clean, damp cloth, carefully wipe the entire rim of each jar. Even a small speck of food can prevent a proper seal.
-
Apply Lids & Rings:
- Center a hot, flat lid on top of the clean jar rim.
- Screw a metal band on top, tightening it “fingertip tight” – just until you feel resistance. Do not overtighten, as this can prevent air from escaping and compromise the seal.
-
Process in the Water Bath Canner:
- Carefully place the filled jars onto the rack in your water bath canner, ensuring they are not touching each other.
- Add hot water to the canner until the water level covers the tops of the jars by at least 1-2 inches.
- Cover the canner with its lid.
- Bring the water to a rolling boil.
- Once a full, rolling boil is achieved, begin timing for the duration specified in your recipe.
- Maintain a vigorous boil throughout the entire processing time. Adjust heat as needed.
-
Cool & Check Seals:
- Once the processing time is complete, turn off the heat and carefully remove the canner lid. Let the jars sit in the hot water for 5 minutes before removing them.
- Using a jar lifter, carefully remove the hot jars and place them upright on a folded towel or cooling rack in a draft-free area. Do not disturb them or tighten screw bands.
- Allow jars to cool undisturbed for 12-24 hours.
- As they cool, you should hear a “ping!” sound as the lids seal and concave.
- Check seals: After cooling, press down on the center of each lid. If it doesn’t flex, it’s sealed. Remove screw bands, lift the jar gently by the lid to double-check. If a lid flexes or lifts, it’s unsealed. Store unsealed jars in the refrigerator and consume within a few days.
-
Store:
- Once sealed, remove the screw bands (this prevents rust and allows for easier re-checking of seals later).
- Wipe jars clean.
- Label each jar with the contents and date.
- Store in a cool, dark, dry place, away from direct sunlight or freezing temperatures.
Pressure Canning: For Low-Acid Foods
Pressure canning is the only safe method for canning low-acid foods. Low-acid foods have a pH above 4.6 and include most vegetables (e.g., green beans, corn, carrots, potatoes), meats, poultry, seafood, and mixed recipes like soups and stews. These foods require higher temperatures (achieved only through pressure) to destroy spores of Clostridium botulinum, the bacteria that causes botulism, a serious and potentially fatal foodborne illness.
Step-by-Step Pressure Canning:
-
Prepare Jars & Lids:
- Similar to water bath, wash jars, screw bands, and new flat lids. Keep jars hot. Simmer lids.
-
Prepare Your Food:
- Strictly follow a tested pressure canning recipe. This is not the time for improvisation.
-
Fill the Jars:
- Ladle hot food into hot jars, leaving the specified headspace (usually 1 inch for most low-acid foods). Remove air bubbles and wipe rims clean.
-
Apply Lids & Rings:
- Place hot lids and apply screw bands fingertip tight.
-
Prepare the Pressure Canner:
- Add the specified amount of water (usually 2-3 inches, check your canner’s manual) to the bottom of the pressure canner. Place the canner rack in the bottom.
- Carefully place filled jars onto the rack, ensuring they are not touching.
-
Secure the Canner Lid & Vent:
- Secure the canner lid according to your canner’s instructions.
- Turn the heat to high. Allow a steady stream of steam to escape from the vent pipe for a full 10 minutes before placing the weighted gauge or closing the petcock/vent. This crucial step removes all air from the canner, which is essential for accurate temperature and safety.
-
Bring to Pressure & Process:
- After venting for 10 minutes, place the weighted gauge on the vent pipe or close the petcock and allow the canner to come up to the required pressure (psi) as specified in your recipe and adjusted for your altitude.
- Once the correct pressure is reached, start timing for the duration specified in your recipe.
- Maintain a consistent pressure throughout the entire processing time. Adjust heat as necessary. Do not let the pressure drop below the target, or you’ll need to restart the timing.
-
Cool Naturally:
- When the processing time is complete, turn off the heat.
- Allow the canner to cool naturally until the pressure returns to zero. Do not open the vent or try to cool the canner quickly with water. Forcing cooling can cause liquid loss from jars and unsafe processing.
- Once the pressure gauge reads zero, wait another 5-10 minutes before carefully removing the weighted gauge or opening the petcock. Then, unfasten the lid and remove it, tilting it away from your face to avoid steam.
-
Cool & Check Seals:
- Remove jars with a jar lifter and place them on a folded towel or cooling rack in a draft-free area for 12-24 hours to cool and seal.
- Check seals as you would with water bath canning (lid concaved, no flex).
-
Store:
- Remove screw bands, wipe jars, label with contents and date, and store in a cool, dark, dry place.
General Canning Tips for Success!
- Always Use Tested Recipes: This cannot be stressed enough. Never make up your own canning recipes or change ingredient proportions in tested recipes (especially for low-acid foods). Recipes are developed to ensure proper acidity and processing times for safety.
- Use Fresh, High-Quality Produce: The quality of your canned goods starts with the ingredients. Use produce that is ripe, firm, and free from blemishes.
- Mind Your Headspace: Too little headspace can cause food to boil out during processing (siphoning), preventing a proper seal. Too much can result in insufficient vacuum and poor seals.
- Cleanliness is Key: Ensure all equipment, jars, and your workspace are sparkling clean to prevent contamination.
- Inspect Jars & Lids: Before each use, run your finger around the rim of each jar to check for nicks, cracks, or chips, which can prevent a seal. Use new flat lids every time.
- Accurate Processing Time & Pressure: Follow the recipe exactly. Do not shorten processing times or reduce pressure.
- Adjust for Altitude: Water boils at a lower temperature at higher altitudes, meaning you need to increase processing times for water bath canning or increase pressure for pressure canning. Always consult an altitude adjustment chart for your specific location.
- Cool Jars Properly: Allow jars to cool undisturbed for the full recommended time.
- Label and Store Properly: Knowing what’s in the jar and when it was canned is crucial. Store in a cool, dark, dry place.
Common Canning Mistakes to Avoid (and Why!)
- Ignoring Tested Recipes or Altering Ingredients: This is the most dangerous mistake. It can lead to food spoilage or, worse, botulism in low-acid foods.
- Improper Headspace: Can lead to unsealed jars or food spoilage.
- Skipping the Venting Step in Pressure Canning: This is critical. Failure to vent releases trapped air, which means the internal temperature won’t reach a safe level, risking botulism.
- Forcing the Pressure Canner to Cool: Rapid cooling can cause jars to siphon (liquid escapes), leading to poor seals or under-processing.
- Re-using Flat Lids: The sealing compound on the flat lid is designed for one-time use. Re-using them greatly reduces the chance of a proper, safe seal.
- Not Removing Air Bubbles: Trapped air can prevent a good seal and affect the quality of the food.
- Using Damaged Jars: Nicks or cracks on the jar rim or body can prevent a seal and even cause the jar to break during processing.
- Not Adjusting for Altitude: This will result in under-processing, meaning harmful bacteria may not be destroyed.
- Overtightening Screw Bands: This can prevent air from escaping during processing, leading to buckling lids or incomplete seals.
Beyond Canning: Other Ways to Preserve Your Bounty
While canning is fantastic, don’t forget these other easy and effective methods:
- Freezing: Perhaps the easiest method for many foods. Blanched vegetables, fruits, herbs, and even prepared meals freeze beautifully. It generally retains nutrients very well.
- Dehydrating: Great for making fruit leather, dried herbs, veggie chips, or preparing ingredients for backpacking meals. Dehydrated foods are lightweight and compact.
- Fermenting: A vibrant method that creates probiotic-rich foods like sauerkraut, kimchi, and fermented pickles. It’s a living food preservation method that offers unique flavors.
Food Safety First!
Your health and safety are paramount. When in doubt about the safety of a canned food:
- If a lid is bulging, seeping, or if the food looks, smells, or tastes unusual, do NOT taste it**. Discard it safely (do not feed to pets or livestock).
- Always follow tested, scientifically researched recipes.
- Invest in a dial gauge pressure canner? Have it tested annually. Your local extension office can often do this.
Start Preserving Today!
Canning and preserving your own food is a rewarding journey that connects you more deeply with your food, reduces waste, and stocks your pantry with delicious, healthy options. It might seem daunting at first, but by starting with a simple, high-acid recipe (like a basic jam or dill pickles) and following instructions carefully, you’ll quickly gain confidence.
So, gather your ingredients, choose a recipe, and get ready to extend your harvest and enjoy the incredible flavors of the season, all year long! Happy preserving!
- UrSpeedtekLive 30 Pack Mason Jars 8 oz with Regular Lids and Bands, Half Pint Canning Jars, Small Glass Jars for Honey Jelly Jam Crafts
- PINIWON Mason Jars 16 oz with Airtight Lids and Bands, 15 Pack Regular Mouth Canning Jars, Clear Glass Pint Jars for Canning, Pickling, Food Storage, DIY Projects, 24 Labels, Brush & String Included
- Miuyhji Wide Mouth Mason Jars 16 oz with Lids [6 Pack], Canning Jars with Metal Airtight Lids and Bands, 16 oz Glass Jars for Fermenting, Pickling, Freezing, Preserving, Meal Prep, Jar Décor
FAQ
Q. What exactly is canning and preserving, and why is it a valuable skill for extending my harvest?
A. Canning and preserving refer to various methods of treating and storing food to inhibit spoilage, allowing it to be enjoyed months or even years after harvest. It’s a valuable skill because it minimizes food waste, saves money by utilizing seasonal abundance, allows you to control ingredients for healthier eating, and provides a pantry full of delicious, homemade goods year-round.
Q. What are the primary methods for home food preservation, and how do they differ?
A. The main methods include water bath canning, pressure canning, freezing, dehydrating, and pickling. Water bath canning is used for high-acid foods (fruits, jams, pickles) and involves processing jars in boiling water. Pressure canning is essential for low-acid foods (vegetables, meats, soups) as it reaches higher temperatures to kill botulism spores. Freezing involves rapidly chilling food to halt microbial growth. Dehydrating removes moisture to prevent spoilage, and pickling uses acid (vinegar) to preserve food.
Q. What essential equipment do I need to get started with home canning?
A. For water bath canning, you’ll need a large canning pot with a rack, glass canning jars (Mason jars) with new lids and bands, a jar lifter, a canning funnel, and a head space tool/bubble remover. For pressure canning, a dedicated pressure canner is required, which is distinct from a pressure cooker. Ensure all equipment is clean and in good working order.
Q. How do I ensure the safety of my home-preserved foods, particularly regarding the risk of botulism?
A. Food safety is paramount. Always use tested recipes from reliable sources like the USDA or university extension offices. Botulism is a concern with low-acid foods; these must be processed in a pressure canner at the correct temperature and time. High-acid foods can be safely water bath canned. Never alter processing times or ingredients in tested recipes, and always ensure jars are properly sealed after processing. If in doubt, when opening a jar, check for signs of spoilage (off-odor, mold, bulging lid) and discard if any are present.
Q. What types of foods are suitable for canning, and how do I choose the correct preservation method for them?
A. A wide variety of foods can be preserved. Fruits, jams, jellies, pickles, and tomatoes (with added acid) are high-acid foods suitable for water bath canning. Low-acid foods like most vegetables, meats, poultry, seafood, and soups must be processed in a pressure canner. The acidity of the food dictates the required canning method. Always consult a tested recipe to determine the appropriate preservation technique for your specific ingredients.
Q. How long do home-canned foods typically last, and what are the best practices for storing them?
A. When properly canned and stored, home-canned foods can last for at least one year and remain safe to eat for even longer, though their quality (color, texture) may degrade over time. Store canned goods in a cool, dark, dry place, ideally between 50-70°F (10-21°C), away from direct sunlight, heat sources, and freezing temperatures. Remove screw bands after jars have cooled and sealed, as leaving them on can trap moisture and promote rust.