Unleash Your Blender’s Potential: Creative Ways to Use It for More Than Smoothies
- Ninja Professional Blender 1000W, Total Crushing Technology- Smoothies, Ice Crushing & Frozen Fruit, Full-Size Countertop Blender, 72-oz. Pitcher, Black & Grey, BL610
- nutribullet Full-Size Blender Combo 1200W – NBF50500 – Dark Gray
- Hamilton Beach Power Elite Wave Action Blender For Smoothies, 40 Oz Glass Jar, 12 Functions Including Puree, Crush Ice, 700 Watts – Black (58148A)
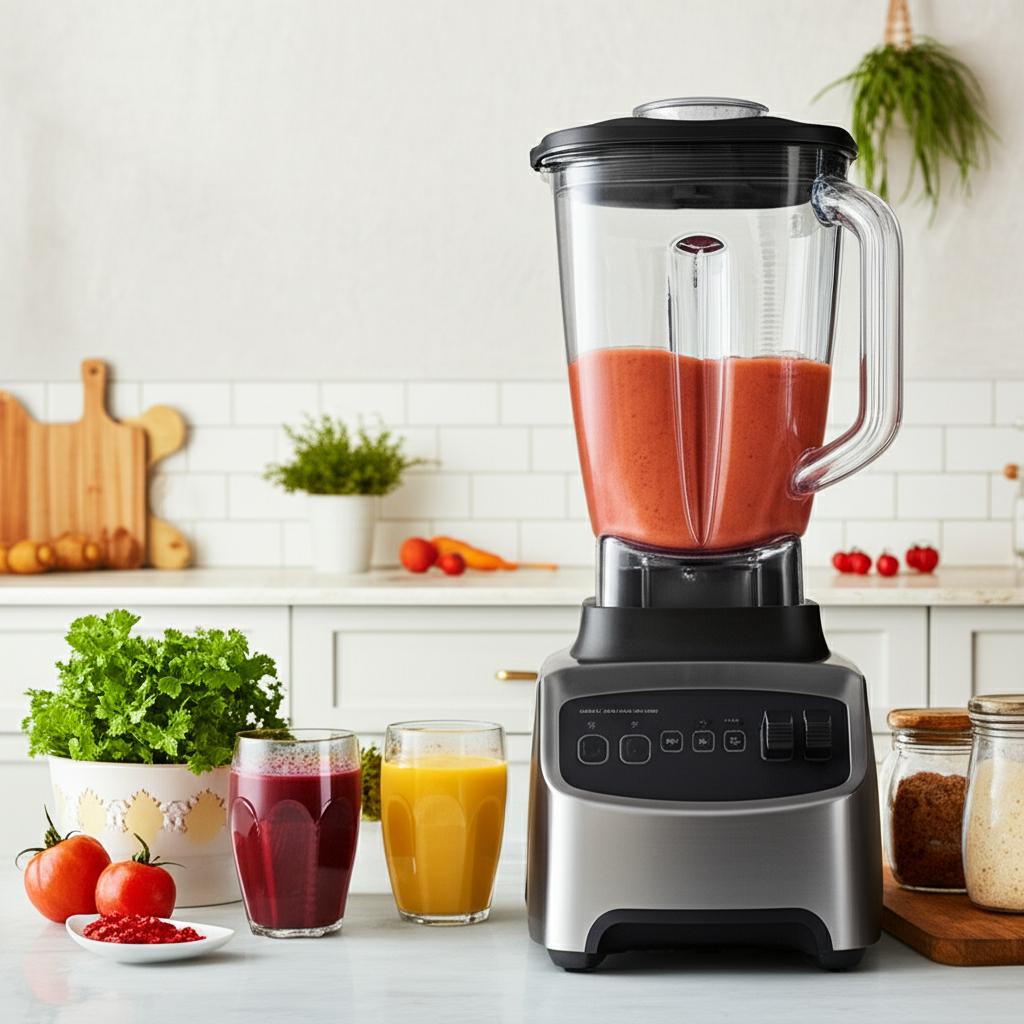
Your blender, often relegated to the morning smoothie routine, is a powerhouse of culinary potential waiting to be unleashed! This versatile kitchen appliance can transform ingredients in ways you might not have imagined, saving you time, effort, and even money. If you’re ready to break free from the smoothie rut and elevate your cooking, you’ve come to the right place.
We’re about to explore a world of creative blender uses, from silky sauces to homemade basics, complete with step-by-step instructions, clever tips, and common mistakes to avoid. Get ready to see your blender in a whole new light!
Why Diversify Your Blender Use?
Before we dive into the delicious details, let’s quickly touch on why expanding your blender’s horizons is a fantastic idea:
- Efficiency: It can chop, mix, grind, and emulsify faster than most other tools.
- Homemade Goodness: Take control of your ingredients, avoid preservatives, and tailor flavors to your exact liking.
- Cost Savings: Making things from scratch (like nut butter or flour) is often cheaper than buying them pre-made.
- Reduced Waste: Use up wilting herbs, overripe fruits, or leftover vegetables.
Let’s get blending!
1. Master the Art of Savory Sauces & Dips
Beyond chunky salsas, your blender can create incredibly smooth, rich, and flavorful sauces and dips perfect for pasta, snacks, or party spreads.
Example 1: Fresh & Flavorful Pesto
Forget store-bought! Homemade pesto is vibrant and utterly delicious.
- Ingredients: 2 cups fresh basil leaves, ½ cup grated Parmesan cheese, ½ cup pine nuts (or walnuts/almonds), 2-3 cloves garlic, ½ cup olive oil, salt and pepper to taste.
- Step-by-Step:
- Combine Dry Ingredients First: Add basil, pine nuts, garlic, and Parmesan to your blender.
- Pulse to Chop: Secure the lid and pulse a few times until the ingredients are roughly chopped.
- Slowly Add Oil: With the blender running on a low setting (or through the lid’s opening), slowly drizzle in the olive oil. This emulsifies the sauce, giving it a creamy texture.
- Season: Stop and scrape down the sides as needed. Blend until smooth, then season with salt and pepper.
- Tips:
- Toast your nuts lightly before blending for deeper flavor.
- If too thick, add a tiny splash of water or more olive oil.
- For a brighter green, blanch your basil quickly in boiling water, then immediately plunge into ice water before blending.
- Common Mistakes to Avoid:
- Adding all the oil at once: This can prevent proper emulsification.
- Over-blending: Can cause the pesto to become warm and lose its vibrant green color. Pulsing is key.
Example 2: Creamy Homemade Hummus
Far superior to anything from a tub!
- Ingredients: 1 (15-ounce) can chickpeas (drained, liquid reserved), ¼ cup tahini, 2-3 tablespoons fresh lemon juice, 1 clove garlic, 2 tablespoons olive oil, 2-4 tablespoons reserved chickpea liquid (or cold water), salt to taste.
- Step-by-Step:
- Add Core Ingredients: Combine chickpeas, tahini, lemon juice, garlic, and salt in your blender.
- Initial Blend: Start blending on low, slowly increasing speed.
- Add Liquid Gradually: While blending, slowly add the reserved chickpea liquid (aquafaba) or cold water one tablespoon at a time until desired creaminess is reached.
- Scrape and Blend: Stop, scrape down the sides thoroughly, and continue blending until super smooth and airy.
- Serve: Drizzle with olive oil and a sprinkle of paprika.
- Tips:
- For the smoothest hummus, remove the skins from the chickpeas (though this is optional and time-consuming).
- A high-powered blender will yield the creamiest results.
- Adjust lemon juice and salt to your preference.
- Common Mistakes to Avoid:
- Not enough liquid: This results in a thick, pasty hummus. Be patient and add liquid until it loosens up.
- Not blending long enough: The key to creamy hummus is sustained blending.
2. Smooth Soups & Velvety Purees
Your blender is perfect for turning cooked vegetables into luxurious, silky-smooth soups and purees, hot or cold.
Example: Velvety Tomato Basil Soup
- Ingredients: Cooked tomatoes (roasted or canned), cooked onions/garlic, vegetable broth, fresh basil, a touch of cream (optional), salt, pepper.
- Step-by-Step:
- Cook Ingredients: Sauté onions and garlic, add tomatoes and broth, and simmer until vegetables are tender. Allow to cool slightly before blending.
- Blend in Batches (Crucial!): Never overfill your blender with hot liquids. Fill the blender no more than halfway.
- Vent the Lid: Remove the center cap of your blender lid (if it has one) and cover the opening with a kitchen towel to prevent splatters while allowing steam to escape. This prevents pressure buildup.
- Blend Carefully: Start on the lowest speed and gradually increase. Blend until completely smooth.
- Combine & Reheat: Pour the blended soup into a clean pot, repeat with remaining batches, then reheat gently on the stove. Stir in cream and basil if using.
- Tips:
- For a rich flavor, roast your vegetables before making the soup base.
- Add a cooked potato or some cashews for extra creaminess without dairy.
- Always vent hot liquids. This is a safety non-negotiable.
- Common Mistakes to Avoid:
- Overfilling with hot liquid: This is extremely dangerous and can cause the lid to blow off, resulting in severe burns. Always blend in small batches and vent.
- Not cooling slightly: Very hot liquids can stress your blender motor and seals.
3. Homemade Basics & Ingredient Prep
Beyond the main dishes, your blender can streamline prep and help you make pantry staples from scratch.
Example 1: Creamy Homemade Nut Butter
Skip the added sugars and oils! Just pure nut goodness.
- Ingredients: 2 cups roasted nuts (peanuts, almonds, cashews, pecans – choose your favorite!). A pinch of salt (optional).
- Step-by-Step:
- Add Nuts: Place the roasted nuts directly into your blender.
- Blend & Scrape (Patience is Key!): Start blending on medium-high. The nuts will go through several stages: crumbled, then pasty, then a thick ball, and finally a smooth, creamy butter.
- Scrape Down: Stop frequently to scrape down the sides with a spatula. This can take 5-10 minutes (or longer for some nuts) depending on your blender’s power.
- Continue Blending: Keep blending and scraping until it reaches your desired consistency. Add a pinch of salt if desired.
- Tips:
- Roast your nuts for about 10-15 minutes at 350°F (175°C) beforehand to release their natural oils and deepen flavor. Let them cool slightly.
- High-powered blenders excel here. If yours struggles, give it a few minutes to rest to prevent overheating.
- Do not add oil unless absolutely necessary for very dry nuts (like walnuts), and only add a tiny amount. The nuts release their own oils.
- Common Mistakes to Avoid:
- Giving up too soon: It looks like it won’t work, then suddenly it transforms! Patience is truly a virtue here.
- Adding oil too early: This can make it difficult for the nuts to break down into butter naturally.
Example 2: Homemade Oat Flour
Perfect for gluten-free baking!
- Ingredients: Rolled oats (ensure they are certified gluten-free if needed).
- Step-by-Step:
- Add Oats: Place dry, rolled oats into your blender.
- Blend to Flour: Secure the lid and blend on high speed until the oats are ground into a fine flour-like consistency.
- Check Consistency: Stop and check for any remaining large pieces. Blend again if necessary.
- Tips:
- Ensure your blender is completely dry before making flours.
- Make only what you need or store extra in an airtight container.
- Common Mistakes to Avoid:
- Using wet ingredients: Any moisture will turn the oats into a paste, not flour.
- Not blending long enough: Results in a gritty flour.
Other Ingredient Prep Uses:
- Breadcrumbs: Pulse stale bread until finely crumbled.
- Finely Chopped Aromatics: Pulse onions, garlic, or ginger for quick, uniform mincing (be careful not to over-process into a paste).
4. Delicious Desserts & Drinks (Beyond the Smoothie Cup)
Your blender can whip up sweet treats and refreshing beverages that go far beyond fruit and yogurt.
Example 1: Instant Whipped Cream
No mixer needed for light, airy whipped cream!
- Ingredients: 1 cup very cold heavy whipping cream, 1-2 tablespoons powdered sugar, ½ teaspoon vanilla extract.
- Step-by-Step:
- Add Ingredients: Pour the cold cream, powdered sugar, and vanilla into your blender.
- Blend to Whip: Secure the lid and blend on medium-high speed.
- Watch Carefully: Keep a close eye! It will thicken quickly. Stop as soon as it reaches soft or firm peaks.
- Tips:
- The colder, the better! You can even chill your blender pitcher for 15 minutes beforehand.
- This works very fast, so be attentive to avoid over-whipping.
- Common Mistakes to Avoid:
- Over-blending: Whipped cream can turn into butter if blended too long! Stop as soon as it’s stiff.
- Warm ingredients: Warm cream will not whip properly.
Example 2: Quick “Nice” Cream / Sorbet
A healthy, fruit-based ice cream alternative.
- Ingredients: 2-3 frozen bananas (sliced), a splash of milk or plant-based milk (or water), optional: other frozen fruits (berries, mango), cocoa powder, nut butter.
- Step-by-Step:
- Add Frozen Fruit: Place sliced frozen bananas (and any other frozen fruit) into your blender.
- Add Minimal Liquid: Add only a tiny splash of liquid (1-2 tablespoons) to help get it moving. You want just enough to process, not make it soupy.
- Blend, Scrape, Tamp: Start blending on a low-medium speed. Use your blender’s tamper (if it has one) to push the frozen fruit into the blades. Stop frequently to scrape down the sides.
- Continue Blending: Keep blending and tamping until it transforms into a creamy, soft-serve consistency.
- Tips:
- The tamper is your best friend for frozen desserts.
- For best texture, serve immediately. You can freeze leftovers, but it will harden significantly.
- Experiment with flavors: add a spoonful of peanut butter, cocoa powder, or a swirl of jam.
- Common Mistakes to Avoid:
- Too much liquid: Will result in a smoothie, not ice cream. Be stingy with the liquid.
- Not using frozen fruit: Fresh fruit won’t give you the right consistency.
General Tips for Blender Success
No matter what you’re whipping up, these universal tips will help:
- Layer Ingredients Strategically: For best results, add liquids first, then soft ingredients (like leafy greens), then harder ingredients (like ice or frozen fruit), and finally powders or thick ingredients. This creates a vortex that pulls everything into the blades.
- Start Slow, Then Go Fast: Begin blending on a low speed to get things moving, then gradually increase to higher speeds for a smoother result.
- Utilize Your Tamper: If your blender came with a tamper, use it! It’s designed to push ingredients down into the blades without touching them, significantly reducing the need to stop and scrape.
- Don’t Overfill: Respect your blender’s max fill line. Overfilling can lead to leaks, splashes, or damage to the motor.
- Clean Promptly: Rinse your blender immediately after use. For a quick clean, fill halfway with warm water, add a drop of dish soap, and blend for 30 seconds. Rinse thoroughly.
- Know Your Blender’s Power: Adjust expectations. A standard blender will handle most tasks, but a high-powered blender excels at things like nut butters and silky-smooth soups.
Common Mistakes to Avoid (Universal Blender Blunders)
- Ignoring the Max Fill Line: As mentioned, this is a recipe for messes and potential damage.
- Not Venting Hot Liquids: This is a safety hazard that cannot be stressed enough. Always vent!
- Not Adding Enough Liquid (for certain recipes): While some recipes (like nice cream) need minimal liquid, others (like smoothies or soups) need enough to create a vortex and blend smoothly.
- Blending Non-Food Items: Unless specifically designed for it (e.g., some heavy-duty commercial blenders), don’t put rocks, bones, or other non-food items in your blender.
- Forgetting the Lid (or not securing it properly): This one is self-explanatory and spectacularly messy.
- Lack of Patience: Especially with thick mixtures like nut butter, it takes time for the ingredients to break down and transform. Don’t give up too soon!
Conclusion
Your blender is so much more than a smoothie maker. It’s a versatile culinary companion capable of creating an impressive array of delicious homemade foods. By understanding its capabilities and following these simple guidelines, you can unlock a world of flavor, efficiency, and creativity in your kitchen.
So, go ahead! Dust off that blender, try a new recipe, and explore the endless possibilities. Your taste buds (and your wallet!) will thank you. Happy blending!
- Ninja Professional Blender 1000W, Total Crushing Technology- Smoothies, Ice Crushing & Frozen Fruit, Full-Size Countertop Blender, 72-oz. Pitcher, Black & Grey, BL610
- nutribullet Full-Size Blender Combo 1200W – NBF50500 – Dark Gray
- Hamilton Beach Power Elite Wave Action Blender For Smoothies, 40 Oz Glass Jar, 12 Functions Including Puree, Crush Ice, 700 Watts – Black (58148A)
FAQ
Q. Beyond beverages, what savory dishes or ingredients can I prepare surprisingly well in my blender?
A. Your blender is a powerhouse for savory creations. Think creamy soups (hot or cold like gazpacho), pestos, hummus, and other bean-based dips. You can also whip up homemade mayonnaise, salad dressings, and even purée cooked vegetables into smooth sauces for pasta or casseroles.
Q. Can I use my blender to make healthy, plant-based alternatives like nut milks or vegan cheeses?
A. Absolutely! Blenders excel at making fresh nut and oat milks – simply soak nuts or oats, blend with water, and strain. For vegan cheeses, soaked cashews are your best friend. Blend them with nutritional yeast, lemon juice, and seasonings to create creamy, dairy-free cheese sauces, dips, or even firm cheese blocks (with added agar-agar).
Q. How can a blender streamline my meal prep efforts for the week?
A. Blenders are fantastic for efficient meal prep. You can quickly batch-prepare larger quantities of homemade dressings, marinades, or sauces that will last for days. They are also great for quickly chopping vegetables (using the pulse function for a coarse chop), making smooth purees for baby food, or blending ingredients for healthier pancake or waffle batters, saving you time during busy mornings.
Q. What pantry staples or baking ingredients can I easily make from scratch using my blender?
A. Ditch the store-bought versions and make your own! Your blender can transform oats into oat flour for baking, stale bread into fresh breadcrumbs, or even nuts into various nut butters (almond, peanut, cashew). You can also grind spices or make powdered sugar from granulated sugar for baking needs.
Q. Are there any innovative dessert or sweet treat applications for my blender, beyond just fruit smoothies?
A. Beyond smoothies, your blender can create delightful desserts. Think “nice cream” by blending frozen fruit (especially bananas) into a soft-serve consistency. You can also make creamy puddings, raw dessert bases (like date and nut crusts), or blend ingredients for quick blender muffins and pancake batters. It’s also perfect for making creamy, dairy-free dessert sauces.
Q. How can my blender help me create healthier homemade sauces and condiments?
A. Blenders allow you to control the ingredients in your sauces and condiments, avoiding unnecessary sugars, preservatives, or unhealthy oils. Easily whip up fresh tomato sauces, healthier salad dressings (like vinaigrettes or creamy cashew-based dressings), homemade ketchup, or even a classic hollandaise sauce. This offers a fresher, often more nutritious alternative to store-bought options.
