Beyond Basic Chopping: Creative Ways to Master Your Food Processor and Unlock Its Full Potential!
- Hamilton Beach Electric Vegetable Chopper & Mini Food Processor, 3-Cup, 350 Watts, for Dicing, Mincing, and Puree, Black (72850)
- GANIZA Food Processors, Electric Food Chopper with Meat Grinder & Vegetable Chopper – 2 Bowls (8 Cup+8 Cup) with Powerful 450W Copper Motor – Includes 2 Sets of Bi-Level Blades for Fruits/Meat/Nuts
- Hamilton Beach Stack & Snap Food Processor and Vegetable Chopper, BPA Free, Stainless Steel Blades, 12 Cup Bowl, 2-Speed 450 Watt Motor, Black (70725A)
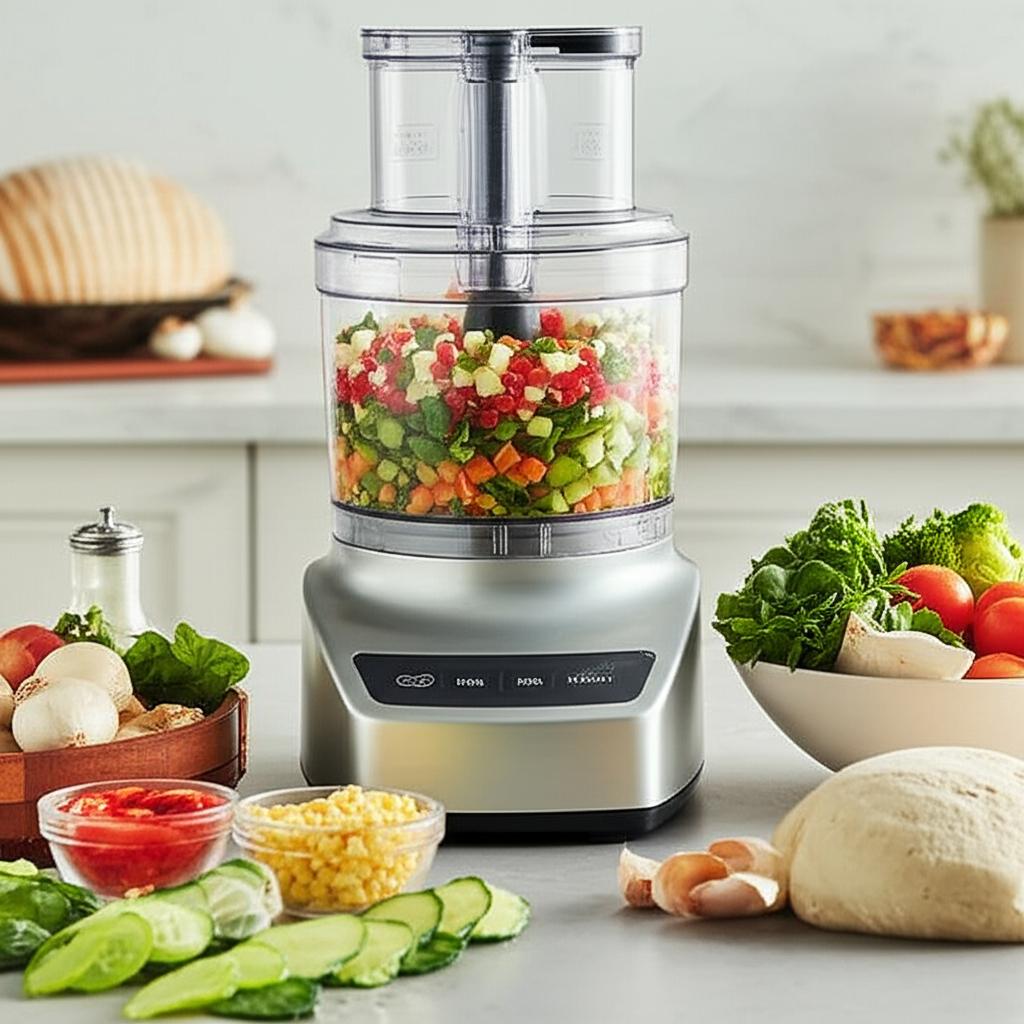
Do you primarily use your food processor for chopping onions or making a quick batch of salsa? If so, you’re only scratching the surface of what this incredibly versatile kitchen appliance can do! Far from being a one-trick pony, your food processor is a powerful workhorse capable of transforming ingredients in ways that save you time, effort, and money.
In this detailed guide, we’ll explore some truly creative and often overlooked uses for your food processor, moving beyond simple chopping to become a culinary magician. Get ready to embrace efficiency and elevate your home cooking!
1. Homemade Nut Butters: Creamy, Customizable, and Cost-Effective
Why buy expensive, store-bought nut butter when you can whip up fresh, additive-free versions in minutes? Making your own nut butter is not only healthier, but it also allows for endless flavor customization.
Why Use Your Food Processor: The powerful motor and sharp blades can break down nuts and seeds into a smooth, creamy consistency without overheating.
Step-by-Step Instructions:
- Roast (Optional, but Recommended): For richer flavor, spread 2 cups of your chosen nuts (peanuts, almonds, cashews, pecans, etc.) on a baking sheet and toast in an oven preheated to 350°F (175°C) for 8-10 minutes, or until fragrant. Let them cool slightly.
- Process: Place the cooled nuts in your food processor.
- Watch the Magic: Turn on the processor and be patient! The nuts will go through several stages:
- Roughly Chopped: (After 30 seconds)
- Fine Meal/Flour: (After 1-2 minutes)
- Clumpy Ball: (After 3-5 minutes) – This is where most people give up! Don’t!
- Sticky Paste: (After 6-8 minutes)
- Smooth, Creamy Butter: (After 8-12 minutes, depending on nut type and processor) – The oils release, creating the desired texture.
- Scrape and Season: Pause periodically to scrape down the sides of the bowl to ensure even processing. Once smooth, add salt to taste, or other flavorings like honey, maple syrup, cocoa powder, or cinnamon. Process briefly to combine.
Tips for Success:
- Start with Roasted Nuts: It significantly enhances the flavor and helps the oils release more easily.
- Be Patient: The process takes time, sometimes up to 15 minutes, but it’s largely hands-off.
- No Added Oil Needed: The nuts contain enough natural oils. Only add a tiny bit (1 tsp at a time) if your butter is too thick after extensive processing.
- Store Properly: Transfer to an airtight jar and store in the refrigerator for up to 2-3 weeks.
Common Mistakes to Avoid:
- Giving Up Too Soon: The “clumpy ball” phase is normal; keep processing!
- Adding Too Much Liquid: Don’t add water or milk, as it will cause the butter to seize up.
- Not Scrapping Down: Leads to unevenly processed butter.
2. Dreamy Dips & Spreads: Beyond Store-Bought Convenience
Whip up fresh, vibrant dips and spreads that are infinitely better than anything from a jar. From classic hummus to fresh pesto or zesty salsa, your food processor is a game-changer.
Why Use Your Food Processor: It effortlessly blends ingredients into a smooth, consistent texture, whether you want chunky or silky smooth.
Step-by-Step Instructions (Hummus Example):
- Combine Base Ingredients: Add 1 can of drained and rinsed chickpeas (or cooked dried chickpeas), 1/4 cup tahini, 1/4 cup lemon juice, 2 cloves garlic, and 2-3 tablespoons cold water to your food processor.
- Process Until Smooth: Process continuously, scraping down the sides as needed, until the mixture is very smooth and creamy. If it’s too thick, add a tablespoon of cold water at a time while processing until desired consistency is reached.
- Season: Taste and adjust seasonings. Add salt, pepper, cumin, or a pinch of paprika. Process briefly to combine.
Tips for Success:
- Peel Chickpeas (for extra smooth hummus): While optional, peeling the skins off chickpeas before blending results in an incredibly silky hummus.
- Layer Ingredients: For pestos, add softer ingredients (herbs, garlic) first, then nuts, cheese, and finally drizzle in oil.
- Pulse for Chunky Textures: For salsa or chunky guacamole, use the pulse function in short bursts to control the consistency and avoid over-processing into a mush.
Common Mistakes to Avoid:
- Over-Processing Chunky Dips: Turn salsa into soup by over-blending. Use pulses!
- Not Enough Liquid: Hummus can be too thick and pasty if not enough liquid (water or lemon juice) is added.
- Forgetting to Scrape: Ingredients can stick to the sides, leading to uneven blending.
3. Flaky Dough & Quick Batters: Effortless Baking Prep
Making pie crusts, biscuit dough, or even scone batters by hand can be messy and time-consuming. Your food processor can create perfectly incorporated dough in seconds, ensuring tender, flaky results.
Why Use Your Food Processor: It quickly cuts cold butter into flour without warming it up, which is crucial for flaky pastries.
Step-by-Step Instructions (Pie Crust Example):
- Combine Dry Ingredients: Add 1 ¼ cups all-purpose flour, ½ teaspoon salt, and ½ teaspoon sugar to your food processor bowl. Pulse once or twice to combine.
- Add Cold Butter: Add ½ cup (1 stick) very cold, unsalted butter, cut into ½-inch cubes, to the flour mixture.
- Pulse to Cut in Butter: Pulse repeatedly until the butter is cut into pea-sized pieces. This usually takes about 10-15 pulses.
- Add Cold Water: With the processor running, slowly drizzle 3-4 tablespoons of ice-cold water through the feed tube until the dough just comes together. Stop processing as soon as it forms a ball.
- Chill: Remove the dough, flatten it into a disc, wrap it in plastic wrap, and chill for at least 30 minutes before rolling.
Tips for Success:
- Keep Ingredients Cold: Cold butter and ice water are paramount for flaky pastries.
- Don’t Over-Process: Over-mixing develops gluten, leading to tough dough. Stop as soon as it comes together.
- Use the Shredding Disc: For even easier butter incorporation, use the shredding disc to shred frozen butter directly into your flour mixture before switching to the main blade for mixing.
Common Mistakes to Avoid:
- Warm Butter: Will melt into the flour, resulting in a tough, un-flaky crust.
- Over-Mixing: Develops too much gluten, making the dough tough and hard to roll.
- Adding Too Much Water: Makes the dough sticky and difficult to work with.
4. Homemade Breadcrumbs & Flour: Reduce Waste, Boost Flavor
Instead of tossing stale bread, turn it into fresh breadcrumbs! You can also make various flours (oat, nut, rice) for gluten-free baking or other culinary uses.
Why Use Your Food Processor: Its powerful blades efficiently grind dry ingredients into fine crumbs or flours.
Step-by-Step Instructions (Breadcrumbs Example):
- Prepare Bread: Cut stale (or toasted fresh) bread into 1-inch cubes. For fine crumbs, remove the crusts.
- Process: Place bread cubes in the food processor.
- Pulse to Desired Consistency: Pulse repeatedly until you reach your desired crumb size – fine, medium, or coarse. Do not over-process into a paste.
- Season (Optional): Add herbs, garlic powder, or Parmesan cheese for seasoned breadcrumbs.
Tips for Success:
- Use Dry Bread: Very fresh, soft bread will turn into a paste. If your bread isn’t stale, toast it lightly first.
- For Flours: Ensure nuts (like almonds for almond flour) are unroasted and completely dry. For oat flour, use rolled oats.
- Small Batches: Don’t overload the processor, especially for flours, to ensure even grinding.
Common Mistakes to Avoid:
- Wet Bread: Will create a gummy mess instead of crumbs.
- Overloading: Leads to unevenly processed crumbs or a strained motor.
- Trying to Grind Oily Nuts into Flour: If nuts are too oily, you’ll get nut butter, not flour. Best for blanched, dry nuts like almonds.
5. Silky Sauces, Dressings & Mayonnaise: Freshness at Your Fingertips
Elevate your meals with homemade sauces and dressings that are free from preservatives and bursting with fresh flavor. Making your own mayonnaise is surprisingly easy!
Why Use Your Food Processor: It creates an emulsion (blending oil and liquid) effortlessly, and the feed tube allows for a slow, steady drizzle of oil.
Step-by-Step Instructions (Mayonnaise Example):
- Combine Base Ingredients: In your food processor, combine 1 large egg yolk, 1 tablespoon Dijon mustard, 1 tablespoon lemon juice (or white vinegar), and a pinch of salt. Process for about 10-15 seconds until well combined.
- Slowly Drizzle in Oil: With the processor running, very slowly drizzle in 1 cup of neutral-flavored oil (like canola, grapeseed, or light olive oil) through the feed tube. The key is a slow, steady stream to allow the emulsion to form.
- Thicken and Season: Continue processing until the mixture thickens into a creamy mayonnaise. Taste and adjust seasoning with more salt or lemon juice as needed.
Tips for Success:
- Room Temperature Ingredients: For mayonnaise, ensure your egg yolk is at room temperature for the best emulsion.
- Slow Oil Drizzle: This is the most crucial step for emulsified sauces. Too fast, and it will break.
- Use the Small Feed Tube Hole: Most food processors have a small hole or opening in the pusher for a perfect slow drizzle.
Common Mistakes to Avoid:
- Adding Oil Too Quickly: The number one reason mayonnaise or vinaigrettes “break” and don’t emulsify.
- Not Enough Base Liquid: For dressings, ensure enough vinegar, citrus, or water to emulsify with the oil.
6. Smooth Soups & Purees: Creamy Comfort in Minutes
Transform cooked vegetables into velvety smooth soups or baby food with minimal effort.
Why Use Your Food Processor: It quickly purees cooked ingredients into a consistent, lump-free texture.
Step-by-Step Instructions (Pureeing Cooked Vegetables):
- Cool Slightly: Allow cooked vegetables or soup to cool down slightly before processing.
- Process in Batches: Pour a manageable amount (usually half full, depending on the size of your processor) of the cooked mixture into the food processor.
- Blend Until Smooth: Secure the lid and process until completely smooth, scraping down the sides as needed.
- Combine & Reheat: Pour the pureed portion into a clean pot or bowl. Repeat with remaining batches. Once all is pureed, gently reheat if necessary.
Tips for Success:
- Don’t Overfill: Hot liquids expand! Overfilling can cause the lid to blow off or hot liquid to spray, creating a dangerous mess.
- Vent Hot Liquids: Remove the small pusher from the feed tube (or use a kitchen towel over the top) when pureeing hot liquids to allow steam to escape and prevent pressure buildup.
- Strain (Optional): For ultra-silky purees (like certain soups), pass the pureed mixture through a fine-mesh sieve.
Common Mistakes to Avoid:
- Pureeing Boiling Hot Liquids: Extremely dangerous due to pressure buildup. Always allow to cool slightly.
- Overfilling: Can lead to leaks, splashes, or even lid explosions.
- Not Venting Steam: Builds pressure inside the bowl, which can force the lid off.
7. “Ricing” Vegetables: Healthy Carb Alternatives
Easily create “rice” from cauliflower, broccoli, or other firm vegetables for low-carb meals, hidden vegetable dishes, or unique salads.
Why Use Your Food Processor: It quickly chops vegetables into small, uniform pieces that mimic the texture of rice.
Step-by-Step Instructions (Cauliflower Rice Example):
- Prepare Cauliflower: Wash and dry a head of cauliflower. Cut it into 1-2 inch florets.
- Process in Batches: Place a single layer of florets (don’t overcrowd) in the food processor bowl.
- Pulse Until “Riced”: Pulse in short bursts (1-second pulses) until the cauliflower is broken down into small, rice-like pieces. Stop as soon as it reaches the desired consistency.
- Remove & Repeat: Transfer the “riced” cauliflower to a bowl and repeat with the remaining florets.
Tips for Success:
- Work in Small Batches: Overcrowding leads to uneven processing, with some pieces turning to mush while others remain too large.
- Pulse, Don’t Process Continuously: Continuous processing will turn your “rice” into a puree.
- Dry Vegetables: Ensure vegetables are dry to prevent clumping.
Common Mistakes to Avoid:
- Over-Processing: The most common mistake, turning your vegetable rice into mush.
- Large Chunks: If you start with pieces that are too large, some will remain un-riced.
- Too Many Batches: Trying to do too much at once will overload the machine and result in uneven texture.
General Food Processor Tips for Optimal Performance
- Read Your Manual: Every food processor has unique features, blades, and safety guidelines. Always consult your owner’s manual for specific instructions.
- Pulse vs. Continuous: Use the pulse button for control when you want chunky results (salsa, coarse crumbs) or to prevent over-processing. Use continuous processing for smooth purees, batters, and emulsions.
- Don’t Overfill: Never fill your food processor bowl above the maximum fill line. This can lead to inefficient processing, leaks, or even damage.
- Prep Your Ingredients: Cut larger ingredients into uniform pieces (about 1-2 inches) before adding them. This ensures even processing.
- Clean Immediately: Residue can dry and become difficult to remove. Clean the bowl, lid, and blades right after use with warm, soapy water. Many parts are dishwasher safe (check your manual).
- Know Your Blades & Discs: Understand the purpose of each blade (S-blade for chopping/mixing, various slicing and shredding discs). Using the right tool for the job makes a huge difference.
Common Food Processor Mistakes to Avoid (Across All Uses)
- Over-Processing: This is the most common mistake! It turns chunky into mush, causes dough to be tough, and can ruin textures. Always err on the side of under-processing and check often.
- Not Scraping Down the Sides: Ingredients stick to the sides, leading to uneven results. Pause and scrape down with a spatula frequently.
- Ignoring the Max Fill Line: Overloading can strain the motor, lead to spills, or result in inefficient processing.
- Trying to Process Frozen Solids: Most food processors are not designed for crushing large ice cubes or fully frozen fruits/vegetables. Use a high-powered blender for these tasks.
- Not Securing the Lid Properly: For safety, food processors have interlock systems that prevent them from operating if the lid isn’t correctly locked in place.
- Using the Wrong Blade/Disc: Using the S-blade for shredding cheese will just turn it into a paste. Use the correct disc!
Unlock Your Culinary Creativity!
Your food processor is a powerful and versatile ally in the kitchen. By expanding its use beyond basic chopping, you’ll discover a world of culinary possibilities that are not only delicious but also incredibly efficient.
So, dust off your food processor, experiment with these creative uses, and get ready to revolutionize your meal prep. Happy processing!
- Hamilton Beach Electric Vegetable Chopper & Mini Food Processor, 3-Cup, 350 Watts, for Dicing, Mincing, and Puree, Black (72850)
- GANIZA Food Processors, Electric Food Chopper with Meat Grinder & Vegetable Chopper – 2 Bowls (8 Cup+8 Cup) with Powerful 450W Copper Motor – Includes 2 Sets of Bi-Level Blades for Fruits/Meat/Nuts
- Hamilton Beach Stack & Snap Food Processor and Vegetable Chopper, BPA Free, Stainless Steel Blades, 12 Cup Bowl, 2-Speed 450 Watt Motor, Black (70725A)
FAQ
Q. Can I really make smooth, creamy nut butter from scratch with my food processor?
A. Yes, absolutely! With patience and the right technique, your food processor can transform roasted nuts into delicious, preservative-free nut butter. Simply process roasted nuts on high, scraping down the sides occasionally. The nuts will go from chopped to floury, then a thick ball, and eventually release their oils to become creamy and smooth. This can take 5-15 minutes depending on the nut and processor power.
Q. Is it possible to make healthy vegetable “rice” alternatives like cauliflower or broccoli rice using a food processor?
A. Yes, your food processor is perfect for this! To make vegetable rice, simply cut the vegetables into florets or chunks that fit easily into the bowl. Pulse them in batches until they resemble grains of rice. Be careful not to over-process, or you’ll end up with a puree. This is a quick and easy way to create low-carb, nutrient-dense meal bases.
Q. Can my food processor create healthy frozen desserts, like “nice” cream or sorbet, from frozen fruit?
A. Indeed! Your food processor excels at making quick, healthy frozen desserts. For “nice” cream, process frozen banana slices (and other frozen fruits like berries) until smooth and creamy. For sorbets, combine frozen fruit with a splash of liquid (water, juice, or plant milk) and perhaps a touch of sweetener, then process until it reaches a soft-serve consistency. It’s a fantastic way to enjoy a guilt-free treat.
Q. I’ve heard you can make dough in a food processor. What kind of doughs work best, and how is it done?
A. Food processors are excellent for making pastry doughs, pie crusts, biscuit doughs, and certain cookie doughs, as they quickly cut cold butter into flour, preventing overworking. To do this, add dry ingredients, then pulse in cold, cubed butter until crumbly. Then, gradually add ice water while pulsing until the dough just comes together. The speed and efficiency help achieve tender, flaky results.
Q. Beyond just chopping, can my food processor help me make homemade breadcrumbs or even grind grains into flour?
A. Absolutely! Your food processor is ideal for making fresh breadcrumbs from stale bread or croutons. Simply tear bread into pieces and pulse until you reach your desired crumb size. For grinding grains into flour (like oats, rice, or even dried beans), ensure your processor has a powerful motor and sharp blades. Pulse small batches until a fine flour forms. This is great for gluten-free baking or making fresh, whole-grain flours.
Q. Besides common dips like hummus, what are some more creative or unique dips and spreads I can easily make with my food processor?
A. Your food processor opens up a world of unique dips and spreads! Think beyond hummus to vibrant beet hummus, sun-dried tomato pesto, roasted red pepper and walnut dip (Muhammara), or even a creamy vegan cashew cheese spread. You can also whip up flavorful compound butters by processing softened butter with herbs, garlic, or citrus zest, or create savory vegetable pates for sandwiches and crackers. The possibilities are endless for creamy, blended concoctions.
Q. Can a food processor be used for fine mincing, like garlic or herbs, more efficiently than by hand?
A. Definitely! For recipes requiring a lot of finely minced ingredients, your food processor is a game-changer. For garlic, ginger, or herbs, simply add peeled cloves or cleaned leaves to the bowl and pulse until very finely chopped. For best results, avoid overfilling and add a small amount of liquid (like oil or water) if needed to help create a smoother paste, ensuring consistent mincing without bruising delicate herbs too much.
