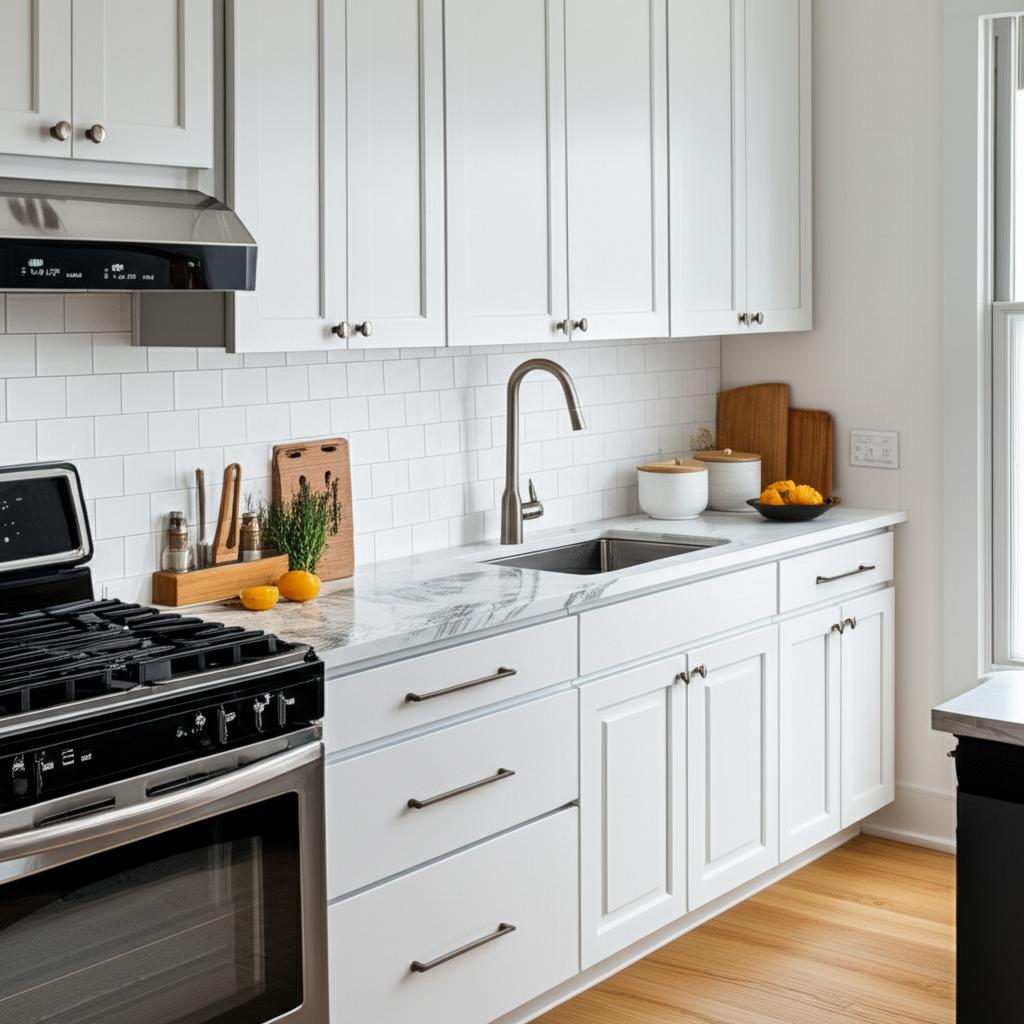
Unlock Your Small Kitchen’s Potential: How to Organize a Small Kitchen Efficiently
Is your small kitchen feeling more like a crowded closet than a culinary haven? You’re not alone! Many of us face the challenge of maximizing space in compact kitchens. The good news is, with a little planning and some clever strategies, you can transform your tiny kitchen into an incredibly efficient, functional, and enjoyable space.
This detailed guide will walk you through the steps to conquer kitchen clutter, make the most of every inch, and maintain a system that works for you. Let’s turn that kitchen overwhelm into organizational zen!
Why Efficient Kitchen Organization Matters
In a small kitchen, every item and every square inch counts. Disorganization can lead to:
* Wasted Time: Frantically searching for utensils or ingredients.
* Stress: A cluttered environment can feel overwhelming.
* Limited Functionality: Not having enough counter space or storage to cook comfortably.
* Duplication: Buying items you already have because you can’t find them.
But with a well-organized system, you’ll find joy in cooking, simplify cleanup, and enjoy a more peaceful home.
Step-by-Step Guide to Organizing Your Small Kitchen Efficiently
Ready to roll up your sleeves? Here’s how to tackle your small kitchen, one manageable step at a time.
Step 1: The Great Empty-Out & Declutter
This is the most crucial, and often most daunting, first step. Think of it as hitting the reset button.
- Empty Everything Out: Yes, everything. Remove all items from your cabinets, drawers, pantry, and countertops. Place them on a large table, your dining room floor, or even another room if needed. Seeing everything you own in one place is incredibly eye-opening.
- Clean as You Go: As each cabinet and drawer is emptied, give it a thorough wipe down. This offers a fresh start.
- Be Ruthless But Realistic: Now for the tough part: Decluttering. Go through every single item and make a decision:
- Keep: Items you use regularly, love, and are in good condition.
- Donate/Sell: Items in good condition that you no longer use, don’t need, or have duplicates of (e.g., that third spatula, the never-used bread maker).
- Toss/Recycle: Broken items, expired food, empty containers, or anything truly unusable. Be especially vigilant about expired spices and condiments.
- Pro Tip: If you haven’t used an item in over a year, seriously consider letting it go.
Step 2: Group Like Items Together
Once you’ve decluttered, group your remaining items into logical categories. This will help you determine where everything should live.
- Cooking Utensils: Spatulas, ladles, whisks, tongs.
- Baking Supplies: Measuring cups, mixing bowls, baking sheets, flour, sugar.
- Food Storage: Containers, wraps, bags.
- Cookware: Pots, pans, lids.
- Dinnerware: Plates, bowls, mugs.
- Glassware: Drinking glasses, wine glasses.
- Linens: Dish towels, pot holders.
- Cleaning Supplies: Soaps, sponges, rags.
- Spices, Oils, Vinegars:
- Small Appliances: Toaster, blender, coffee maker.
Knowing exactly what you have and how much of it is key to efficient organization.
Step 3: Zone Your Kitchen for Efficiency
Think about how you use your kitchen. Create “zones” based on activities. This minimizes movement and makes cooking more intuitive.
- Prep Zone: Near your main cutting board and often the sink. Store knives, cutting boards, and frequently used prep bowls here.
- Cooking Zone: Around your stovetop and oven. Keep pots, pans, cooking utensils, and spices used during cooking nearby.
- Pantry/Food Storage Zone: Where you store non-perishable food items.
- Dishwashing/Cleaning Zone: Around the sink. Store dish soap, sponges, and dish towels here. Plates, bowls, and glasses should be stored near the dishwasher or drying rack for easy put-away.
- Breakfast/Coffee Zone: If applicable, keep coffee maker, mugs, and related items together.
Placing items where they’re used most often drastically improves workflow.
Step 4: Master Vertical Space
Small kitchens often lack horizontal space, but they have walls! Thinking vertically is a game-changer.
- Install Shelves: If you have empty wall space, even small floating shelves can hold frequently used items, spices, or cookbooks.
- Utilize Wall-Mounted Organizers: Think magnetic knife strips (safer and space-saving), pegboards for hanging pots/pans or utensils, or small wall-mounted racks for spices or cutting boards.
- Stackable Solutions Inside Cabinets: Look for stackable shelves or risers that create new “layers” within your existing cabinets, allowing you to store more dishes or pantry items.
- Under-Shelf Baskets: These clever additions clip onto existing shelves, creating immediate extra storage underneath for wraps, foil, or small plates.
Step 5: Tame Drawers and Cabinets
This is where many small kitchens go awry. Without internal organization, these spaces become dumping grounds.
- Drawer Dividers are Your Best Friend: Use adjustable or modular drawer dividers to keep utensils, cooking tools, and smaller items neatly separated. No more rummaging for that potato peeler!
- Cabinet Organizers:
- Pull-out organizers for pots and pans can make deep cabinets much more accessible.
- Pan organizers (vertical racks) allow you to store pans on their sides, saving horizontal space and preventing scratches.
- Lazy Susans (turntables) are perfect for corners or deep cabinets, especially for oils, sauces, or spices, making everything easily reachable.
- Clear, Stackable Containers: For dry goods in your pantry or upper cabinets. They allow you to see what you have at a glance and utilize vertical space efficiently.
- Store Heavier Items Low: Cast iron pans and large mixing bowls belong in lower cabinets for safety and ease of access.
- Store Less-Used Items High: Holiday dishes, specialty appliances, or rarely used serving platters can go on top shelves.
Step 6: Optimize Your Countertops
In a small kitchen, countertop real estate is precious.
- Keep it Clear: Only display items you use daily (e.g., coffee maker, toaster). Everything else should have a designated home inside a cabinet or drawer.
- Use Vertical Countertop Organizers: A tiered fruit basket, a slim knife block, or a compact utensil holder can keep essentials tidy without spreading them out horizontally.
- Utilize “Dead” Space: Consider a small over-the-sink drying rack if you hand wash dishes, freeing up counter space.
Step 7: Don’t Forget the Fridge and Pantry
These are often overlooked but are crucial for overall kitchen efficiency.
- Clear Bins and Dividers: Use clear bins to group similar items in the fridge (e.g., dairy, produce, leftovers). This makes everything visible and prevents food waste.
- First In, First Out (FIFO): Place newer items behind older ones to ensure you use food before it expires.
- Adjustable Shelving: Maximize your fridge and pantry space by adjusting shelves to fit taller items.
- Door Storage: Utilize fridge door bins for condiments and drinks. For pantry doors, consider over-the-door organizers for small packets, spices, or cleaning supplies.
Smart Organizing Tips & Tricks for Small Kitchens
Beyond the steps, these hacks will help you squeeze even more efficiency out of your compact space:
- Embrace Multi-Purpose Items: A cutting board that doubles as a serving tray, nesting mixing bowls, or an Instant Pot that replaces several appliances. Fewer items means more space.
- Hooks, Hooks, Hooks! Command hooks on the inside of cabinet doors for measuring spoons, oven mitts, or dish towels. Hooks on the side of a fridge for aprons.
- Magnetic Strips: Not just for knives! Use them inside cabinets for small metal items like spice tins, measuring cups, or even small kitchen scissors.
- Roll, Don’t Fold: For dish towels and placemats, rolling them often takes up less space than folding.
- Decant Dry Goods: Transfer flour, sugar, pasta, and cereals into airtight, clear containers. This saves space (they’re often stackable), keeps food fresher, and looks uniform and tidy.
- Use the Back of Doors: Install thin racks or command hooks on the inside of pantry or cabinet doors for wraps, foils, cutting boards, or small cleaning tools.
Common Mistakes to Avoid When Organizing a Small Kitchen
Even with the best intentions, it’s easy to fall into traps that hinder true efficiency.
- Buying Organizing Solutions BEFORE Decluttering: Don’t buy a single bin, divider, or rack until you know exactly what you’re keeping and how much space you have. You’ll end up with more clutter in the form of unused organizers!
- Overstuffing Spaces: Just because you can fit it, doesn’t mean you should. Overstuffed drawers and cabinets are hard to navigate and quickly become messy again. Leave a little breathing room.
- Neglecting Regular Maintenance: Organization isn’t a one-time event. Schedule a quick weekly tidy-up and a deeper declutter every few months to keep things in check.
- Ignoring Vertical Space: This is the biggest missed opportunity in small kitchens. Look up! Look down!
- Keeping Duplicates (or Triplicates!): Unless you run a restaurant, you likely don’t need three sets of measuring cups or five spatulas. Be honest about what you truly use.
- Sticking to “Traditional” Layouts: Don’t be afraid to put things where they make sense for your habits, even if it’s unconventional. Maybe your toaster oven works best on a small rolling cart, or your cutting boards hang on a wall.
Conclusion: Embrace Your Efficient Small Kitchen!
Organizing a small kitchen efficiently isn’t just about making it look tidy; it’s about creating a space that supports your cooking habits, reduces stress, and feels truly functional. By systematically decluttering, zoning, and using clever storage solutions, you’ll discover that even the tiniest kitchen can become a mighty hub of culinary creativity.
Take it one step at a time, celebrate your progress, and enjoy the newfound calm and convenience in your perfectly organized small kitchen! Happy cooking!
FAQ
Q. How can I maximize limited counter space in a small kitchen?
A. To maximize limited counter space, focus on vertical solutions. Utilize wall-mounted shelves for spices or frequently used items, use magnetic knife strips instead of knife blocks, and consider tiered drying racks or dish drainers. Keep only essential appliances on the counter and store others away when not in use. Regularly declutter to ensure only functional items remain visible.
Q. What are the best storage solutions for a tiny kitchen with insufficient cabinet space?
A. When cabinet space is scarce, think creatively about alternative storage. Install open shelving on empty walls, use pegboards for hanging pots and utensils, or add a slim rolling cart for extra storage and prep space. Over-the-door organizers for pantry or cabinet doors can provide valuable hidden storage for wraps, foils, or cleaning supplies. Look for stackable containers and nested bowls to save vertical space.
Q. How do I decide what to keep and what to declutter when organizing a small kitchen?
A. A good rule of thumb is to remove everything from your cabinets and drawers. Then, sort items into categories: “keep,” “donate/sell,” and “discard.” For items in the “keep” pile, ask yourself: “Do I use this regularly (at least once a week or month, depending on the item)?” and “Do I have duplicates?” If an item is rarely used or you have more than one, consider if it truly earns its valuable space. Be ruthless in eliminating duplicates and items that don’t bring joy or serve a practical purpose.
Q. What’s an effective way to organize deep cabinets or pantries in a small kitchen?
A. Deep cabinets can become black holes. To organize them effectively, use pull-out shelves or drawers, clear stackable bins, and tiered risers. Group similar items together in these containers (e.g., all baking supplies, all breakfast items). This allows you to easily see and access items at the back without having to remove everything in front. Labeling bins can also save time.
Q. How can I make my small kitchen feel less cluttered and more spacious?
A. To make your small kitchen feel less cluttered and more spacious, aim for clear counter surfaces as much as possible. Implement hidden storage solutions like inside-cabinet door organizers or under-sink caddies. Use a consistent color palette for your storage containers and accessories to create a cohesive look. Incorporate reflective surfaces, like a mirrored backsplash or stainless steel appliances, to bounce light around and make the space feel larger.
Q. Are there specific organizing items or products I should invest in for a small kitchen?
A. Absolutely! Key investments include drawer dividers for cutlery and utensils, clear stackable food storage containers, tiered spice racks or cabinet shelf inserts, and magnetic knife strips. Consider a slim rolling utility cart, an over-the-sink cutting board/drying rack, and narrow pot lid organizers. Anything that helps you utilize vertical space or keep items contained and easily accessible will be highly beneficial.
Q. How can I best store small appliances that I don’t use daily in a small kitchen?
A. For small appliances not used daily, prioritize storing them in less prime real estate. This could mean the top shelf of a cabinet, a pantry, or even an unused corner of a closet outside the kitchen if space is extremely tight. Look for appliance garages if you have the space or consider multi-functional appliances (e.g., an Instant Pot that replaces a slow cooker and rice cooker) to reduce the number of units you need to store.


