Mastering Sourdough: Your Journey to Artisanal Bread
- Mature Sourdough Starter Culture – 100+ Years Old Dehydrated Sourdough Starter Kit for Delicious Homemade Sourdough Bread – All-Natural and Organic – Beginner Friendly, Fast reactivation and Expert Support
- Cultures for Health San Francisco Sourdough Style Starter Culture | Homemade Artisan Bread | Heirloom, non-GMO | Live Culture Bread Mix | Easy to Follow Recipe
- Living Dough – 900 Year Old Sourdough Starter Culture – Active & Live Organic Sourdough Starter for Baking – For Artisanal Bread, Pizza Dough, Waffles & More
Few culinary experiences are as rewarding as pulling a perfectly baked, crusty, and aromatic sourdough loaf from your oven. The crackle of the crust, the open, airy crumb, and that signature tangy flavor are a testament to patience, practice, and the incredible power of wild yeast. If you’ve dreamt of creating your own artisanal bread, this comprehensive, friendly guide is your roadmap to mastering sourdough.
Sourdough isn’t just a recipe; it’s a living process, a partnership between you and a vibrant microbial community. It requires understanding, attention, and a willingness to learn from each bake. But don’t be intimidated! With the right guidance, anyone can unlock the magic of homemade sourdough.
The Sourdough Starter: The Living Heart of Your Loaf
Before you can bake sourdough bread, you need a sourdough starter. This is the magical blend of flour and water that captures wild yeasts and bacteria from the air, creating the leavening agent and unique flavor for your bread. Think of it as your bread’s pet – it needs consistent feeding and care!
Creating Your Starter (or Acquiring One)
You can create your own starter from scratch, or you can get a mature one from a friend or an online community. Starting from scratch takes about 5-10 days.
To Create Your Own:
- Day 1: In a clean jar, mix 50g whole wheat flour (it has more natural yeasts) with 50g unchlorinated water (tap water left out overnight works). Mix well until no dry spots remain. Cover loosely with a lid or cloth. Place in a warm spot (70-75°F / 21-24°C).
- Days 2-3: You might see a few bubbles or nothing. Don’t worry. Discard half of your starter (this helps concentrate the yeast and manage volume), then feed it again with 50g whole wheat flour and 50g unchlorinated water. Repeat once every 24 hours.
- Days 4-7+: You should start seeing more consistent activity: bubbles, a sour but pleasant smell, and a noticeable rise after feeding. Once your starter consistently doubles in size within 4-8 hours after feeding and passes the float test, it’s ready!
The Float Test: Drop a small spoonful of your active, bubbly starter into a glass of water. If it floats, it’s ready to bake with! If it sinks, it needs more time or another feeding.
Feeding and Maintaining Your Starter
Consistency is key. A well-fed starter is a strong starter.
- Feeding Ratio: The most common ratio is 1:1:1 (starter:fresh flour:fresh water by weight). So, if you keep 50g of starter, you’d feed it 50g flour and 50g water.
- Discarding: Before each feeding, you’ll discard most of your old starter, leaving only a small amount behind. This prevents your starter from growing too large and ensures the yeast always has fresh food.
- Schedule:
- Room Temperature (if baking frequently): Feed every 12-24 hours.
- Refrigerator (for storage/less frequent baking): Feed once a week. Take it out 1-2 days before baking and feed it at room temperature to reactivate.
Signs of a Healthy Starter:
* It smells pleasantly sour, yeasty, or like ripe fruit.
* It rises significantly after feeding (often doubling or tripling).
* It’s full of bubbles.
* It passes the float test!
The Sourdough Process: Your Step-by-Step Guide
This is where the real magic happens. While there are countless sourdough recipes, the fundamental steps remain largely the same. This guide focuses on a typical loaf of classic country sourdough.
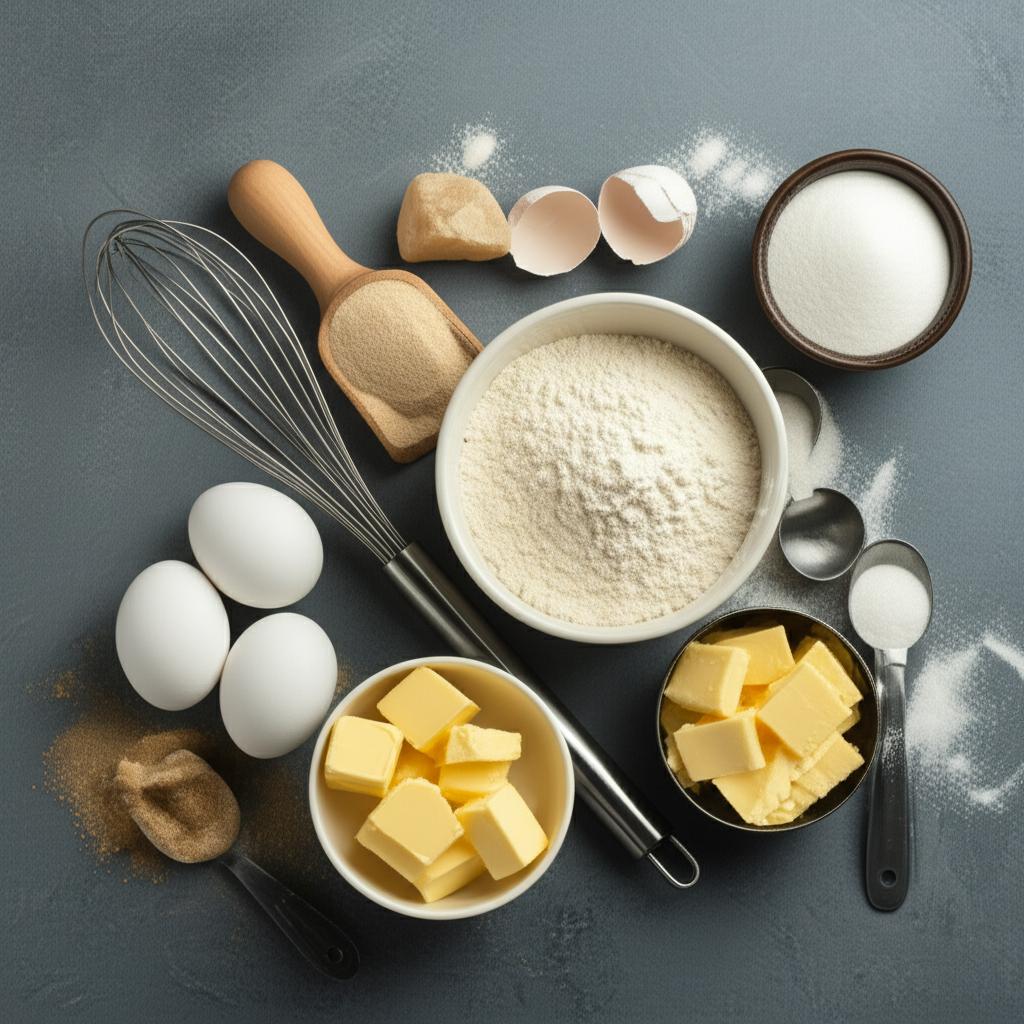
Ingredients You’ll Need:
* Active Sourdough Starter: Peaked and ready for baking.
* Bread Flour: High protein content is best for gluten development.
* Whole Wheat Flour (Optional): Adds flavor and nutrients.
* Unchlorinated Water: Essential for your starter and dough.
* Fine Sea Salt: Crucial for flavor and controlling fermentation.
Step 1: Autolyse (or Initial Mix)
This step allows the flour to fully hydrate and enzymes to begin breaking down starches, which aids in gluten development later.
- Process: In a large bowl, combine your water, active sourdough starter, and all of your flour. Mix until just combined and there are no dry spots. It will be shaggy and sticky.
- No Salt Yet! Do not add salt during this phase, as it can inhibit the autolyse process.
- Rest Time: Cover the bowl and let it rest for 30 minutes to 1 hour. This rest period is vital.
Step 2: Mixing and Initial Development
Now it’s time to incorporate the salt and begin developing the dough’s structure.
- Add Salt: Sprinkle the salt over the dough.
- Mix: Gently mix the salt into the dough, squeezing and folding until fully incorporated. The dough will become smoother as you work it. You’re not kneading vigorously; rather, you’re helping the dough come together.
- Optional: Perform a few “slap and folds” or “stretch and folds” in the bowl to kickstart gluten development.
Step 3: Bulk Fermentation (Bulk Proofing) & Stretch and Folds
This is the most critical stage, where your dough develops flavor, strength, and airiness. It’s also known as the “first rise.”
- Process: Leave the dough in the covered bowl. Over the next 3-5 hours (or longer, depending on your room temperature and starter strength), you will perform a series of “stretch and folds.”
- How to Stretch and Fold: With wet hands, gently grab one side of the dough, stretch it up, and fold it over to the opposite side. Rotate the bowl and repeat this for all four “sides” of the dough. This creates strength and incorporates air.
- Frequency: Perform 3-6 sets of stretch and folds, spaced every 30-60 minutes during the bulk fermentation.
- Knowing When It’s Done: This is often the trickiest part for beginners. Your dough should look visibly larger (often 30-50% increased in volume), bubbly, airy, and jiggles when you shake the bowl. It will feel softer and more extensible. Temperature greatly impacts bulk fermentation time – warmer means faster, cooler means slower.
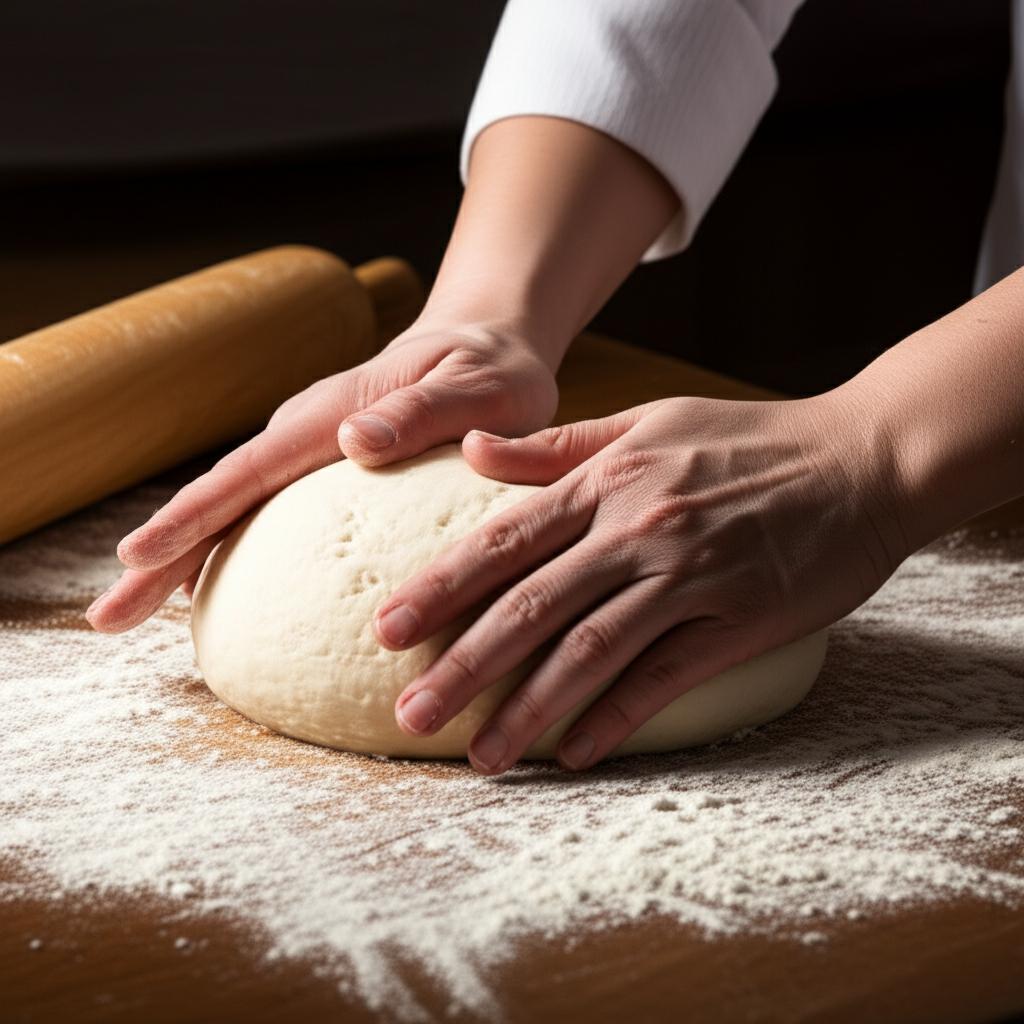
Step 4: Pre-Shaping (Bench Rest)
This step helps to create initial tension in the dough, making the final shaping easier.
- Process: Gently turn your dough out onto a lightly floured surface. Using a bench scraper or your hands, gently coax the dough into a loose round or rectangle. You’re not trying to create a perfect shape, just building some surface tension.
- Rest Time: Cover the dough with the bowl or a damp cloth and let it rest for 15-30 minutes. This allows the gluten to relax.
Step 5: Final Shaping
Now, you’ll create the final shape that will hold its form during proofing and baking.
- Process: Lightly flour your work surface again. Gently flatten the dough into a rough rectangle. Fold one side in, then the other, similar to folding a letter. Then, roll it up from the top to create a tight cylinder, or fold it over on itself to create a taut ball. The goal is to create significant surface tension without tearing the dough.
- Prepare for Proofing: Lightly flour a banneton (a proofing basket) or a bowl lined with a floured towel. Transfer your shaped dough, seam-side up, into the banneton.
Step 6: Cold Proofing (Retardation)
This step slows down the fermentation, allowing the flavors to deepen and making the dough easier to handle and score.
- Process: Cover your banneton with plastic wrap or a shower cap and place it in the refrigerator for 12-18 hours (or even up to 24-36 hours).
- Why Cold Proof?
- Flavor: Develops a deeper, more complex sourdough tang.
- Handling: Chilled dough is much firmer and easier to score without deflating.
- Schedule: Allows you to bake on your own timetable.
Step 7: Baking Your Masterpiece
The grand finale! High heat and steam are crucial for a beautiful crust and oven spring.
- Preheat Oven: Place your Dutch oven (with its lid) inside your oven. Preheat your oven to 450-500°F (232-260°C) for at least 30-60 minutes. The Dutch oven needs to be screaming hot.
- Score the Dough: Just before baking, carefully take your dough out of the fridge. Gently invert it from the banneton onto a piece of parchment paper. Using a very sharp knife or a bread lame, score the top of the dough deeply (at least ½ inch deep) in your desired pattern. This controls where the dough expands.
- Bake with Lid On: Carefully transfer the dough (on the parchment) into the hot Dutch oven. Cover with the lid. This traps steam, allowing for maximum oven spring and a soft, extensible crust. Bake for 20-30 minutes.
- Bake with Lid Off: Remove the lid from the Dutch oven. This allows the crust to crisp up and brown beautifully. Continue baking for another 20-30 minutes, or until the crust is a deep golden brown and the internal temperature reaches around 200-210°F (93-99°C).
- Cool Completely! This is perhaps the hardest step! Transfer your baked loaf to a wire rack and let it cool completely (at least 2-3 hours, preferably longer) before slicing. Slicing too early can result in a gummy interior as the steam needs to dissipate and the starches need to set.
Troubleshooting & Common Sourdough Mistakes
Don’t get discouraged by imperfect loaves! Each one is a learning opportunity.
-
Flat Bread / No Oven Spring:
- Weak Starter: Your starter wasn’t active enough. Ensure it passes the float test.
- Under-Proofed: Dough wasn’t allowed enough bulk fermentation or cold proofing time. It lacked enough gas to expand.
- Over-Proofed: The dough fermented too long and ran out of food, causing the gluten structure to collapse. It looked good, then sagged.
- Poor Shaping: Not enough surface tension created during shaping.
- Oven Not Hot Enough: Lacked the initial burst of heat needed for expansion.
-
Dense Crumb / Gummy Interior:
- Under-Baked: Needs more time in the oven. Always cool completely!
- Insufficient Bulk Fermentation: Not enough gas pockets created.
- Weak Starter: Again, not enough leavening power.
- Too Low Hydration: Dough might be too stiff.
-
Sticky Dough / Hard to Handle:
- High Hydration: More water means stickier dough. Start with lower hydration (65-70%) and work your way up.
- Insufficient Gluten Development: Not enough stretch and folds during bulk fermentation.
- Under-Proofed: The dough hasn’t built enough structure yet.
-
Very Sour Taste:
- Over-Proofed: Especially if left at room temperature too long.
- Long Cold Proof: While often desirable, very long cold proofs can increase tang.
- Infrequent Feeding: Your starter might be very hungry and producing a lot of acetic acid.
Key Takeaway: Keep a baking journal! Note down temperatures (room, water), bulk fermentation times, how your starter behaved, and results. This will help you learn and adjust for future bakes.
Elevate Your Craft: Advanced Tips for Mastering Sourdough
Once you’ve got the basics down, you can start experimenting and truly “mastering” your sourdough.
- Experiment with Hydration: Higher hydration (75-85% water to flour ratio) creates a more open, airy crumb but is harder to handle. Lower hydration is easier for beginners.
- Explore Different Flours: Incorporate whole wheat, rye, spelt, or even ancient grains for unique flavors and textures. Each flour behaves differently.
- Perfect Your Scoring: Beyond basic cuts, learn intricate scoring patterns using a sharp lame. This is both artistic and functional, guiding the oven spring.
- Add Inclusions: Mix in seeds (sesame, poppy, flax), dried fruits, nuts, olives, or cheese during the final stretch and fold or before pre-shaping.
- Adapt to Your Schedule: Learn how to manipulate bulk fermentation and cold proofing times to fit your life. A warm kitchen means a faster bulk; a cold fridge means a longer proof.
- Listen to Your Dough: Over time, you’ll develop an intuition for how your dough feels and looks at each stage. This “feel” is invaluable.
Your Sourdough Journey Awaits!
Mastering sourdough is a rewarding journey, not a single destination. There will be perfect loaves, and there will be learning loaves. Embrace the process, be patient, and trust your senses. Each loaf you bake will deepen your understanding and connection to this ancient craft.
So, gather your flour, wake up your starter, and embark on your incredible journey to baking artisanal sourdough bread at home. Your first masterpiece awaits!
- Mature Sourdough Starter Culture – 100+ Years Old Dehydrated Sourdough Starter Kit for Delicious Homemade Sourdough Bread – All-Natural and Organic – Beginner Friendly, Fast reactivation and Expert Support
- Cultures for Health San Francisco Sourdough Style Starter Culture | Homemade Artisan Bread | Heirloom, non-GMO | Live Culture Bread Mix | Easy to Follow Recipe
- Living Dough – 900 Year Old Sourdough Starter Culture – Active & Live Organic Sourdough Starter for Baking – For Artisanal Bread, Pizza Dough, Waffles & More
FAQ
Q. Is “Mastering Sourdough: Your Journey to Artisanal Bread” suitable for complete beginners?
A. Absolutely! This course is meticulously designed to guide individuals with no prior sourdough or even baking experience from the very basics to confidently baking beautiful artisanal loaves. We start with understanding your starter and build up step-by-step.
Q. What specific skills and recipes will I learn during the course?
A. You will learn how to create and maintain a vibrant sourdough starter, master essential kneading and folding techniques, understand bulk fermentation and proofing, and achieve the perfect bake with excellent crust and crumb. Recipes covered include classic country loaves, flavorful inclusions, and potentially more advanced variations as your skills grow.
Q. How much time per week should I dedicate to “Mastering Sourdough”?
A. While the actual hands-on time for mixing and folding is relatively short, sourdough baking involves waiting periods for fermentation. We recommend setting aside a few dedicated shorter sessions throughout the week for active work, plus being available for checking on your dough during its resting phases. The course is designed to be flexible and fit into most schedules.
Q. Do I need special equipment to start this journey?
A. You don’t need a lot of expensive equipment to begin! Essential items include a sturdy mixing bowl, a kitchen scale for accurate measurements, a Dutch oven or baking stone for baking, and basic measuring tools. The course will provide a detailed list of recommended items, many of which you likely already own.
Q. What if my sourdough starter isn’t behaving or seems inactive?
A. Don’t worry, troubleshooting your starter is a common part of the sourdough journey, and the course provides extensive guidance on this. We cover common issues like sluggish activity, hooch, and mold, offering practical solutions and tips to get your starter vibrant and ready for baking. You’ll gain the knowledge to diagnose and revive it.
Q. Does the course cover advanced techniques beyond basic loaves?
A. Yes, while we build a strong foundation with classic sourdough, “Mastering Sourdough” also delves into techniques for incorporating various flours, adding inclusions like seeds and dried fruits, shaping different styles of loaves, and understanding baker’s percentages to allow for recipe modification and advanced experimentation once you’ve mastered the fundamentals.
Q. Will I receive ongoing support or be part of a community?
A. Yes, the course aims to foster a supportive learning environment. Depending on the course structure (e.g., online platform, private forum), you will have opportunities to ask questions, share your progress, and connect with fellow sourdough enthusiasts and instructors, creating a community where you can learn from each other’s experiences.