As parents, we’ve all been there: the dreaded school bag explosion. A perfectly packed lunch, meticulously prepared with love, somehow transforms into a sticky, soggy mess by the time it reaches the school cafeteria. Yogurt seeping into textbooks, soup mingling with homework, fruit juice saturating gym clothes – it’s a nightmare. Not only is it frustrating to clean up, but it also means wasted food and a disappointed child with no lunch. The solution? Investing in a high-quality leak-proof lunch container for school kids.
This isn’t just about preventing spills; it’s about peace of mind for you, a clean backpack for your child, and ensuring they get to enjoy their healthy, home-packed meal just the way you intended. But with so many options out there, how do you choose the right one? This comprehensive guide will walk you through everything you need to know, from understanding what makes a container truly leak-proof to selecting the perfect one for your child’s needs and age.
Why a Leak-Proof Lunch Container is an Absolute Must
Forget the days of wrapping every item in plastic wrap or multiple zip-top bags. A good leak-proof container simplifies packing, reduces waste, and offers numerous benefits:
- No More Spills & Stains: This is the most obvious and perhaps most crucial benefit. Say goodbye to ruined textbooks, sticky backpacks, and the frustration of cleaning up food spills.
- Food Stays Fresh & Appealing: When food is properly sealed, it retains its freshness, flavor, and texture. No more dried-out sandwiches or soggy fruit. This encourages kids to actually eat their lunch, reducing food waste.
- Allows for Variety: With separate, sealed compartments, you can pack a wider range of foods – from yogurt and dips to fruit and sandwiches – without worrying about them mixing or leaking into each other. This is especially true for bento box-style lunch containers.
- Promotes Healthy Eating: Packing varied, home-cooked meals is easier when you have a reliable container. This helps you control ingredients, reduce processed foods, and ensure your child gets balanced nutrition.
- Environmentally Friendly: Reusable leak-proof containers reduce the need for single-use plastic bags and wraps, contributing to a more sustainable lifestyle.
- Saves Time & Money: Less time spent cleaning up messes, less money spent on replacing ruined school supplies or buying cafeteria food when packed lunches fail.
What Makes a Lunch Container Truly Leak-Proof? Key Features to Look For
Not all containers advertised as “leak-proof” live up to the hype. To ensure you’re getting a truly reliable product, pay close attention to these critical features:
1. The Sealing Mechanism
This is the heart of a leak-proof design. Different mechanisms offer varying degrees of protection:
- Silicone Gaskets/Seals: This is the gold standard. A flexible silicone ring fits snugly into a groove in the lid, creating an airtight and watertight barrier when the lid is closed. These seals are highly effective, but it’s important that they are removable for thorough cleaning to prevent mold buildup.
- Snap-on Lids with Multiple Latches: Many containers feature lids that snap down with two, four, or even more latches. When combined with a silicone gasket, these latches provide the pressure needed to create a tight seal. More latches often mean a more secure closure.
- Vacuum Seals: Some advanced containers use a one-way valve to remove air, creating a vacuum that enhances leak resistance and keeps food fresher for longer. These are less common for school kids but exist.
- Screw-on Lids: Typically found on thermal containers or small snack pots, screw-on lids can offer a very secure seal, especially when they have an internal silicone gasket.
Tip: A truly leak-proof container will often pass the “shake test” – fill it with water, seal it, and shake it vigorously. If not a single drop escapes, you’ve found a winner.
2. Materials: Safety, Durability & Functionality
The material of the container affects its safety, durability, weight, and how easy it is to clean.
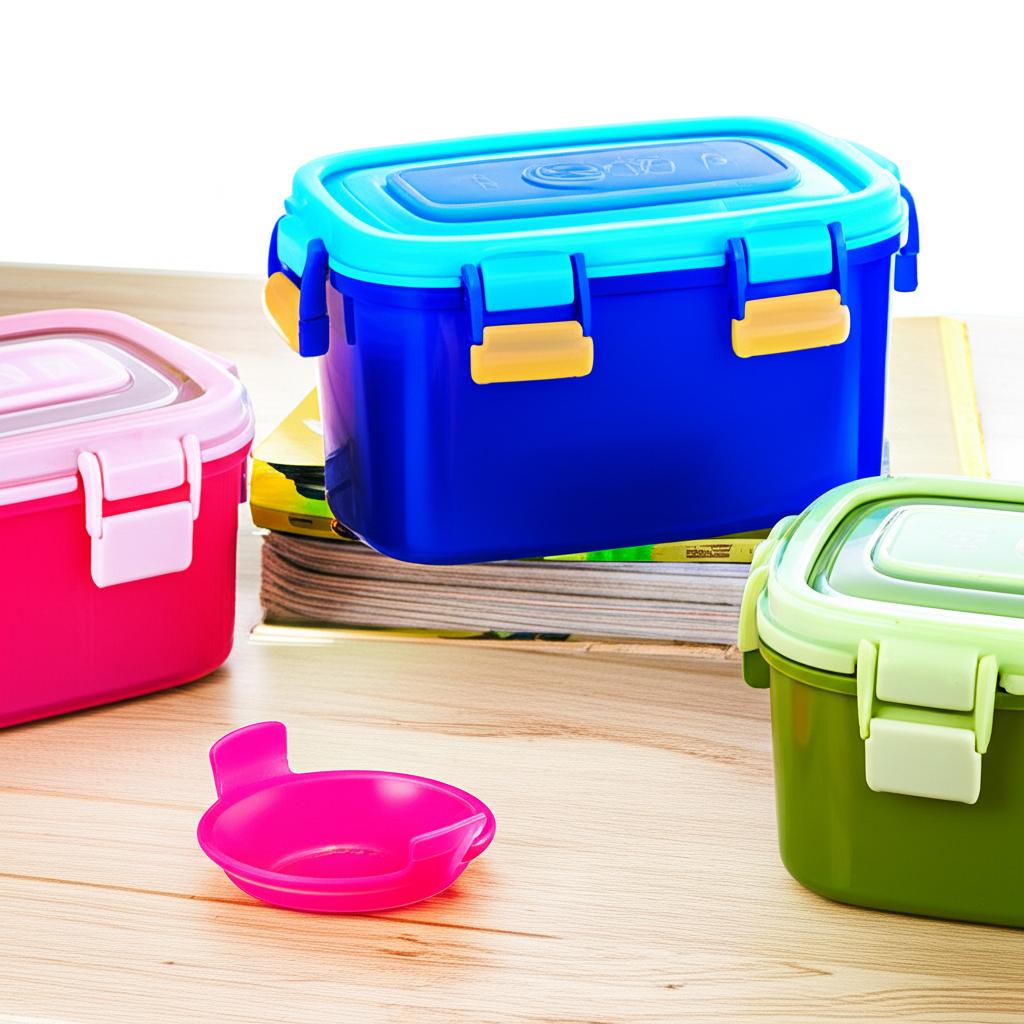
- BPA-Free Plastic: Look for high-quality, food-grade plastic that is explicitly labeled “BPA-free,” “phthalate-free,” and “lead-free.” Plastic containers are lightweight, often come in fun colors, and are generally more affordable. However, they can sometimes stain, retain odors, or degrade over time, especially with frequent use of dishwashers or microwaves.
- Pros: Lightweight, affordable, variety of designs.
- Cons: Can scratch, stain, retain odors, may not last as long as other materials.
- Stainless Steel: A highly durable and popular choice. Food-grade stainless steel (e.g., 18/8 or 304 grade) is naturally BPA-free, resistant to odors and stains, and incredibly long-lasting. It’s heavier than plastic but can withstand drops and daily wear and tear.
- Pros: Extremely durable, non-toxic, odor/stain resistant, easy to clean, often dishwasher safe.
- Cons: Heavier, can be more expensive, not microwave safe. Some may dent if dropped repeatedly.
- Silicone: Often used for lids, dividers, or collapsible containers. Silicone is flexible, durable, and generally non-toxic. It’s great for certain food items and can be good for small snack pots.
- Pros: Flexible, lightweight, easy to clean, often oven and freezer safe.
- Cons: Can sometimes absorb odors, less rigid for main containers.
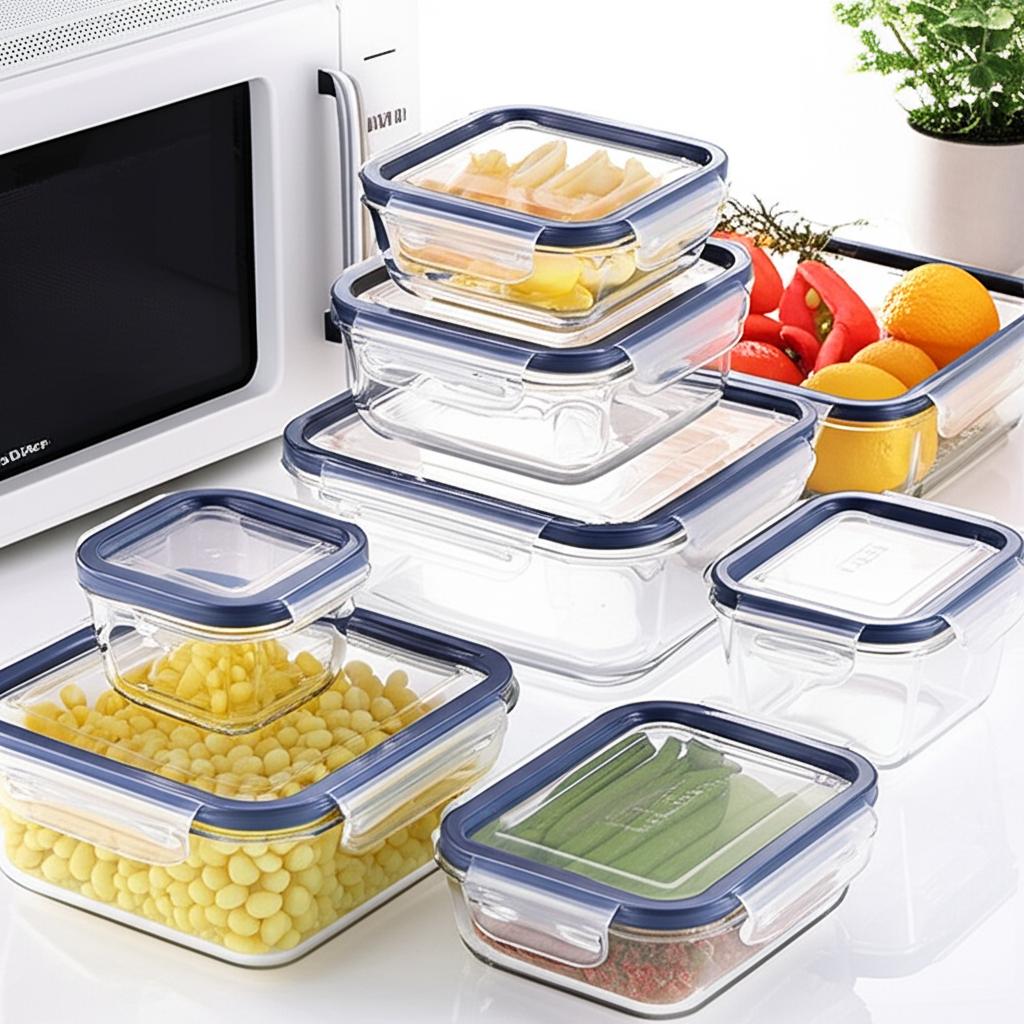
- Glass (with Silicone or Plastic Lids): While excellent for food safety and non-reactivity, glass is generally not recommended for young school kids due to its weight and fragility. It’s better suited for older teens or adults.
3. Compartments & Portion Control
Many modern leak-proof lunch containers, especially bento box-style containers, come with multiple compartments. This is fantastic for packing a balanced meal and keeping different food items separate and fresh.
- Fixed Dividers: These offer permanent separation, preventing foods from touching. Look for containers where the lid seals each compartment individually for maximum leak protection.
- Removable Dividers: Some containers offer adjustable or removable dividers, giving you more flexibility in how you portion out food. Ensure these dividers fit snugly to prevent mixing.
- Multiple Small Containers within a Larger One: Some systems provide several small, individually sealed containers that fit inside a larger outer shell. This offers supreme leak protection for specific items like yogurt or applesauce.
4. Durability & Kid-Friendly Design
Kids aren’t always gentle with their belongings. A good lunch container needs to withstand being jostled in a backpack, dropped occasionally, and opened/closed multiple times a day.
- Robust Construction: Look for sturdy materials and well-made latches that won’t break easily.
- Easy to Open/Close: While a secure seal is vital, it shouldn’t be so tight that a child struggles to open it independently. Test it out with your child before school starts. Latches that are easy for small hands to manipulate are a huge plus.
- Fun Designs/Colors: While not directly related to leak-proofing, a container that your child loves to look at and use makes them more enthusiastic about packing and eating their lunch.
5. Size & Capacity
The right size depends on your child’s age, appetite, and the types of food you pack.
- Toddlers/Preschoolers: Smaller containers with 2-3 compartments are usually sufficient for their smaller appetites.
- Elementary School Kids: Medium-sized containers with 3-5 compartments work well for packing a main course, fruit, veggies, and a small snack.
- Middle/High School Kids: Larger containers or multiple smaller ones might be needed to accommodate growing appetites and varied food preferences.
6. Ease of Cleaning
A container that’s difficult to clean will quickly become a burden.
- Dishwasher Safe: Most plastic and stainless steel containers are dishwasher safe (top rack recommended for plastic). Always check manufacturer instructions.
- Removable Gaskets: If the container has a silicone gasket, ensure it’s easy to remove for thorough cleaning to prevent mold and mildew buildup, especially in its groove.
- Wide Openings: Containers with wide mouths or large compartments are easier to hand-wash.
7. Insulation (for Thermal Options)
While not all leak-proof containers are insulated, some offer thermal properties to keep food warm or cold. These are often separate thermos-style containers or integrated into larger systems.
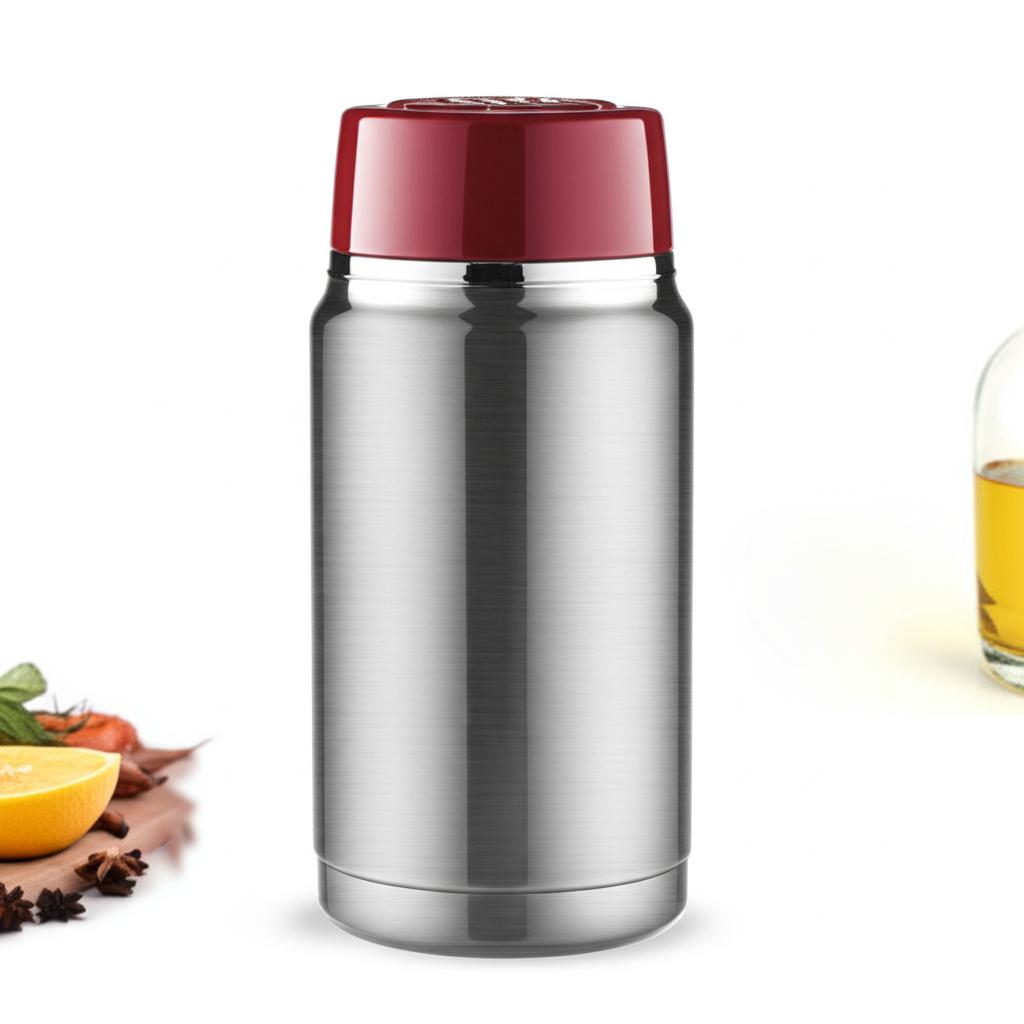
- Double-Walled Vacuum Insulation: For keeping food hot (like soup or pasta) or cold (like yogurt or fruit salad) for several hours. This is typically found in stainless steel thermal jars.
- Companion Insulated Bags: Many leak-proof containers are designed to fit perfectly into matching insulated lunch bags, which help maintain temperature for longer.
Types of Leak-Proof Lunch Containers for School Kids
Beyond general features, containers often fall into a few common categories:
- Bento-Style Containers: These are arguably the most popular choice for kids due to their built-in compartments. A good leak-proof lunch container for school kids in bento style will have a lid that seals each compartment individually, or at least has a solid, overarching seal. They’re great for variety without mixing.
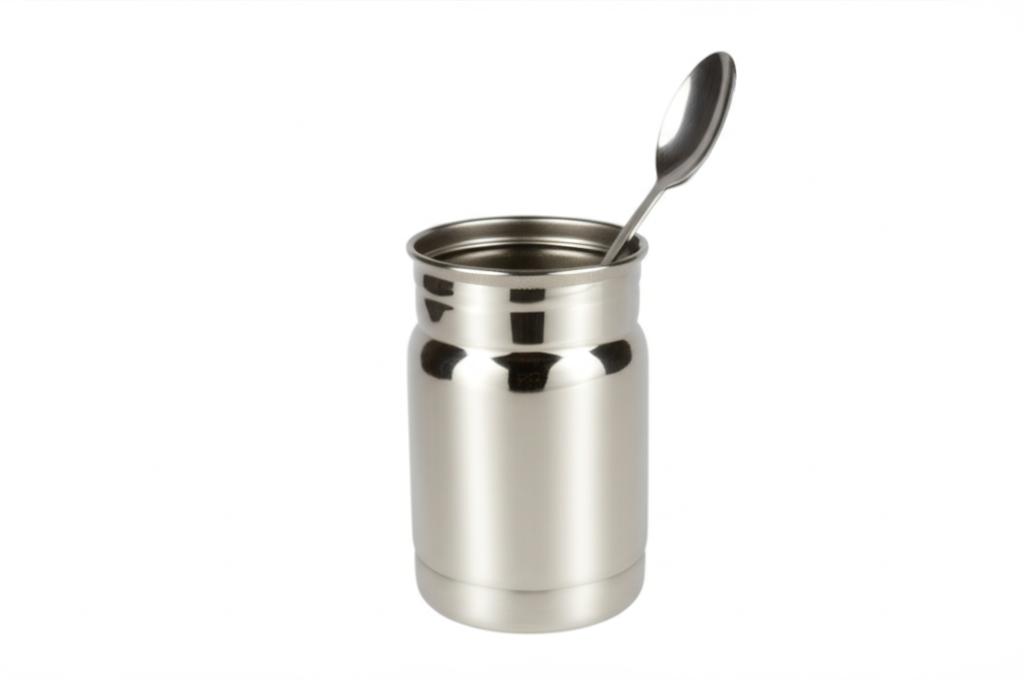
- Thermal Jars/Thermoses: Designed specifically for keeping hot foods hot and cold foods cold. They typically have a wide mouth, screw-on lid, and double-walled vacuum insulation. Often used in conjunction with a main container for other items.
- Traditional Containers with Upgraded Seals: These look like standard rectangular or square containers but feature superior sealing mechanisms (like silicone gaskets and robust latches) that make them truly leak-proof. They might not have built-in compartments but can be paired with smaller individual leak-proof snack pots.
- All-in-One Systems: Some brands offer complete lunch systems that include a main leak-proof container, smaller individual pots, and sometimes even cutlery, all designed to fit within a specific insulated bag.
Choosing the Right Leak-Proof Container for Your Child’s Age
The “best” container isn’t one-size-fits-all. Consider your child’s age and developmental stage:
- Toddlers & Preschoolers (Ages 2-5):
- Focus On: Easy-to-open latches (not too stiff), durable enough to withstand drops, smaller portions, fun designs.
- Good Choices: Compact plastic bento boxes with simple, child-friendly latches. Stainless steel bento boxes are also excellent if you prefer a non-plastic option and don’t mind the extra weight. Small, leak-proof snack containers for yogurt or fruit puree.
- Elementary School Kids (Ages 6-10):
- Focus On: More compartments for variety, durability for daily use, slightly larger capacity, designs they’ll enjoy showing off.
- Good Choices: Medium-sized bento boxes (plastic or stainless steel) with 3-5 well-sealed compartments. A separate small thermal jar for warm foods might be appreciated. Look for robust construction to handle rough handling.
- Middle School Kids (Ages 11-13):
- Focus On: Larger capacity for growing appetites, more mature designs, ability to keep food warm/cold for longer, durability for heavier backpacks.
- Good Choices: Larger bento boxes, perhaps a combination of a main container and separate thermal jar. Stainless steel options become very appealing for their longevity and sleek look. They can usually handle more complex latch systems.
- High School Kids (Ages 14+):
- Focus On: Large capacity, very durable, possibly more adult-looking designs, versatility for different types of meals.
- Good Choices: Large stainless steel containers, versatile bento systems, high-capacity thermal jars. They often appreciate containers that fit easily into larger backpacks and can withstand heavier books.
Tips and Best Practices for Using Your Leak-Proof Lunch Container
Even with the best leak-proof lunch container for school kids, a few habits can ensure success:
- Do a Water Test: When you first get a new container (and periodically), fill it with water, seal it, and turn it upside down or shake it gently over the sink. If it leaks, contact the manufacturer or return it.
- Don’t Overfill: This is a common mistake. Overfilling can compromise the seal, no matter how good the container is. Leave a little space at the top.
- Check the Seal: Before closing, ensure the silicone gasket (if present) is properly seated in its groove and free of food debris. A tiny crumb can break the seal.
- Secure the Latches: Make sure all latches are firmly closed and snapped into place. Listen for the click!
- Pack Smart:
- For very liquid items like soup or smoothies, a dedicated thermal liquid container (thermos) with a screw-on lid is always the safest bet.
- Place heavier items at the bottom of the lunch bag to avoid crushing lighter, more delicate foods.
- Consider using silicone muffin cups or small reusable snack bags inside compartments for extra separation or for really wet items if your container doesn’t have individual seals for each section.
- Preheat/Pre-chill Thermal Jars: If using a thermal jar, preheat it with hot water for 5-10 minutes before adding hot food, or pre-chill with ice water for cold food. This significantly improves temperature retention.
- Pair with a Quality Lunch Bag: An insulated lunch bag provides an extra layer of protection against temperature fluctuations and, in the rare event of a leak, can contain the mess.
Common Mistakes to Avoid When Using Lunch Containers
Knowing what not to do is just as important as knowing what to do:
- Ignoring Cleaning Instructions: Don’t just throw everything in the dishwasher if the manufacturer says hand-wash. Also, make sure to remove and thoroughly clean silicone gaskets regularly to prevent mold buildup.
- Using Abrasive Cleaners or Scouring Pads: These can scratch plastic, damage seals, and potentially compromise the container’s integrity.
- Microwaving Stainless Steel: Never put stainless steel containers in the microwave. They are not microwave safe and can cause sparks or fires.
- Forgetting to Check for Wear and Tear: Over time, seals can degrade, or latches can weaken. Periodically inspect your containers for cracks, warped lids, or brittle seals. Replace them when necessary.
- Buying Purely on Aesthetics: While a fun design is great, prioritize functionality, durability, and a genuine leak-proof design over looks alone.
- Assuming All “Bento” Boxes Are Leak-Proof: Many bento boxes are simply compartmentalized, but their lids don’t seal each section individually, or even the main box effectively. Always look for explicit “leak-proof” claims and features like silicone seals and strong latches.
Conclusion: Invest in Peace of Mind
Packing a school lunch should be a joyful act of love, not a source of stress or mess. By investing in a high-quality leak-proof lunch container for school kids, you’re not just buying a piece of plastic or steel; you’re buying peace of mind. You’re ensuring your child’s healthy meal arrives intact, their school supplies stay clean, and you spend less time cleaning up avoidable messes.
Take the time to research, read reviews, and choose a container that truly meets your family’s needs. Look for durable materials, effective sealing mechanisms, and designs that are easy for your child to use. With the right container, school lunches can be packed with confidence, enjoyed with enthusiasm, and cleaned up with ease.
Frequently Asked Questions (FAQ)
Q1: How can I tell if a lunch container is truly leak-proof before buying it?
A1: It’s hard to be 100% sure without testing, but look for specific features: clear claims of “leak-proof,” strong and multiple latches, a visible silicone or rubber gasket/seal inside the lid, and individual sealing for each compartment in bento-style containers. Reading customer reviews mentioning leak performance is also highly recommended.
Q2: Are all bento boxes leak-proof?
A2: Absolutely not! Many bento boxes are simply compartmentalized trays with a lid that rests on top. For a bento box to be leak-proof, it needs a secure sealing mechanism, often with a silicone gasket that seals the main container and ideally, individual seals for each compartment within. Always check product descriptions carefully.
Q3: What’s the safest material for a school lunch container?
A3: Food-grade stainless steel (like 18/8 or 304) is widely considered one of the safest and most durable options, as it’s non-reactive and doesn’t leach chemicals. High-quality, BPA-free, phthalate-free plastic is also safe, but ensure it’s specifically labeled as such. Avoid cheap plastics that don’t specify their composition.
Q4: Can I put liquids like soup or yogurt directly into a leak-proof bento container?
A4: It depends on the container. Some advanced bento boxes are designed with individually sealed, liquid-tight compartments that can hold yogurt or thicker soups. For thin liquids like brothy soups or smoothies, a dedicated thermal liquid container (thermos) with a screw-on lid is generally the most reliable and recommended option to prevent any risk of leaks.
Q5: How do I clean my leak-proof lunch container and prevent mold in the seals?
A5: Most plastic and stainless steel containers are top-rack dishwasher safe, but always check manufacturer instructions. For silicone gaskets, remove them regularly (at least weekly, or daily if packing wet foods) and wash them separately by hand with soap and water. Ensure both the gasket and the groove in the lid are completely dry before reassembling to prevent mold and mildew growth.
Q6: My child struggles to open the latches. What should I do?
A6: This is common, especially with younger kids, as a tight seal means tighter latches. Practice with your child at home. Look for containers with larger, easier-to-grip latches or simpler snap-on designs. Some parents pre-open one latch before packing to make it easier for the child, while still relying on the other latches for the seal.
Q7: How long do leak-proof lunch containers typically last?
A7: The lifespan varies greatly by material and brand. High-quality stainless steel containers can last for many years, even a decade or more, with proper care. Good quality BPA-free plastic containers typically last 2-5 years before they might show signs of wear, staining, or seal degradation. Regular cleaning and proper usage extend their life.
Q8: Can I put hot food in a leak-proof container?
A8: Most standard leak-proof containers are not designed to keep food hot for extended periods. For hot foods like pasta, soup, or stews, you’ll need a dedicated insulated thermal food jar (thermos) which is specifically designed to retain heat for several hours. These are usually made of double-walled stainless steel.
Q9: Are leak-proof containers microwave safe?
A9: It depends on the material. Plastic leak-proof containers are often microwave safe, but always check for a “microwave safe” label and ensure you remove the lid (especially if it has a silicone seal) before microwaving. Stainless steel containers are never microwave safe.
Q10: How do I choose the right size container for my child?
A10: Consider your child’s age, appetite, and what types of food you typically pack.
* Small (1-2 cups): Good for toddlers or light snack packers.
* Medium (2-4 cups): Ideal for elementary school kids for a main course and a few sides.
* Large (4+ cups): Suitable for older kids, teens, or those with larger appetites, perhaps for packing a full meal plus snacks.
Choose a size that fits comfortably in their lunch bag or backpack without being too bulky.