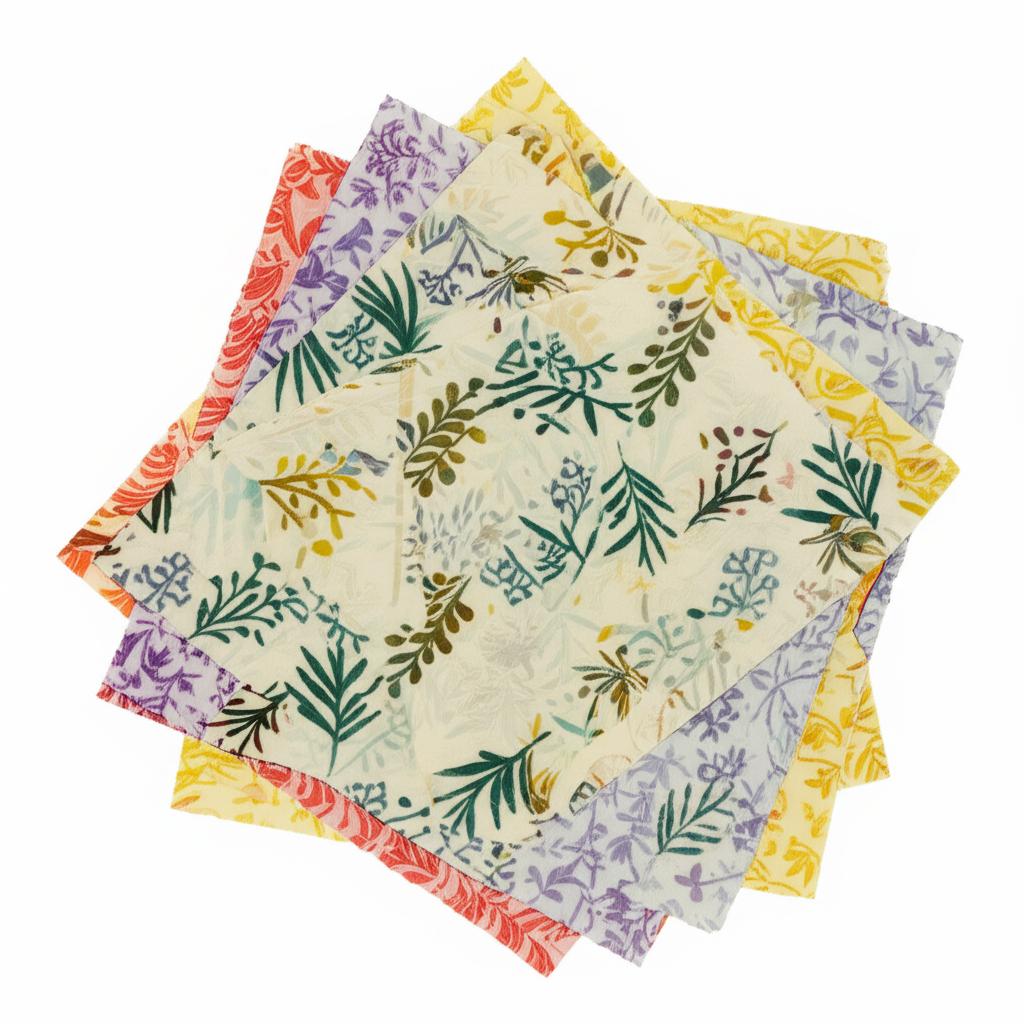
Are you tired of grappling with rolls of plastic cling film that never quite stick right, or rummaging through a drawer full of mismatched plastic containers? Does the thought of contributing to ever-growing landfills weigh on your conscience? If you’re nodding along, then it’s time to discover a true kitchen game-changer: reusable beeswax wraps for food storage. These ingenious, eco-friendly alternatives are not just a trend; they’re a return to simpler, more sustainable ways of preserving food, offering a vibrant, breathable, and utterly charming solution for keeping your produce, leftovers, and snacks deliciously fresh.
In a world increasingly aware of its environmental footprint, finding practical and effective ways to reduce waste is paramount. And let’s be honest, plastic wrap, while convenient in a pinch, is a significant part of the problem. It’s single-use, non-biodegradable, and often ends up polluting our oceans and land for centuries. Enter beeswax wraps – a natural, reusable, and surprisingly versatile answer to many of our modern food storage dilemmas.
This comprehensive guide will delve deep into the world of beeswax wraps, exploring what they are, why they’re an absolute must-have for any conscious kitchen, how to use and care for them effectively, and even common pitfalls to steer clear of. By the end, you’ll be well-equipped to make the switch and embrace a fresher, greener way of life.
What Exactly Are Beeswax Wraps?
At their core, beeswax wraps are incredibly simple yet remarkably effective. Imagine a piece of organic cotton fabric infused and coated with a blend of natural ingredients, primarily beeswax. This natural coating makes the fabric pliable, slightly sticky, and naturally antimicrobial, allowing it to cling to itself and to various surfaces, forming a breathable seal around your food.
A Glimpse into Their History
While they seem like a relatively new innovation, beeswax wraps draw inspiration from ancient practices. Before the advent of modern plastics, our ancestors used natural materials to preserve food. Think of waxed canvas or cloth steeped in various fats and resins – these were early forms of protective barriers for sustenance. The modern beeswax wrap revives this age-old wisdom, combining it with contemporary design and an understanding of food science. They represent a beautiful blend of traditional craftsmanship and a forward-thinking approach to sustainability.
The Magic Ingredients
The effectiveness of beeswax wraps lies in their carefully selected natural components:
- Beeswax: The star ingredient! Beeswax provides the wrap’s pliability, its mild stickiness, and crucial antimicrobial properties that help inhibit the growth of bacteria and mould, keeping food fresh naturally. It’s also waterproof and breathable, allowing food to respire without drying out too quickly or getting soggy.
- Organic Cotton: This forms the base fabric. Using organic cotton ensures that no harmful pesticides or chemicals are introduced into the product, aligning with the eco-friendly ethos.
- Jojoba Oil: This plant-based oil adds extra malleability and extends the life of the wrap. Jojoba oil is also known for its antifungal properties, further enhancing the wrap’s ability to preserve food.
- Tree Resin: Often pine resin, this ingredient gives the wrap its signature “stickiness,” allowing it to hold its shape when moulded around food or containers. It also contributes to its durability and flexibility.
These simple, natural ingredients work in harmony to create a truly remarkable food preservation tool.
Why Make the Switch? The Unbeatable Benefits of Beeswax Wraps
Adopting reusable beeswax wraps for food storage isn’t just about making a small change; it’s about embracing a significant upgrade to your kitchen habits with a multitude of benefits that span environmental impact, food quality, and even your wallet.
1. Environmental Hero: Say Goodbye to Plastic!
This is perhaps the most compelling reason to switch. Every time you reach for a beeswax wrap instead of plastic cling film or a single-use plastic bag, you’re making a direct positive impact on our planet.
- Waste Reduction: Beeswax wraps are reusable for up to a year or even longer with proper care. Imagine how many rolls of plastic wrap you’ll save from landfills and our oceans over that period!
- Biodegradable & Compostable: Unlike plastic, which takes hundreds of years to break down into microplastics, beeswax wraps are completely biodegradable and compostable at the end of their life cycle. You can simply cut them into strips and add them to your compost bin, returning their components naturally to the earth.
- Reduced Carbon Footprint: The production of natural materials like cotton and beeswax generally has a lower carbon footprint compared to the manufacturing of petroleum-based plastics.
2. Keeps Food Fresher, Longer
This isn’t just an eco-friendly choice; it’s a superior food preservation method.
- Breathability: Unlike plastic, which creates a suffocating, airtight seal that can trap moisture and accelerate spoilage, beeswax wraps are breathable. This allows food, especially produce, to breathe naturally, preventing condensation buildup that often leads to mould and sliminess. Your half-cut avocado won’t brown as quickly, and your block of cheese won’t develop a slimy coating.
- Natural Antimicrobial Properties: The beeswax and jojoba oil in the wraps naturally inhibit the growth of bacteria and fungi, providing an extra layer of protection against spoilage.
- Retains Moisture (Without Trapping It): They help food retain its natural moisture without making it soggy, keeping everything from crusty bread to crisp vegetables in optimal condition.
3. Economical in the Long Run
While the initial cost of a set of beeswax wraps might seem a bit higher than a roll of plastic wrap, they are undoubtedly a money-saver over time. Considering their lifespan of many months to a year or more, they quickly pay for themselves, eliminating the recurring expense of single-use plastics. It’s an investment in sustainable living that yields financial returns.
4. Safe and Natural
You’re putting these wraps directly onto your food, so knowing what they’re made of is crucial. Beeswax wraps are crafted from entirely natural, non-toxic ingredients. There’s no risk of harmful chemicals leaching into your food, unlike some plastics which can contain endocrine-disrupting phthalates or BPA. This makes them a wonderfully safe choice for your family’s health.
5. Versatile and Practical
Beeswax wraps are surprisingly adaptable to a variety of food storage needs:
- Wrapping: Perfect for covering bowls, wrapping sandwiches, cheese, fruits, vegetables, baked goods, and even a bunch of herbs.
- Moulding: Their pliable nature means they can be moulded around oddly shaped items or bowls, creating a custom seal simply by using the warmth of your hands.
- Travel-Friendly: Lightweight and flexible, they’re ideal for packing lunches, snacks for a picnic, or taking on camping trips.
Mastering the Art: How to Use Reusable Beeswax Wraps
Using beeswax wraps is incredibly intuitive, but a few simple techniques can help you get the most out of them.
1. Preparing Your Wrap
Before you even think about wrapping, remember the warmth of your hands is your best friend.
- Activate the Wrap: Take the wrap and gently warm it between your hands for a few seconds. This softens the wax and resin, making the wrap more pliable and easier to mould. You’ll feel it become more flexible and slightly tacky.
2. Wrapping Various Foods
The key is to create a good seal.
- For Bowls and Containers: Place the wrap over the opening of the bowl or container. Use the warmth and pressure of your hands to mould the wrap down and around the edges of the rim, pressing firmly to create a seal. The wrap will stick to itself and the smooth surface of the bowl.
- For Individual Food Items (e.g., Cheese, Half-Avocado, Bread): Place the food item in the centre of the wrap. Fold the edges of the wrap over the food, pressing and moulding it with your hands to create a snug package. The warmth of your hands will help the wrap cling to itself, forming a tight seal. For a loaf of bread, you might need a larger wrap and simply fold it around the bread, tucking the ends underneath.
- For Sandwiches and Snacks: Lay the wrap flat. Place your sandwich or snack in the middle. Fold the sides in, then fold the top and bottom over, just like you would with traditional wrapping paper. Press firmly along the folds to seal.
3. What NOT to Wrap
While incredibly versatile, beeswax wraps aren’t suitable for everything:
- Raw Meat & Fish: Due to the difficulty of sterilizing the wraps thoroughly enough to prevent cross-contamination, and the fact that they’re generally cleaned with cool water, it’s best to avoid wrapping raw meat or fish. Use glass containers for these.
- Hot Food: Never wrap food that is still hot. The heat will melt the wax coating, potentially damaging the wrap and making a mess. Always wait for food to cool completely before wrapping.
- Pineapples & Melon Rinds: Some highly acidic or rough-skinned fruits can potentially degrade the wax coating over time. While a quick wrap for a slice is fine, prolonged contact should be avoided.
- Very Wet or Oily Foods: While they handle some moisture, extremely wet or oily foods might leave residue that’s hard to clean and can break down the wax more quickly.
Care and Maintenance: Making Your Wraps Last
The lifespan of your reusable beeswax wraps for food storage depends significantly on how well you care for them. With proper attention, they can last a year or even longer!
1. Cleaning is a Breeze
This is the most crucial step for longevity.
- Cool Water is Key: Always wash your beeswax wraps in COOL or lukewarm water. Hot water will melt the wax and ruin your wrap.
- Gentle Soap: Use a mild dish soap if necessary. Avoid harsh detergents or abrasive scrubbers.
- Soft Sponge or Cloth: Gently wipe down the wrap with a soft sponge or cloth. If food is stuck, you can gently scrape it off with your fingernail or a soft brush.
- Rinse Thoroughly: Ensure all soap residue is rinsed off.
2. Drying and Storing
Proper drying and storage prevent mould and damage.
- Air Dry: Hang your wraps to air dry. A drying rack, clothespin, or even draping them over the back of a chair works perfectly. They dry quickly.
- Store Flat or Rolled: Once completely dry, you can store them flat in a drawer, rolled up, or folded neatly. Keep them away from direct sunlight or heat sources (like near the stove or a heating vent) as this can cause the wax to melt or degrade.
3. Rejuvenating Your Wraps
Over time, with repeated use and washing, your wraps might start to lose some of their stickiness and pliability. This doesn’t mean they’re done for!
- Re-waxing: Many brands sell “re-waxing” kits or bars. You can grate some wax over the wrap, place it between two sheets of parchment paper, and gently iron it on a low setting, spreading the wax evenly.
- Oven Method: Alternatively, lay the wrap flat on a baking sheet lined with parchment paper. Sprinkle some beeswax pellets (or grated beeswax) over it. Bake in a preheated oven at a very low temperature (around 170-200°F or 80-95°C) for just a few minutes, until the wax is melted. Carefully remove, lift the wrap by a corner (it will be hot!), and wave it gently until it cools and stiffens.
Rejuvenation can significantly extend the life of your wraps, making them even more sustainable.
Common Mistakes to Avoid When Using Beeswax Wraps
Even with the best intentions, it’s easy to make small blunders that can shorten the life of your reusable beeswax wraps. Being aware of these common pitfalls will help you maximize their utility and lifespan.
1. Using Hot Water for Cleaning
This is the cardinal sin of beeswax wrap care! As mentioned, hot water melts the wax, making it sticky, patchy, and effectively ruining its cling properties. Always, always use cool or lukewarm water.
2. Wrapping the Wrong Foods
Putting raw meat, very hot items, or super oily/acidic foods in beeswax wraps can lead to contamination, damage to the wrap, or simply ineffective storage. Stick to the guidelines for what not to wrap.
3. Folding Incorrectly
While it’s hard to really mess up, simply draping a wrap over a bowl without pressing and moulding it with the warmth of your hands won’t create an effective seal. You need that hand pressure to make it cling.
4. Machine Washing or Dishwasher Use
This is a quick way to destroy your wraps. The high temperatures and harsh detergents of washing machines and dishwashers are completely incompatible with the delicate wax coating. Hand wash only!
5. Ignoring Rejuvenation Signs
If your wraps are looking tired, flaky, or have lost their stickiness, don’t just discard them. Many wraps can be easily rejuvenated, breathing new life into them and saving you money on replacements.
Beyond the Kitchen: Creative Uses for Beeswax Wraps
While their primary purpose is food storage, the versatility of beeswax wraps extends beyond just the pantry and fridge. Get creative with these eco-friendly covers!
- Packing Toiletries: Wrap a bar of soap, shampoo bar, or a toothbrush for travel. They’re leak-proof for solids and keep things neat.
- Covering Pet Bowls: Great for covering your pet’s leftover food in their bowl.
- DIY Gifts: Use them to wrap small gifts like a bar of handmade soap, a small piece of jewelry, or a sweet treat. It adds a lovely, personal, and sustainable touch.
- Camping Companion: Excellent for wrapping fire starters, keeping matches dry, or even creating a temporary waterproof pouch for small essentials.
- Travel Pouch: Fold a larger wrap into a small pouch for coins, earbuds, or other tiny items in your bag.
DIY Beeswax Wraps: A Fun Project
Feeling crafty and want to get even more hands-on with your sustainable living journey? Making your own beeswax wraps is a surprisingly straightforward and rewarding project. All you need are a few basic supplies:
- Fabric: Choose 100% cotton fabric in fun patterns (old bed sheets or cotton shirts work great too!).
- Beeswax Pellets: Food-grade beeswax pellets are ideal.
- Optional: Jojoba oil and pine resin (for extra stickiness and pliability, though you can omit them for a simpler wrap).
- Tools: An old paintbrush you don’t mind getting waxy, parchment paper, a baking sheet, and an oven or an iron.
There are many detailed tutorials online, but the basic idea involves melting the beeswax (and other ingredients) onto the fabric, allowing it to soak in, and then letting it cool and harden. It’s a great way to customize your wraps and truly appreciate the materials.
Making the Transition: Tips for a Plastic-Free Kitchen
Switching to reusable beeswax wraps for food storage is a fantastic step towards a plastic-free kitchen, but it’s part of a bigger picture. Here are a few tips to help you on your journey:
- Start Small: Don’t feel overwhelmed. Begin by replacing one item, like plastic wrap, with beeswax wraps. Once comfortable, move on to other areas.
- Embrace Reusables: Invest in quality reusable containers (glass, stainless steel), reusable produce bags, and reusable shopping bags.
- Buy in Bulk: Reduce packaging waste by buying grains, nuts, and other staples from bulk bins using your own containers or cloth bags.
- Compost Food Scraps: Divert organic waste from landfills by composting.
- Educate Yourself: Learn about what can and cannot be recycled in your area.
- Support Local: Shop at farmer’s markets where produce often comes without excessive packaging.
By taking these steps, you’re not just changing individual habits; you’re contributing to a larger movement for a healthier planet.
Conclusion
The journey towards a more sustainable lifestyle can feel daunting, but it’s often the small, actionable changes that make the biggest difference. Adopting reusable beeswax wraps for food storage is one such change – simple, effective, and deeply impactful. These charming, natural food covers offer a breath of fresh air, literally, for your food and metaphorically for our environment. They invite us to slow down, appreciate the natural world, and make conscious choices that benefit both our households and the planet we call home. So, unroll the possibilities, give them a try, and discover the satisfying freshness that comes with embracing this ancient yet incredibly modern solution. Your food, your wallet, and Mother Earth will thank you!
Frequently Asked Questions (FAQ) About Reusable Beeswax Wraps
Q1: How long do reusable beeswax wraps typically last?
A1: With proper care and regular use, beeswax wraps can last for about 6 months to 1 year, and sometimes even longer. Their lifespan can be extended further by re-waxing them when they start to lose their stickiness.
Q2: Are beeswax wraps truly effective at keeping food fresh?
A2: Yes, they are! Beeswax wraps are breathable, which is key. Unlike plastic wrap that suffocates food and traps moisture (leading to mould), beeswax wraps allow food to breathe, preventing condensation while still keeping it from drying out. The natural antimicrobial properties of beeswax and jojoba oil also help inhibit bacterial and fungal growth.
Q3: Can I wash my beeswax wraps in hot water or put them in the dishwasher?
A3: Absolutely NOT. This is the quickest way to ruin your wraps. Hot water will melt the wax coating, making them sticky, patchy, and unusable. Always wash beeswax wraps with cool or lukewarm water and a mild dish soap.
Q4: What foods should I avoid wrapping with beeswax wraps?
A4: It’s best to avoid wrapping raw meat or fish due to potential cross-contamination concerns and difficulty in proper sterilization. Also, do not wrap hot food, as the heat will melt the wax. Very wet, oily, or highly acidic items (like fresh pineapple or super ripe tomatoes) are also not ideal for prolonged storage, as they can degrade the wax over time.
Q5: Are beeswax wraps compostable or biodegradable?
A5: Yes! At the end of their life, when they can no longer be rejuvenated, beeswax wraps are fully biodegradable and compostable. Simply cut them into strips and add them to your home compost bin, or dispose of them in a green waste bin where accepted.
Q6: Can I use beeswax wraps in the microwave, oven, or freezer?
A6: No. Beeswax wraps are not suitable for microwave or oven use, as the heat will melt the wax. While some people briefly freeze items wrapped in beeswax, prolonged freezing can make them brittle and prone to cracking. For best results, use them for fridge or pantry storage.
Q7: How do I get my beeswax wrap to stick to a bowl or food item?
A7: The warmth of your hands is the secret! Gently warm the wrap between your hands for a few seconds. Then, place it over the bowl or food and use the pressure and warmth from your hands to mould it around the item, pressing down firmly to create a seal. The wax will soften slightly and cling to itself and the surface.
Q8: What should I do if my beeswax wrap loses its stickiness?
A8: This is a sign it’s time for rejuvenation! Many brands sell beeswax refresher bars or pellets. You can re-wax them yourself by grating beeswax onto the wrap, placing it between parchment paper, and gently ironing it on low, or by baking it briefly in a very low-temperature oven. This process restores their stickiness and pliability.
Q9: Are there vegan alternatives to beeswax wraps?
A9: Yes, absolutely! If you’re vegan or have a beeswax allergy, there are plant-based food wraps available. These often use Candelilla wax, soy wax, or other plant-based waxes combined with tree resin and plant oils to achieve similar properties to beeswax wraps.
Q10: Can I use beeswax wraps to wrap sandwiches for lunch?
A10: Yes, they are perfect for sandwiches, bagels, or wraps! Their flexible nature allows them to mould around the shape of your lunch, keeping it fresh until you’re ready to eat. They’re also great for snacks like muffins, cookies, or fruit slices.
