Master the Kitchen: Simple Cooking Techniques Every Beginner Should Learn
Embarking on your culinary journey can feel daunting, but don’t let the thought of cooking intimidate you! At its heart, cooking is a wonderfully creative and rewarding process that empowers you to eat healthier, save money, and truly connect with your food. The secret? Mastering a few fundamental cooking techniques.
This detailed guide will break down the most essential cooking methods every beginner should learn. We’ll provide easy-to-follow step-by-step instructions, helpful tips, and common pitfalls to avoid, all presented in a friendly, encouraging tone. Get ready to build your confidence and transform fresh ingredients into delicious meals!
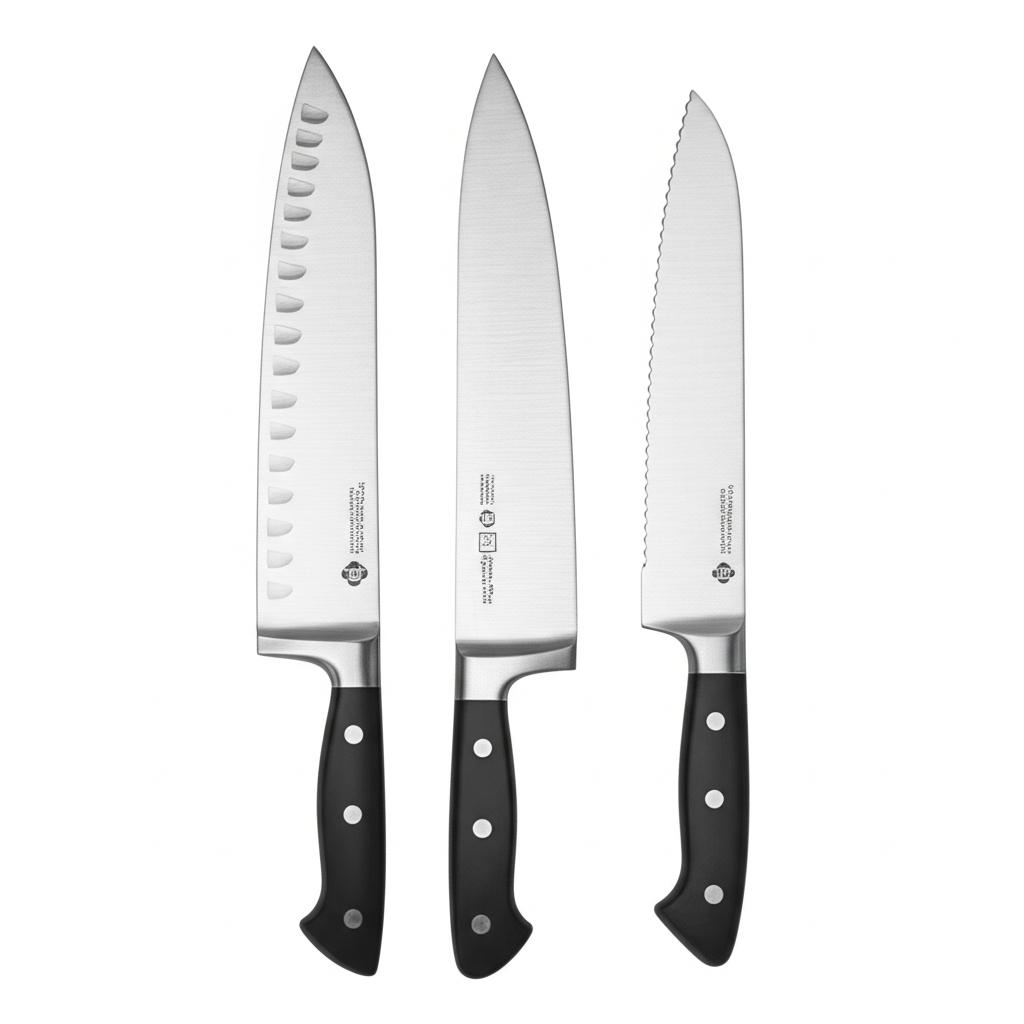
1. Knife Skills: Your Foundation for Culinary Success
Before you even think about heat, you need to get comfortable with your most important kitchen tool: the knife. Proper knife skills aren’t just for chefs; they make cooking faster, safer, and more enjoyable for everyone.
Why It’s Essential
Safety first! Learning to hold and use a knife correctly significantly reduces the risk of accidents. Beyond safety, efficient chopping ensures your ingredients cook evenly and look appealing.
Step-by-Step Basic Chopping
- Choose the Right Knife: For beginners, a chef’s knife (8-inch) is incredibly versatile.
- Stable Surface: Always work on a flat, stable cutting board. Place a damp paper towel or a non-slip mat underneath if your board slides.
- Proper Grip:
- Dominant Hand: Hold the knife handle firmly but relaxed, with your thumb and forefinger pinching the blade just where it meets the handle. Your other fingers wrap around the handle. This “pinch grip” gives you maximum control.
- Non-Dominant Hand (The “Claw”): This is crucial for safety. Curl your fingertips inwards, creating a “claw” shape. Your knuckles should guide the knife blade as you cut, keeping your fingertips tucked safely away from the blade.
- The Rocking Motion: For most vegetables, use a gentle rocking motion. The tip of the knife stays on the board, while the heel lifts and presses down through the food.
- Steady Pace: Don’t rush. Focus on smooth, controlled movements.
Tips for Success
- Keep Your Knife Sharp: A sharp knife is safer than a dull one. Dull knives require more force, increasing the chance of slipping. Learn to use a honing steel regularly.
- Work Smart: Cut your ingredients into manageable pieces (e.g., cut an onion in half) to make them easier to handle before dicing.
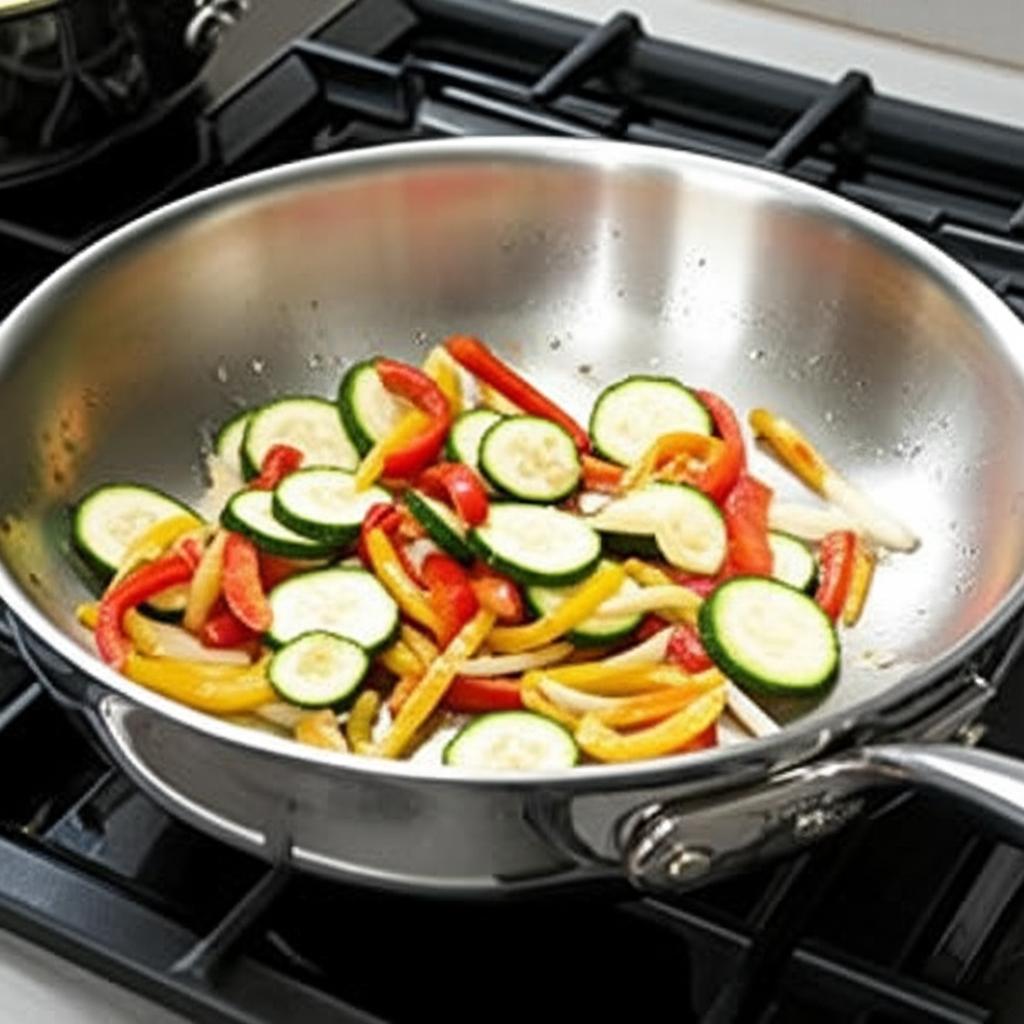
- Practice Makes Perfect: Start with soft vegetables like cucumbers or bell peppers to build confidence.
Common Mistakes to Avoid
- Holding the Knife Like a Saw: Don’t grip the handle with all your fingers like a saw. You’ll have less control.
- Fingers Outstretched: Never let your non-dominant hand’s fingers stick out. Always use the “claw” hand.
- Rushing: This is where most accidents happen. Take your time, especially when learning.
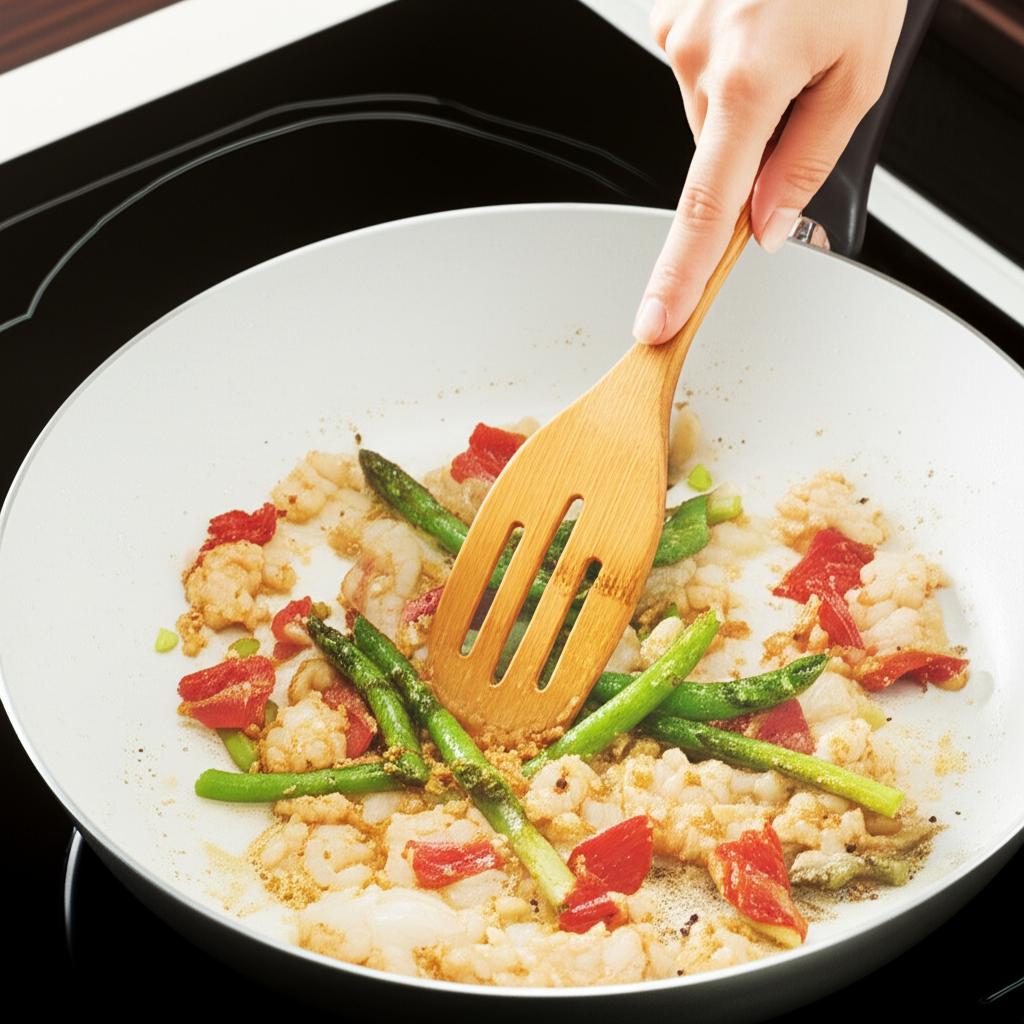
2. Sautéing & Pan-Frying: Quick Cooking, Maximum Flavor
Sautéing (from the French “sauter,” meaning “to jump”) and pan-frying are similar techniques that involve cooking food quickly in a small amount of fat over relatively high heat. They’re fantastic for developing rich, caramelized flavors.
Why It’s Essential
These techniques are perfect for everything from quick weeknight stir-fries and perfectly seared chicken breasts to building the flavor base for soups and sauces. They teach you heat management – a critical skill in cooking.
Step-by-Step Sautéing/Pan-Frying
- Choose the Right Pan: A wide, shallow pan like a sauté pan or skillet with a heavy bottom is ideal for even heat distribution.
- Preheat the Pan: Place your pan over medium-high heat. Let it heat up for a minute or two before adding oil.
- Add Fat: Once hot, add a thin layer of cooking oil (like olive, vegetable, or canola oil) or butter. The fat should shimmer, but not smoke excessively.
- Add Ingredients (Don’t Overcrowd!): Add your ingredients in a single layer. Give them space! If the pan is too crowded, the temperature will drop, and the food will steam instead of brown. You may need to cook in batches.
- Let it Brown: Resist the urge to constantly stir or flip. Allow the food to make direct contact with the hot pan to develop a beautiful golden-brown crust. This is where the flavor comes from!
- Flip & Finish: Once browned on one side, flip or stir the ingredients to cook evenly. Cook until done, removing from the pan promptly to prevent overcooking.
Tips for Success
- Dry Ingredients: Pat ingredients like meat or vegetables dry with paper towels before adding them to the pan. Excess moisture creates steam, preventing browning.
- Listen to the Sizzle: You should hear a gentle sizzle when food hits the pan. If it doesn’t sizzle, the pan isn’t hot enough.
- Batch Cook: If you have a lot of ingredients, cook them in smaller batches to ensure proper browning and avoid overcrowding.
Common Mistakes to Avoid
- Cold Pan: Adding food to a cold pan will result in soggy, pale food rather than beautifully browned items. Always preheat!
- Overcrowding: This is perhaps the most common mistake for beginners. It lowers the pan temperature and steams food instead of searing it.
- Too Much Oil: Don’t drown your food in oil. A thin layer is all you need.
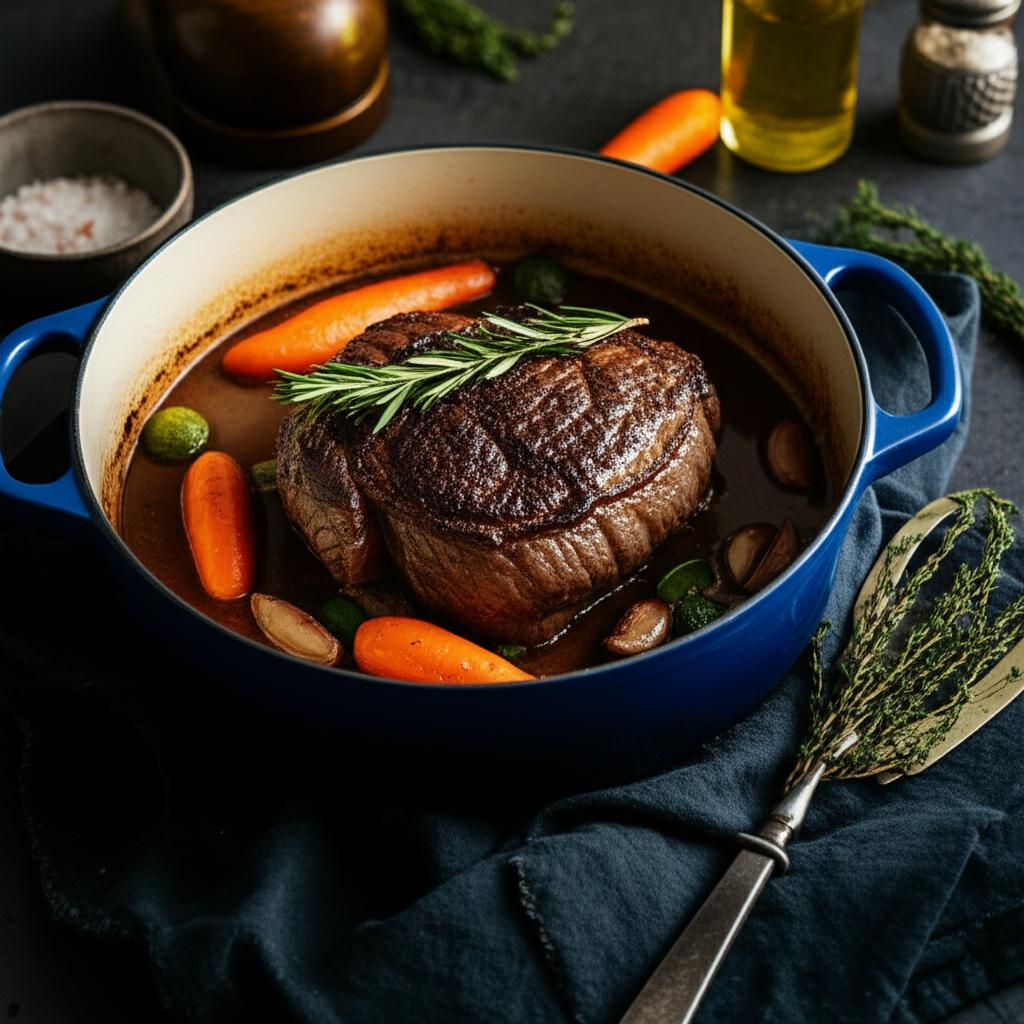
3. Boiling & Simmering: Gentle Cooking, Big Flavor
Boiling and simmering are wet-heat cooking methods that are fundamental for everything from pasta and rice to soups, stews, and blanched vegetables.
Why It’s Essential
These techniques are your go-to for cooking grains, pasta, and potatoes, and for creating comforting, flavorful broths and sauces. They teach you how to control liquid temperature and understand how ingredients soften and absorb liquid.
Understanding the Difference
- Boiling: Aggressive bubbles breaking rapidly over the entire surface of the liquid. Used for quick cooking of pasta, blanching vegetables, or starting potatoes.
- Simmering: Gentle bubbles that barely break the surface of the liquid, usually around the edges of the pot. Used for slow cooking, tenderizing tougher cuts of meat, developing flavors in soups and stews, and cooking rice.
Step-by-Step Boiling/Simmering
- Choose the Right Pot: Use a pot large enough to comfortably hold your ingredients and liquid. For pasta, the bigger, the better to prevent sticking.
- Add Liquid: Fill the pot with water, broth, or other liquid.
- Heat to Desired Temperature:
- For Boiling: Place the pot over high heat. Cover with a lid (if desired, to speed up heating) and bring the liquid to a rolling boil.
- For Simmering: Bring the liquid to a boil first, then reduce the heat to low until only small, gentle bubbles appear around the edges.
- Add Ingredients: Add your ingredients carefully.
- Cook Until Done: Follow your recipe for cooking times.
- Boiling: Stir occasionally to prevent sticking.
- Simmering: Stir occasionally to prevent sticking and ensure even cooking. Keep covered loosely to minimize evaporation.
- Drain (if necessary): For pasta or vegetables, drain thoroughly using a colander.
Tips for Success
- Salt Your Water (for Boiling): Especially for pasta, salt the water generously (it should taste like the ocean). This seasons the pasta from the inside out.
- Don’t Overcook: Pay attention to cooking times. Overcooked vegetables are mushy, and overcooked pasta is limp.
- Cover for Simmering: Using a lid during simmering helps maintain temperature and reduces liquid evaporation, which is important for soups and stews.
Common Mistakes to Avoid
- Not Enough Water for Pasta: This leads to sticky, clumpy pasta. Use a large volume of water for pasta.
- Boiling When Simmering is Needed: Vigorous boiling can break down delicate ingredients, evaporate too much liquid, and make meat tough. Learn to reduce the heat for a gentle simmer.
- Adding Ingredients to Cold Water: For most boiling tasks (like pasta or quick-blanched veggies), wait until the water is fully boiling before adding ingredients.
4. Roasting: Hands-Off Perfection in the Oven
Roasting involves cooking food in the oven using dry heat, typically at higher temperatures. It’s fantastic for vegetables, meats, and poultry, creating tender interiors and beautifully caramelized exteriors.
Why It’s Essential
Roasting is incredibly versatile and often very hands-off. It’s perfect for meal prep and for developing deep, concentrated flavors. Once you master it, you’ll be roasting everything!
Step-by-Step Roasting
- Preheat the Oven: This is crucial! Always preheat your oven to the specified temperature (often 375°F-425°F or 190°C-220°C).
- Prep Your Ingredients: Cut ingredients into similarly sized pieces so they cook evenly. For vegetables, this usually means bite-sized chunks. For meats, make sure they’re patted dry.
- Season Liberally: Toss your ingredients with a good amount of cooking oil (like olive oil), salt, pepper, and any desired herbs or spices. Don’t skimp on the oil; it helps with browning and flavor.
- Single Layer on a Baking Sheet: Arrange the ingredients in a single layer on a large baking sheet. Use two sheets if necessary. Do not overcrowd the pan, as this will steam the food instead of roasting it.
- Roast! Place the baking sheet in the preheated oven.
- Flip (Optional): Halfway through cooking, you can flip or stir the ingredients for more even browning.
- Check for Doneness: Cook until tender, browned, and cooked through. For vegetables, they should be fork-tender. For meat, use a meat thermometer to ensure safe internal temperatures.
Tips for Success
- Hot Oven is Key: A truly hot oven is essential for proper roasting and caramelization.
- Don’t Overcrowd: We can’t say this enough! It’s the #1 mistake in roasting. Give your food space to breathe.
- Use Parchment Paper: Lining your baking sheet with parchment paper makes cleanup a breeze and helps prevent sticking.
- Experiment with Seasonings: Roasting is a great canvas for different flavors – garlic, rosemary, thyme, paprika, cumin, etc.
Common Mistakes to Avoid
- Cold Oven: If your oven isn’t fully preheated, your food will take longer to cook and won’t get that desirable roasted crispness.
- Overcrowding the Pan: Again, this leads to steaming, not roasting. Your food will be soggy instead of crispy and delicious.
- Too Little Oil: Oil helps conduct heat, brown the food, and distribute seasoning. Don’t be afraid to use a reasonable amount.
5. Essential Skill: Mastering Seasoning
This isn’t a “technique” in the same way as the others, but it’s arguably the most crucial skill for making food taste good.
Why It’s Essential
Proper seasoning elevates a dish from bland to brilliant. It makes flavors pop and balances different tastes.
How to Season Effectively
- Salt is Your Best Friend: Salt doesn’t just make things salty; it enhances all other flavors. Use kosher salt or sea salt for cooking.
- Season in Layers: Don’t just season at the end. Season ingredients as you cook them (e.g., season vegetables when you sauté them, season water for boiling pasta).
- Taste, Taste, Taste! This is the golden rule. Always taste your food as you cook. Adjust seasoning as needed. You can always add more salt, but you can’t take it away!
- Beyond Salt & Pepper: Don’t forget other flavor enhancers like fresh herbs, dried spices, acids (lemon juice, vinegar), and umami boosters (soy sauce, nutritional yeast, tomato paste).
Common Mistakes to Avoid
- Not Enough Salt: The most common reason home-cooked food tastes “flat.” Don’t be shy, but add gradually and taste.
- Seasoning Only at the End: Flavors develop better when seasoning is incorporated throughout the cooking process.
- Not Tasting: Relying solely on a recipe’s seasoning amounts without tasting is a recipe for disappointment. Every ingredient, every palate is different.
6. Essential Skill: Accurate Measuring
While baking often requires precision, even savory cooking benefits greatly from accurate measuring.
Why It’s Essential
Accurate measuring ensures consistency in your dishes. It helps you control flavor balance and ensures ingredients are in the right proportion to cook correctly.
How to Measure Accurately
- Dry Ingredients (Flour, Sugar, Spices):
- Spoon & Level: Spoon the ingredient into the measuring cup until overflowing, then use the back of a straight knife or a flat edge to level off the excess.
- Do not pack flour unless specified. Brown sugar should be packed.
- Liquid Ingredients (Water, Milk, Oil):
- Use liquid measuring cups with a spout and clear markings.
- Place the cup on a flat surface and read at eye level.
- Small Amounts (Teaspoons/Tablespoons): Use accurate measuring spoons. Level them off for dry ingredients.
Common Mistakes to Avoid
- Eyeballing Too Much: While some dishes are forgiving, start by measuring accurately until you develop an intuitive feel for quantities.
- Using Dry Cups for Liquids (or vice versa): They are designed differently for accuracy.
- Not Leveling: An un-leveled cup can significantly alter the amount of an ingredient.
General Tips for Every Beginner Cook
- Read the Entire Recipe First: Before you even chop an onion, read the recipe from start to finish. Understand the steps, ingredients, and timing.
- Mise en Place (Everything in its Place): This French culinary term means preparing all your ingredients before you start cooking. Chop your vegetables, measure your spices, and have everything ready. This makes cooking smoother and less stressful.
- Start Simple: Don’t try to make a gourmet meal on your first attempt. Begin with straightforward recipes like scrambled eggs, roasted vegetables, or a simple pasta dish.
- Clean As You Go: As you cook, wash used utensils and wipe down surfaces. This keeps your workspace tidy and makes post-meal cleanup much easier.
- Don’t Be Afraid to Make Mistakes: Everyone makes mistakes in the kitchen, even experienced chefs. Learn from them, adjust, and keep trying!
- Invest in a Few Good Tools: You don’t need a lot, but a good chef’s knife, a sturdy cutting board, a decent set of pots and pans, and reliable measuring tools will make a huge difference.
Conclusion: Your Culinary Adventure Awaits!
Learning to cook is a journey, not a destination. By focusing on these simple, foundational cooking techniques, you’re building a strong base that will serve you well for a lifetime of delicious meals. From the satisfying thud of a knife on a cutting board to the delightful sizzle of food in a hot pan, each technique unlocks new possibilities in your kitchen.
So, grab your apron, choose a recipe, and start practicing! The most important ingredient in any dish is confidence, and with these skills under your belt, you’re well on your way to becoming a confident, creative, and joyful cook. Happy cooking!
FAQ
Q. What is “mise en place” and why is it important for beginner cooks?
A. “Mise en place” is a French culinary term meaning “everything in its place.” For beginners, it involves prepping all your ingredients—chopping vegetables, measuring spices, portioning meats—before you even turn on the stove. This technique is crucial because it helps you stay organized, reduces stress during cooking, prevents last-minute scrambling for ingredients, and ensures that cooking steps flow smoothly without interruptions, leading to better results and less chance of burning food.
Q. What are some essential basic knife skills every beginner should master for efficiency and safety?
A. Beyond basic chopping, beginners should focus on learning how to hold a knife properly for control and safety (the “claw” grip for your non-dominant hand), and mastering a few fundamental cuts. These include the basic chop for rough cuts, the dice for uniform cubes (e.g., onions, carrots), and the mince for very small pieces (e.g., garlic, herbs). Prioritizing safety, such as using a stable cutting board and keeping your fingers tucked, is paramount. Consistent cuts also ensure ingredients cook evenly.
Q. How can I avoid burning food when sautéing or pan-frying, which often happens to beginners?
A. The key to successful sautéing or pan-frying without burning is understanding heat control and not overcrowding the pan. Use a medium-high heat setting and allow your pan to get hot before adding fat, then add your ingredients. Avoid piling too much food into the pan at once, as this lowers the temperature and steams the food instead of browning it. Cook in batches if necessary, and keep an eye on the food, stirring or flipping regularly to ensure even cooking and browning.
Q. What’s the difference between boiling and simmering, and when should I use each technique?
A. Boiling is when a liquid reaches its highest possible temperature, creating large, vigorous bubbles that break rapidly on the surface. It’s best for cooking pasta, blanching vegetables, or quickly cooking items that need a lot of heat. Simmering, on the other hand, involves cooking food in liquid just below boiling point, where small, gentle bubbles rise slowly to the surface. It’s ideal for developing flavors in soups, stews, sauces, or braising meats, as it cooks food slowly and evenly without toughening it.
Q. How do I properly season my food to enhance flavor, and what are common beginner mistakes?
A. Proper seasoning involves adding salt, pepper, and other herbs or spices throughout the cooking process, not just at the end. The most common beginner mistake is not adding enough salt, or adding it all at once at the very end. Start with a smaller amount, taste as you go, and adjust as needed. Remember that certain ingredients, like vegetables, absorb salt as they cook. Understanding how different herbs and spices complement various ingredients is also key, so start with simple combinations and experiment.
Q. Why is understanding food safety crucial for beginners, especially regarding cooking temperatures?
A. Food safety is non-negotiable for beginners to prevent foodborne illnesses. This primarily involves preventing cross-contamination (e.g., raw meat juices touching ready-to-eat foods) and cooking foods to safe internal temperatures. For instance, poultry needs to reach 165°F (74°C), ground meats 160°F (71°C), and whole cuts of pork, beef, and lamb at least 145°F (63°C). Investing in a simple meat thermometer is highly recommended for beginners to ensure food is cooked safely and thoroughly without overcooking.
Q. Can you give me a simple tip for making a basic pan sauce after cooking meat?
A. Absolutely! A simple pan sauce elevates many dishes. After cooking meat in a pan, remove the meat and drain excess fat, leaving behind the flavorful browned bits (fond). Deglaze the pan by pouring a small amount of liquid, like broth, wine, or even water, into the hot pan. Use a wooden spoon to scrape up all the fond from the bottom. Let the liquid simmer and reduce slightly until it thickens. You can finish it by whisking in a small knob of cold butter for richness and shine.