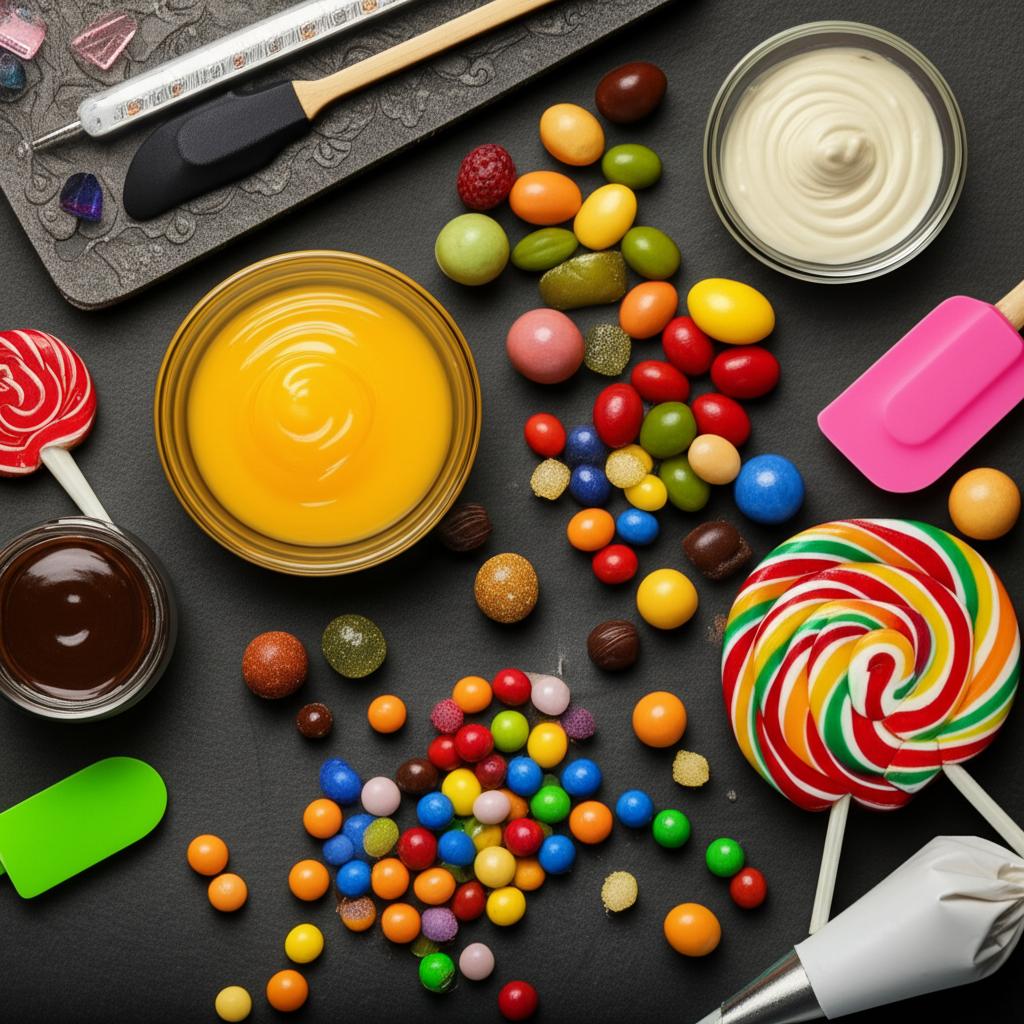
Unlock the Sweet Secrets: The Art of Making Homemade Candies
- Fimary Chocolate Bar Mold – Non-Stick Chocolate Molds, Food Grade Silicone Deep Mold for Dubai Pistachio, Candy, Snacks
- JOERSH Round Candy Molds Silicone Molds for Hard Candy, Gummy, Caramels, Chocolate, Ganache, Ice Cubes, 220 Cavity
- Flower Candy Molds Silicone 2PCS Daisy Flower Chocolate Molds Tulip Flower Molds Bow Tie Leaf Jello Molds Ice Mold Pudding Molds Soap Molds Cookie Molds for Desserts Making
There’s a unique magic in creating something delicious with your own hands, and when it comes to homemade candies, that magic is especially sweet! Imagine the aroma of vanilla and sugar filling your kitchen, the satisfying pour of a rich caramel, or the joy of seeing perfectly set fudge. Making your own candy isn’t just about the end product; it’s a delightful journey, a scientific dance, and an artistic expression.
This comprehensive guide will help you embark on your own candy-making adventure, turning simple ingredients into delectable treats. Get ready to impress your friends, delight your family, and discover the satisfying world of homemade candy crafting!
Why Dive into Homemade Candy Making?
Beyond the sheer deliciousness, there are many compelling reasons to try your hand at making candy at home:
- Personalization: Tailor flavors, colors, and textures to your exact liking. Have a favorite nut? Add it! Craving a specific spice? Include it!
- Quality Ingredients: You control what goes into your treats, opting for high-quality, fresh ingredients.
- Thoughtful Gifts: Handmade candies make incredibly personal and cherished gifts for any occasion.
- Fun & Rewarding: The process itself is incredibly engaging, and the sense of accomplishment when you create a perfect batch is truly rewarding.
- Cost-Effective: Often, making candy at home can be more economical than buying gourmet versions.
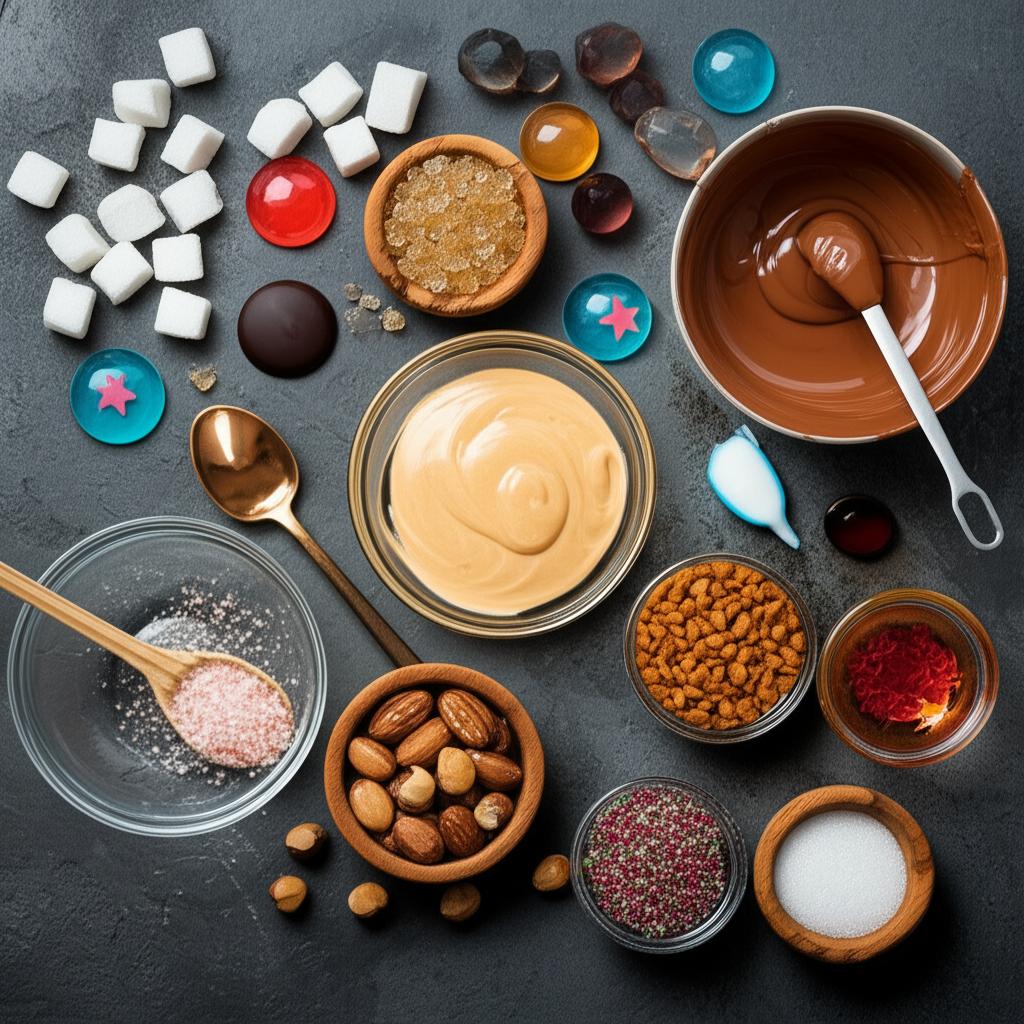
Essential Tools for Your Candy Making Journey
While the art of candy making seems complex, the basic tools are surprisingly simple. Accuracy is key, so investing in a few good pieces of equipment will make all the difference.
- Heavy-Bottomed Pot: This is your primary vessel. A heavy-bottomed pot (stainless steel is excellent) distributes heat evenly, preventing scorching, which is crucial for sugar-based confections.
- Candy Thermometer: Your best friend! A reliable candy thermometer is absolutely non-negotiable for most candy recipes. It measures the precise temperature of your sugar syrup, which directly dictates the final texture of your candy. Clip-on models that rest on the side of the pot are very convenient.
- Parchment Paper or Silicone Mats: For non-stick surfaces when pouring and cooling. Never skip lining your pans unless the recipe explicitly states otherwise.
- Measuring Cups and Spoons: Precision is vital in candy making. Accurate measurements ensure the right balance of ingredients for proper chemical reactions.
- Heat-Resistant Spatulas or Wooden Spoons: For stirring and scraping.
- Pastry Brush (Optional but Handy): A small brush for washing down sugar crystals from the sides of the pot (more on this later!).
- Candy Molds (Optional): If you’re making hard candies, lollipops, or chocolates, silicone or metal molds are fantastic.
Understanding Sugar Stages: The Science Behind the Sweetness
The magic of candy making largely hinges on understanding sugar stages. As sugar syrup heats up, water evaporates, concentrating the sugar and increasing its temperature. Each specific temperature corresponds to a unique consistency when the syrup cools, defining the type of candy you’ll create. This is where your candy thermometer is indispensable.
Here are the most common sugar stages and the candies they produce:
- Thread Stage (223-235°F / 106-113°C): When dropped in cold water, it forms fine threads. Used for syrups, glazes.
- Soft Ball Stage (235-245°F / 118-121°C): Forms a soft, pliable ball when dropped in cold water. Perfect for fudge, soft caramels, and nougat.
- Firm Ball Stage (245-250°F / 121-126°C): Forms a firm, but still pliable ball. Used for divinity and firm caramels.
- Hard Ball Stage (250-265°F / 126-130°C): Forms a rigid, but still moldable ball. Ideal for taffy and marshmallows.
- Soft Crack Stage (270-290°F / 132-143°C): Separates into threads that are firm but still pliable when dropped in cold water. Used for butterscotch and some toffees.
- Hard Crack Stage (300-310°F / 149-154°C): Separates into brittle, hard threads. This is the stage for hard candies, brittle, and lollipops.
- Caramel Stage (320-350°F / 160-177°C): The sugar begins to turn golden brown and develops a nutty flavor. Be cautious, as it can burn quickly at this stage!
Always remember: A difference of just a few degrees can completely change your candy’s texture!
The Journey: Step-by-Step Guide to Homemade Candy
While specific recipes will have their nuances, the general process for most sugar-based candies follows these foundational steps:
1. Gather Your Ingredients & Prep Your Space
- Read the Entire Recipe: Before you even think about turning on the stove, read your chosen recipe from start to finish. Understand every step.
- Measure Precisely: Get all your ingredients measured out and ready (this is called “mise en place”). Accuracy is paramount in candy making.
- Prepare Your Pans: Line baking sheets or molds with parchment paper or silicone mats. Have them ready and within arm’s reach. For some recipes, you might need to butter or oil them lightly.
- Set Up an Ice Bath (Optional but Recommended): For quick cooling, have a large bowl of ice water ready. This is especially useful for stopping the cooking process precisely at the target temperature.
2. The Melting Pot: Cooking Your Sugar Syrup
- Combine Ingredients: In your heavy-bottomed pot, combine the sugar, water, corn syrup (if using), and any other liquid ingredients as per your recipe. Corn syrup helps prevent crystallization.
- Gentle Heat: Begin heating the mixture over low to medium heat. Stir gently just until the sugar dissolves.
- Avoid Excessive Stirring: Once the sugar has fully dissolved and the mixture comes to a boil, resist the urge to stir constantly. Stirring can introduce air bubbles and encourage crystallization (the formation of gritty sugar crystals).
- Wash Down Crystals: If you see sugar crystals forming on the sides of the pot, use a wet pastry brush to gently wash them back into the syrup. These errant crystals can act as “seeds” and cause the entire batch to crystallize.
3. The Temperature Dance: Monitoring with Your Thermometer
- Clip On Your Thermometer: Once the syrup is boiling, attach your candy thermometer to the side of the pot, ensuring the tip is submerged in the syrup but not touching the bottom.
- Watch Carefully: Allow the syrup to cook undisturbed (or with minimal, gentle stirring if the recipe requires) until it reaches the exact temperature specified by your recipe for the desired sugar stage.
- Patience is a Virtue: Don’t rush it. The temperature rise might seem slow, then accelerate towards the end.
4. The Grand Finale: Cooling & Setting
- Remove from Heat Immediately: As soon as your candy reaches the target temperature, remove the pot from the heat.
- Add Flavorings/Butter (If Required): Stir in butter, vanilla, extracts, or colorings after removing from heat, unless the recipe specifies otherwise.
- Don’t Stir (Unless Directed): For many candies (like brittle or hard candy), do not stir once removed from heat. Agitation can encourage crystallization. For fudge or divinity, stirring or beating is crucial for the correct texture at specific cooling temperatures. Follow your recipe precisely here.
- Pour & Cool: Carefully pour the hot candy onto your prepared lined baking sheet, into molds, or onto a marble slab.
- Cool Completely: Allow the candy to cool and set completely before cutting, wrapping, or storing. This can take several hours, or even overnight, depending on the candy. Resist the temptation to cut too early, as it can affect the texture.
5. The Sweet Reward: Finishing Touches
- Cut & Break: Once fully cooled, cut your candy into pieces, or break brittle into shards.
- Wrap & Store: Wrap individual pieces if necessary to prevent sticking, and store according to the recipe’s recommendations.
Sweet Success: Tips for the Aspiring Candymaker
- Read the Recipe Twice: Seriously, do it!
- Measure Accurately: This cannot be stressed enough. Precision is critical.
- Patience is Key: Don’t rush the heating or cooling processes.
- Humidity is Your Enemy: Sugar is hygroscopic, meaning it absorbs moisture from the air. Avoid making candy on humid or rainy days if possible, as it can lead to sticky, weeping candy.
- Cleanliness Matters: Ensure your pot and utensils are spotlessly clean to prevent sugar crystals from forming.
- Safety First: Boiling sugar syrup is extremely hot and can cause severe burns. Always handle with extreme caution and keep children and pets away from the cooking area.
- Calibrate Your Thermometer: To ensure accuracy, you can test your candy thermometer in boiling water (it should read 212°F / 100°C at sea level). Adjust recipes accordingly if it’s off.
Avoiding Sticky Situations: Common Candy Making Mistakes
Even experienced candymakers encounter challenges. Here are some common pitfalls and how to avoid them:
- Not Using a Thermometer: This is the #1 mistake. Guessing temperatures will almost always lead to failure. Get a reliable candy thermometer!
- Crystallization (Gritty Candy): This happens when sugar crystals form in your batch, making it gritty.
- Prevention: Don’t stir excessively once boiling; wash down sugar crystals from the sides of the pot; add a little corn syrup (if the recipe allows) as it inhibits crystallization.
- Stirring Too Much/Too Little: Follow recipe instructions precisely. Some candies require beating (like fudge after it cools slightly), while others (like hard candy) should not be stirred once boiling.
- Humidity: As mentioned, humidity can ruin your batch. If it’s a humid day, postpone your candy-making plans.
- Impatience: Pulling the candy off the heat too early will result in a soft, runny mess. Cutting too early can make your candy crumble or stick. Let it reach the correct temperature and cool completely.
- Incorrect Cooling: Some candies need to cool undisturbed; others need to be worked or beaten at specific temperatures. Always follow the recipe’s cooling instructions carefully.
Storing Your Sweet Creations
Proper storage helps maintain freshness and texture:
- Airtight Containers: Most candies should be stored in airtight containers at room temperature to protect them from moisture and air.
- Cool, Dry Place: Avoid direct sunlight or warm spots, which can cause melting or stickiness.
- Separate Layers: For sticky candies, place parchment paper between layers to prevent them from sticking together.
- Refrigeration/Freezing: Some candies (like fudge) can be refrigerated or frozen, but check your specific recipe for recommendations. Be aware that refrigeration can sometimes alter texture.
Conclusion: Embrace the Sweet Journey!
Making homemade candies is a truly rewarding experience, transforming simple ingredients into edible works of art. While it requires a bit of patience and precision, the satisfaction of creating your own sweet treats from scratch is immeasurable.
So, gather your tools, choose a recipe that excites you, and don’t be afraid to experiment! With practice, you’ll gain confidence, understand the nuances of sugar, and soon be crafting delectable homemade candies that will bring joy to everyone who tastes them. Happy candy making!
- Fimary Chocolate Bar Mold – Non-Stick Chocolate Molds, Food Grade Silicone Deep Mold for Dubai Pistachio, Candy, Snacks
- JOERSH Round Candy Molds Silicone Molds for Hard Candy, Gummy, Caramels, Chocolate, Ganache, Ice Cubes, 220 Cavity
- Flower Candy Molds Silicone 2PCS Daisy Flower Chocolate Molds Tulip Flower Molds Bow Tie Leaf Jello Molds Ice Mold Pudding Molds Soap Molds Cookie Molds for Desserts Making
FAQ
Q. What are the essential tools and ingredients I need to start making homemade candies?
A. The most crucial tool is a reliable candy thermometer. You’ll also need a heavy-bottomed pot to prevent scorching, measuring cups and spoons, and a whisk or sturdy spoon. Core ingredients typically include granulated sugar, corn syrup (to prevent crystallization), water, butter, and flavorings or extracts. Depending on the candy, you might also need cream, chocolate, nuts, or food coloring.
Q. My homemade candy turned out grainy or sugary. What went wrong and how can I prevent it?
A. This is a common issue called crystallization. It usually happens when sugar crystals, either from un-dissolved sugar on the sides of the pan or from stirring during the cooking process, cause the entire batch to seize up and become grainy. To prevent this, ensure all sugar crystals are dissolved before the mixture boils, avoid stirring once it reaches a boil, and use a wet pastry brush to wash down any sugar crystals on the sides of the pot. Adding a small amount of corn syrup or an acidic ingredient like lemon juice also helps inhibit crystallization.
Q. My candy isn’t setting or is too soft. What did I do wrong?
A. The most likely reason your candy isn’t setting is that it didn’t reach the correct temperature. Each type of candy requires a specific temperature for its ideal texture (e.g., soft ball, firm ball, hard crack). If it’s undercooked, it won’t harden properly. High humidity can also affect setting. Ensure your candy thermometer is accurate and that you cook the mixture precisely to the temperature specified in the recipe.
Q. How should I properly store homemade candies to keep them fresh?
A. Most homemade candies should be stored in an airtight container at room temperature in a cool, dry place away from direct sunlight. Humidity is a big enemy of candy, causing stickiness or softening, so avoid storing them in humid environments or the refrigerator unless the recipe specifically calls for it (like some chocolate-based candies or fudge). For longer storage, some candies can be frozen in airtight containers or freezer bags.
Q. Is a candy thermometer absolutely necessary, or can I just eyeball the doneness?
A. While experienced confectioners might be able to gauge doneness by the “cold water test” or visual cues, a candy thermometer is highly recommended and almost essential for consistent success, especially for beginners. Candy making is a science where precise temperatures determine the final texture and consistency. Being even a few degrees off can result in a candy that is too soft, too hard, or crystallizes. Investing in a good quality candy thermometer will save you frustration and ingredients.
Q. Can I substitute ingredients in candy recipes, especially different types of sugar or sweeteners?
A. Generally, it’s best to stick to the specific type of sugar and other sweeteners (like corn syrup) indicated in the recipe. Different sugars (granulated, brown, powdered, liquid) behave differently when heated and affect crystallization, texture, and flavor. Substituting them without understanding the chemical implications can lead to failed batches. However, you can often experiment with flavorings, extracts, food colorings, and add-ins like nuts or dried fruits once you have mastered the basic recipe.
Q. What are some safety precautions I should take when making homemade candies?
A. When making candy, you’re dealing with extremely hot sugar syrup, which can cause severe burns if not handled carefully. Always use a pot large enough to prevent boil-overs, and never leave boiling sugar unattended. Keep children and pets away from the cooking area. Use long-handled utensils, wear oven mitts, and be extra careful when pouring or stirring. In case of a burn, immediately run cold water over the affected area and seek medical attention if necessary.