The Art of Pickling: Crafting Tangy & Delicious Preserves at Home
- Ball Wide Mouth Glass Mason Jars with Lids and Bands, Used for Canning, Pickling, Juice, Jam, Jelly, Quart Size 32 Ounce (Pack of 2)
- Galssmagic 32 oz Wide Mouth Mason Jars,4 Pack Glass Pickling Jars with Airtight Lids,Air Tight Glass Storage Container for Canning,Pickling,Fermenting
- Miuyhji Wide Mouth Mason Jars 16 oz with Lids [6 Pack], Canning Jars with Metal Airtight Lids and Bands, 16 oz Glass Jars for Fermenting, Pickling, Freezing, Preserving, Meal Prep, Jar Décor
Imagine a crisp, tangy bite that awakens your taste buds, a burst of flavor that complements any meal. That’s the magic of pickling! Far more than just preserving cucumbers, pickling is a delightful culinary art form that allows you to transform fresh vegetables and fruits into vibrant, flavorful preserves. It’s a rewarding journey that connects you to food in a whole new way, offering endless possibilities for creativity in your kitchen.
This comprehensive guide will walk you through the fascinating world of pickling, from basic principles to advanced tips, ensuring your first batch is a resounding success. Get ready to embrace the tang!
Why Embark on Your Pickling Journey?
Pickling isn’t just a trend; it’s a timeless tradition with incredible benefits:
- Explosive Flavor: Pickling transforms the taste of ingredients, adding a unique sour, sweet, and savory dimension that’s utterly addictive.
- Extend Shelf Life: It’s a fantastic way to preserve the bounty of your garden or farmer’s market, enjoying fresh produce long after its season has passed.
- Reduce Food Waste: Have an abundance of cucumbers, green beans, or even carrots? Pickle them instead of letting them go to waste!
- Health Benefits: While many associate pickling with vinegar, traditional lacto-fermented pickles (which we’ll touch on) are packed with beneficial probiotics for gut health.
- Ultimate Customization: You control the ingredients, spices, and level of tanginess, creating preserves perfectly suited to your palate.
- Satisfying & Rewarding: There’s immense satisfaction in opening a jar of homemade pickles, knowing you created something delicious from scratch.
The Essential Elements of Pickling
At its heart, pickling involves submerging food in an acidic brine. Let’s break down the key players:
-
Your Produce: The star of the show!
- Freshness is Key: Always start with fresh, crisp, and unblemished produce. Limp or bruised vegetables will result in limp pickles.
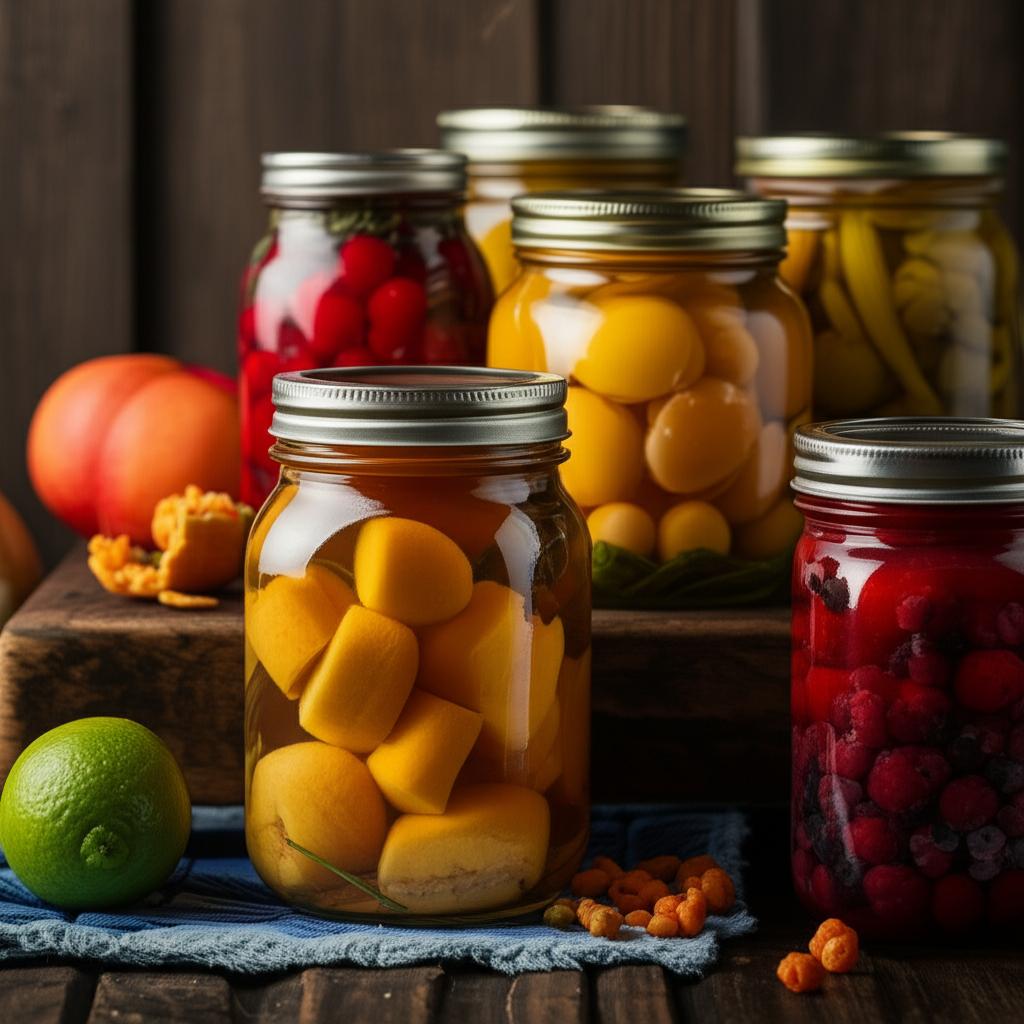
- Common Choices: Cucumbers (pickling varieties like Kirby or Gherkin are best), green beans, carrots, asparagus, bell peppers, onions, cauliflower, radishes, and even some fruits like peaches or cherries.
-
The Brine: This is where the magic happens.
- Vinegar: The backbone of your brine, providing the essential acidity for preservation and flavor. White vinegar, apple cider vinegar, and rice vinegar are popular choices. Ensure it has at least 5% acidity (standard for most vinegars). Do NOT use vinegars with lower acidity for safety.
- Salt: Crucial for flavor, texture (keeping things crisp), and aiding in the preservation process. Use pickling salt or kosher salt. These are pure salts without anti-caking agents or iodine, which can turn your brine cloudy and affect color. Never use iodized table salt.
- Water: Use clean, filtered water. Tap water with high mineral content or chlorine can sometimes affect the clarity and flavor of your pickles.
- Sugar (Optional but Recommended): Balances the acidity of the vinegar and enhances overall flavor. Adjust to your preference for a sweeter or tangier pickle.
- Spices & Aromatics: This is where you infuse your signature flavor! Common additions include:
- Dill (fresh or dried dill weed/seed)
- Garlic cloves
- Mustard seeds
- Coriander seeds
- Fennel seeds
- Peppercorns (black, white, or mixed)
- Red pepper flakes (for heat)
- Bay leaves
- Celery seeds
- Pickling spice blends
-
Your Equipment: Simple tools for a seamless process.
- Glass Canning Jars: Mason jars or similar glass jars with two-piece lids (flat lid and screw band) are ideal. Always use jars designed for canning if you plan to water-bath process for shelf stability.
- Large Pot: For preparing the brine and for water-bath processing (if applicable).
- Jar Lifter: Essential for safely removing hot jars from boiling water.
- Canning Funnel: Helps pour brine without spills.
- Ladle: For scooping brine.
- Vegetable Peeler, Knife, Cutting Board: For prepping your produce.
- Clean Towels: For wiping jar rims.
Your Step-by-Step Pickling Journey Begins!
This guide focuses on the most common method: vinegar pickling (also known as quick pickling or refrigerator pickling). While some steps apply to traditional water-bath canning for shelf stability, we’ll clearly indicate when that’s an additional step.
Step 1: Prep Your Produce with Precision
- Wash Thoroughly: Rinse all vegetables or fruits under cold running water.
- Trim & Cut: Remove any stems, ends, or blemishes. Cut your produce into desired shapes and sizes – spears, slices, chips, or whole. Aim for uniform pieces so they pickle evenly. For cucumbers, you can slice off both ends to help prevent enzymatic softening.
Step 2: Prepare Your Jars (Crucial for Safety!)
- Wash & Sterilize: Even if making refrigerator pickles, it’s good practice to ensure your jars are as clean as possible. For shelf-stable pickles (water-bath canning), sterilization is paramount.
- Wash jars, lids, and bands in hot, soapy water. Rinse well.
- To Sterilize: Place clean jars in a large pot, cover with water, and bring to a boil for at least 10 minutes. Keep them in the hot water until ready to fill. New lids (the flat part) do not need to be boiled; just warm them in simmering water. Bands just need to be clean.
Step 3: Craft Your Delicious Brine
- Classic Ratio (Starting Point): A common ratio is 1 part vinegar to 1 part water, with about 1 tablespoon of pickling salt per cup of liquid. Adjust sugar to taste.
- Example: For 4 cups of brine, you might use 2 cups vinegar, 2 cups water, 4 tablespoons pickling salt, and 2-4 tablespoons sugar.
- Combine & Heat: In a non-reactive pot (stainless steel or enamel), combine your vinegar, water, salt, and sugar.
- Dissolve & Simmer: Bring the mixture to a rolling boil, stirring occasionally to ensure the salt and sugar dissolve completely. Once dissolved, reduce heat to a simmer.
Step 4: Pack Those Jars Snugly
- Add Aromatics First: To each hot, sterilized jar, add your desired spices and aromatics (e.g., a sprig of fresh dill, 1-2 garlic cloves, ½ tsp mustard seeds, a pinch of red pepper flakes).
- Pack Your Produce: Carefully pack your prepped vegetables or fruit into the hot jars. Pack them snugly but not so tightly that you can’t pour brine around them. Leave about ½ to ¾ inch of headspace (the space between the top of the food and the rim of the jar).
Step 5: Pour & Seal
- Pour Hot Brine: Using a canning funnel and ladle, carefully pour the hot brine over your packed produce, ensuring everything is submerged. Maintain that ½ to ¾ inch headspace.
- Remove Air Bubbles: Use a clean, non-metallic utensil (like a chopstick or plastic knife) to gently dislodge any trapped air bubbles by running it along the inside of the jar.
- Wipe Rims: Wipe the rims of the jars clean with a damp cloth. Any food or liquid on the rim can prevent a proper seal.
- Apply Lids & Bands: Center a warmed lid on each jar, then screw on the band until it’s finger-tight (just snug, not overly tightened).
Step 6: Process for Shelf-Stability (Optional, but Recommended for Long-Term Storage)
If you want shelf-stable pickles that don’t require refrigeration until opened, you MUST water-bath can. If you’re making refrigerator pickles, skip this step and go to Step 7.
- Prepare Your Canner: Place a canning rack in the bottom of a large stockpot or canning pot. Fill the pot halfway with water and bring it to a boil.
- Load Jars: Carefully lower the filled, sealed jars onto the rack using a jar lifter, ensuring they don’t touch each other. Add more boiling water if needed, so the tops of the jars are covered by at least 1 inch of water.
- Process: Bring the water back to a full, rolling boil. Start your timer only when the water reaches a full boil. Processing times vary depending on the recipe and altitude; always follow a trusted recipe for specific times. (e.g., 10-15 minutes for cucumber pickles).
- Remove & Cool: Once processing is complete, turn off the heat. Let the jars sit in the hot water for 5 minutes before carefully removing them with a jar lifter. Place them on a wire rack or folded towel, spaced apart, to cool completely for 12-24 hours.
Step 7: Cool & Wait (The Hardest Part!)
- Cooling: For both refrigerator and water-bath processed pickles, allow the jars to cool undisturbed at room temperature. For water-bath processed jars, you’ll hear a satisfying “pop” as the lids seal.
- Check Seals (Water-Bath Only): After 12-24 hours, press on the center of each lid. If it doesn’t flex, the jar is sealed. If a lid doesn’t seal, refrigerate that jar and consume it within a few weeks.
- Patience is a Virtue: Your pickles will taste best after they’ve had time to marinate and absorb the flavors. Wait at least 1-2 weeks (or even 3-4 weeks for best flavor) before opening and enjoying your shelf-stable pickles. Refrigerator pickles can be enjoyed after a few days, but their flavor deepens over a week or two.
Expert Tips for Pickling Success
- Always Use Fresh Produce: This cannot be stressed enough. Crisp produce makes crisp pickles.
- Chill Your Produce: Some picklers prefer to chill their vegetables in an ice bath for an hour before packing to ensure maximum crispness.
- Grape Leaves for Crunch: Adding a clean grape leaf to each jar can help keep pickles crisp. The tannins in the leaf inhibit enzymes that cause softening.
- Don’t Overpack: While you want a snug fit, don’t jam vegetables in too tightly. This prevents proper brine circulation and can lead to uneven pickling or breakage.
- Label and Date: Once cooled, label your jars with the contents and the date they were made. This is especially helpful if you’re experimenting with different recipes.
- Experiment with Flavors: Don’t be afraid to try different spice combinations. Star anise for an Asian flair, bay leaves for a herbal note, or a touch of smoked paprika for depth.
- Altitude Adjustments: If you live at high altitudes, you may need to adjust your processing times for water-bath canning. Consult a reliable canning guide for specific adjustments.
Common Pickling Pitfalls to Avoid
- Using Iodized Salt: As mentioned, it causes cloudy brine and can affect the color of your pickles. Stick to pickling salt or pure kosher salt.
- Skipping Sterilization or Proper Canning Practices: This is a major safety concern when making shelf-stable preserves. Improperly processed jars can lead to spoilage or, worse, dangerous bacteria growth like botulism. Follow trusted recipes and guidelines meticulously.
- Limp or Old Produce: You can’t make crisp pickles from limp vegetables. Start with the best quality ingredients.
- Incorrect Headspace: Too little headspace can cause lids to buckle or jars to break during processing. Too much can result in food discoloring at the top of the jar or an inadequate vacuum seal. Follow the recipe’s recommended headspace.
- Eating Too Soon: The waiting period is crucial for the flavors to meld and deepen. Resist the urge to open them immediately!
- Forgetting to Remove Air Bubbles: Trapped air can lead to discoloration or floating produce.
- Ignoring Signs of Spoilage: If you see mold, extreme cloudiness (beyond initial normal cloudiness), bubbling (after cooling), or an off-smell, DO NOT TASTE OR EAT. Discard the contents immediately. “When in doubt, throw it out” is the golden rule of home preservation.
Beyond the Cucumber: Flavor Adventures!
While dill pickles are a classic, the pickling world is vast and exciting:
- Spicy Pickled Green Beans: Add red pepper flakes, whole dried chilies, or a sliced jalapeño to your brine.
- Sweet & Sour Pickled Carrots: Increase the sugar in your brine and add warm spices like cinnamon sticks or star anise.
- Pickled Red Onions: Perfect for tacos, salads, or sandwiches, made with a simple apple cider vinegar brine.
- Bread and Butter Pickles: A classic sweet and savory cucumber pickle with onions and mustard seed.
- Pickled Asparagus: A gourmet treat, fantastic in a Bloody Mary or as a side dish.
- Pickled Peaches or Cherries: A surprising sweet-tart preserve that pairs wonderfully with meats or cheeses.
Storage & Enjoyment
- Refrigerator Pickles: Store in the refrigerator for up to 1-2 months.
- Water-Bath Canned (Shelf-Stable) Pickles: Store in a cool, dark place (like a pantry) for up to 1 year. Once opened, refrigerate and consume within a few weeks.
- Serving Suggestions: Enjoy your homemade pickles straight from the jar, chop them for salads, use them to garnish sandwiches or burgers, or serve them as a tangy side to rich meals.
Embrace the Tang!
The art of pickling is a truly rewarding endeavor. With a little patience and attention to detail, you can transform fresh ingredients into an array of tangy, delicious preserves that will delight your palate and impress your friends and family. So gather your fresh produce, prepare your brine, and start your pickling adventure today! Your taste buds will thank you.
- Ball Wide Mouth Glass Mason Jars with Lids and Bands, Used for Canning, Pickling, Juice, Jam, Jelly, Quart Size 32 Ounce (Pack of 2)
- Galssmagic 32 oz Wide Mouth Mason Jars,4 Pack Glass Pickling Jars with Airtight Lids,Air Tight Glass Storage Container for Canning,Pickling,Fermenting
- Miuyhji Wide Mouth Mason Jars 16 oz with Lids [6 Pack], Canning Jars with Metal Airtight Lids and Bands, 16 oz Glass Jars for Fermenting, Pickling, Freezing, Preserving, Meal Prep, Jar Décor
FAQ
Q. What exactly is pickling, and what are its main benefits?
A. Pickling is a food preservation method that uses an acidic solution, typically vinegar or a salt brine, to extend the shelf life of fruits and vegetables. Beyond preservation, pickling enhances flavors, adding a distinct tangy, sweet, or savory profile to foods, and in the case of fermentation, it can introduce beneficial probiotics for gut health.
Q. What are the essential equipment and ingredients I need to start pickling at home?
A. To begin, you’ll need canning jars with new lids and bands, a large pot for brining and/or water bath canning, basic kitchen utensils (ladle, funnel), and a clean workspace. For ingredients, you’ll typically need fresh, firm produce, pickling salt (non-iodized), vinegar (white, apple cider, or rice vinegar, usually 5% acidity), sugar, and various spices like dill, mustard seeds, or peppercorns for flavor.
Q. Can I pickle almost any fruit or vegetable, or are there specific ones that work best?
A. While many fruits and vegetables can be pickled, some lend themselves better to the process due to their texture and flavor profile. Common favorites include cucumbers, cabbage, carrots, green beans, onions, cauliflower, and even some fruits like peaches or cherries. The key is to select fresh, firm produce without blemishes, as this greatly impacts the final texture and quality of your preserves.
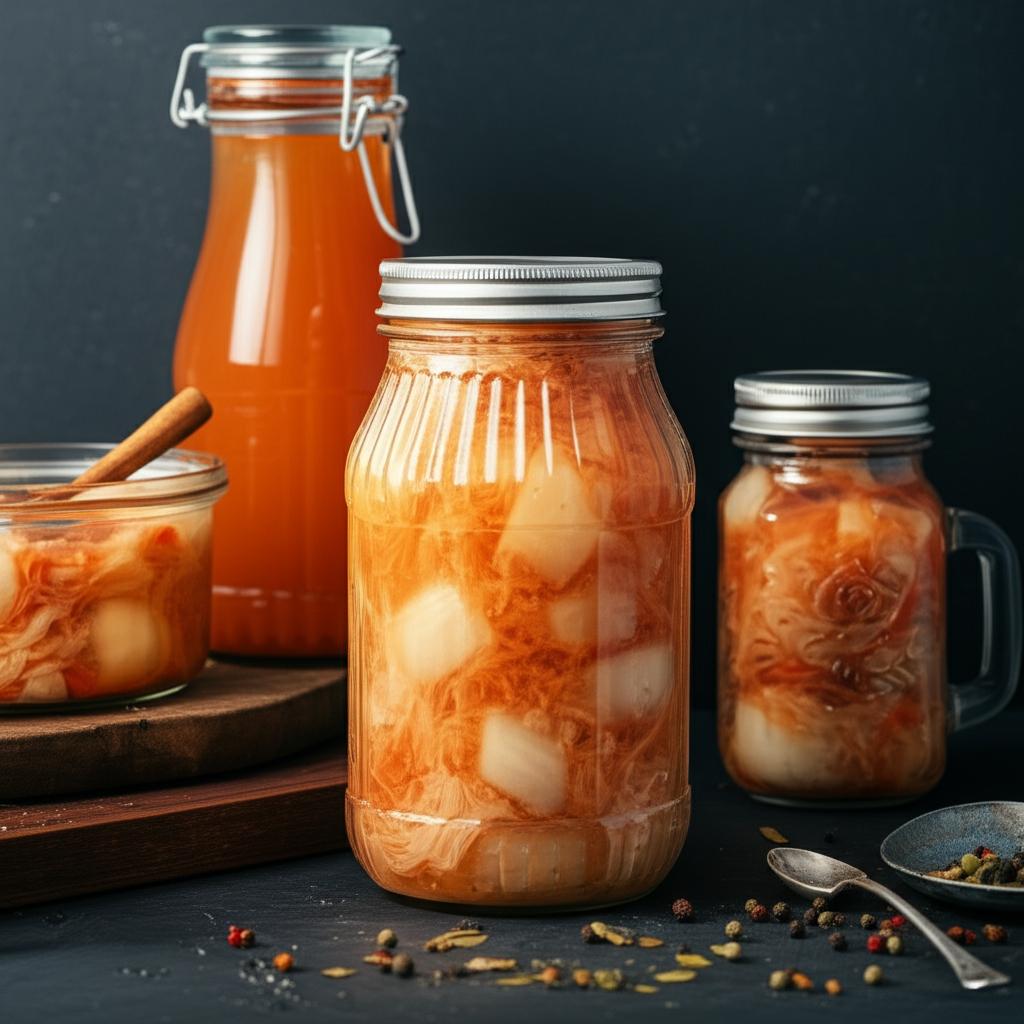
Q. What’s the difference between quick pickling and fermentation, and which method is right for me?
A. Quick pickling (or refrigerator pickling) involves pouring a hot vinegar-based brine over fresh produce and refrigerating it. These pickles are ready quickly but require refrigeration and last for a few weeks. Fermentation, on the other hand, relies on beneficial bacteria converting sugars in a salt brine into lactic acid, which preserves the food. Fermented pickles develop more complex flavors, offer probiotic benefits, are shelf-stable for longer once properly sealed, and take more time. Your choice depends on desired flavor, shelf life, and whether you want probiotic benefits.
Q. How can I ensure my homemade preserves are safe to eat and avoid spoilage?
A. Food safety is paramount in pickling. Always use clean and sterilized jars and lids. Follow recipes precisely, especially regarding vinegar-to-water ratios, as the acidity is key to preventing harmful bacteria. Ensure jars are properly sealed if using a water bath canning method. Store pickled goods in a cool, dark place, and refrigerate once opened. Discard any pickles that show signs of mold, have an off odor, or whose lids have unsealed.
Q. My pickles sometimes turn out soft or mushy. What causes this, and how can I keep them crisp?
A. Mushy pickles are a common issue often caused by using older or less firm produce, overcooking during the brining or canning process, or improper brine ratios. To maintain crispness, start with very fresh, firm produce (even ice-bathing them before pickling can help). Avoid over-processing during canning. Adding a tannin-rich ingredient like a grape leaf or bay leaf to each jar can help, as can a small amount of pickle crisp (calcium chloride), which strengthens cell walls.