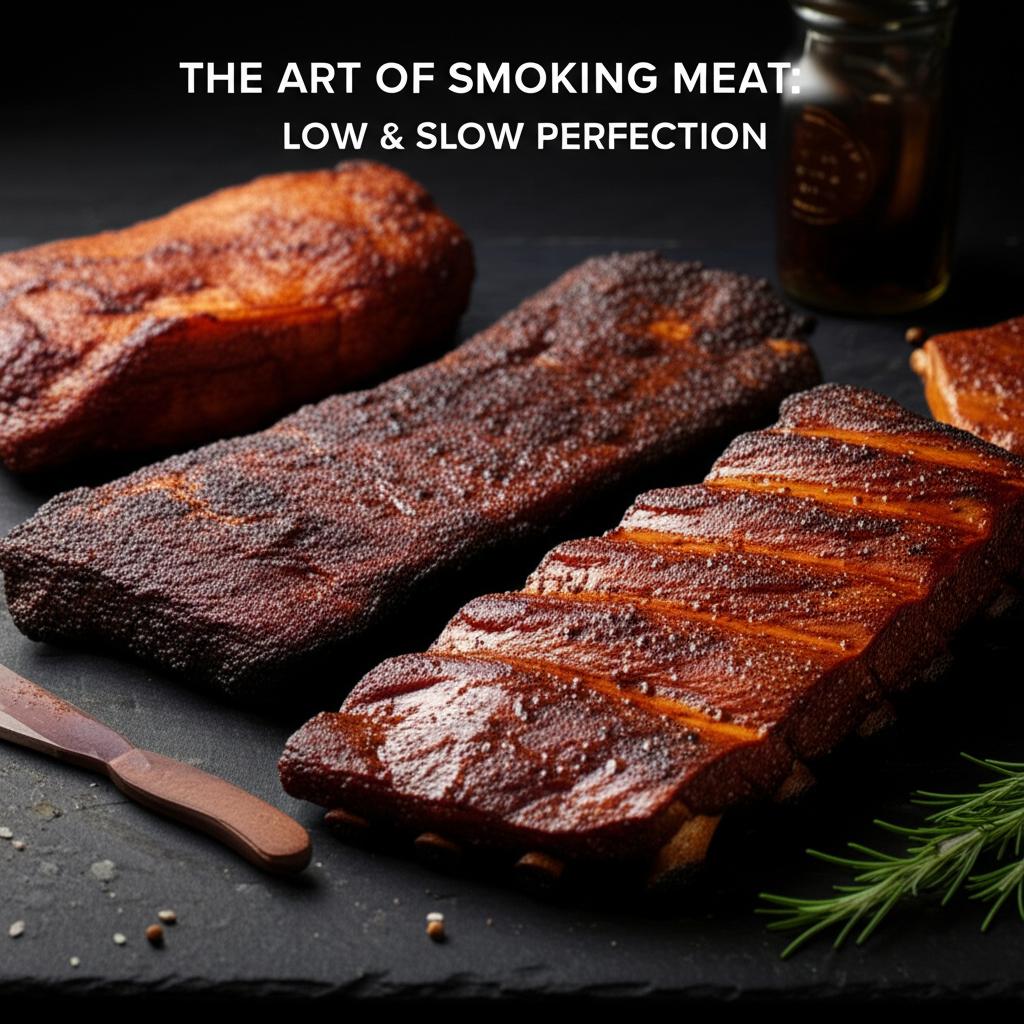
The Art of Smoking Meat: Unlocking Low & Slow Perfection
- EAST OAK 30″ Electric Smoker for Outdoors | Built-in Meat Probe & Up to 6× Longer Smokes on a Single Load | Side Chip Loader for Uninterrupted Smoking | Bigger Batches with 725 sq in Cooking Area
- Masterbuilt® 30-inch Digital Electric Vertical BBQ Smoker with Leg Kit, Side Wood Chip Loader and 710 Cooking Square Inches in Black, Model MB20070421
- Pellet Grill Cover for Traeger Pro 22/575 Series with Waterproof Zipper, 600D Fade Resistant & Rip-Proof Smoker Fabric, Full-Length Grill Accessories for Century 22 and More (Cover Only)
There’s a magical alchemy that happens when meat meets smoke and low, consistent heat. The aroma alone can transport you to a backyard barbecue dreamscape, promising succulent, fall-apart tender results. This isn’t just cooking; it’s The Art of Smoking Meat, a craft centered on the philosophy of “low and slow”.
Forget high-heat grilling that crisps and chars. Smoking is about patience, transformation, and creating unparalleled depth of flavor. If you’ve ever dreamt of pulling apart a perfectly smoked brisket or sinking your teeth into juicy, tender ribs, you’re in the right place. This guide will walk you through the journey to becoming a low & slow perfectionist.
Why “Low & Slow” is the Secret Sauce
The magic of smoking at lower temperatures (typically between 225°F and 275°F) for extended periods lies in its effect on the meat’s structure.
* Collagen Breakdown: Tough connective tissues (collagen) in cuts like brisket or pork shoulder slowly break down into gelatin at these lower temperatures. This is what transforms a notoriously tough cut into something incredibly tender and melt-in-your-mouth.
* Moisture Retention: Unlike high-heat cooking, low and slow allows the meat to slowly release moisture while simultaneously absorbing smoky goodness, preventing it from drying out. The result is consistently juicy, flavorful meat.
* Smoke Penetration: The longer exposure to smoke at lower temperatures allows the flavors from your chosen wood to deeply infuse into the meat, creating that characteristic “smoke ring” and complex taste.
The Essentials: Preparing Your Masterpiece
Before the smoke begins, thoughtful preparation sets the stage for success.
1. Choosing Your Canvas (The Meat)
Not all cuts are created equal for smoking. Focus on cuts with good marbling and connective tissue that will benefit from the low and slow process.
* Brisket: The king of smoked meats, notoriously tough but transforms into incredibly tender, flavorful slices.
* Pork Shoulder (Boston Butt): Perfect for pulled pork, it’s forgiving and flavorful.
* Ribs (Pork or Beef): A BBQ staple that becomes wonderfully tender.
* Beef Ribs: Richer and beefier than pork, equally rewarding.
* Whole Chicken/Turkey: Great for juicy, smoked poultry.
Always opt for high-quality meat from a reputable source.
2. The Flavor Foundation (Rubs & Marinades)
This is where much of your external flavor and “bark” (the flavorful crust) will come from.
* Dry Rubs: A blend of salt, sugar, spices, and herbs applied directly to the meat. Rubs create a fantastic bark and contribute significantly to the overall flavor. Apply generously and allow it to sit on the meat for several hours, or even overnight, in the refrigerator.
* Marinades: Liquid mixtures that can tenderize and flavor the meat. While less common for large smoking cuts (as they can inhibit bark formation), they work well for poultry or thinner cuts.
3. The Art of Trimming
Trimming fat is crucial for even cooking and allowing smoke to penetrate the meat.
* Brisket: Trim the hard, excess fat down to about 1/4 to 1/2 inch. This allows for better smoke penetration and a perfect bark.
* Pork Shoulder: Trim any large, hard fat pockets.
* Ribs: Remove the silver skin from the back of the ribs. This thin membrane becomes tough when cooked and prevents seasoning from penetrating.
4. The Aromatic Fuel (Wood Selection)
The type of wood you choose dramatically impacts the flavor profile of your smoked meat.
* Mild (Fruity/Sweet): Apple, Cherry, Pecan. Great for poultry, pork, and lighter meats.
* Medium (Balanced): Oak, Maple. Versatile and good for almost anything.
* Strong (Robust): Hickory, Mesquite. Best for beef and pork, but use sparingly as they can be overpowering.
Use wood chunks or chips (soaked for a short time or unsoaked, depending on your smoker type) for clean, consistent smoke. Avoid using chemically treated wood or scrap lumber.
Step-by-Step Guide: Your Journey to Smoked Perfection
Now, let’s get that meat smoking!
1. Setting Up Your Smoker
Regardless of your smoker type (offset, pellet, electric, ceramic), the goal is the same: achieve a stable temperature and clean smoke.
* Cleanliness: Always start with a clean smoker. Old grease can create off-flavors.
* Fuel/Heat Source: Prepare your charcoal, wood, or pellets according to your smoker’s instructions.
* Water Pan: Many smokers benefit from a water pan placed inside. This helps stabilize temperature and adds moisture to the cooking environment, preventing the meat from drying out.
2. Achieving the Perfect Temperature
This is arguably the most critical aspect of low & slow smoking.
* Target Range: Aim for a consistent sweet spot between 225°F and 275°F. Lower temperatures (225-250°F) are ideal for large cuts like brisket and pork shoulder, while ribs might benefit slightly from the higher end (275°F).
* Stabilize: Don’t put the meat on until your smoker has held its target temperature for at least 30 minutes, producing thin, “blue” or “invisible” smoke (a sign of clean combustion). Thick, white smoke is usually a sign of incomplete combustion and can lead to bitter flavors.
3. The Meat Goes In
Once your smoker is stable and producing clean smoke, place the meat correctly. Ensure good airflow around all sides of the meat. If you have multiple pieces, don’t overcrowd the grates.
4. Monitoring & Maintaining
This is where patience becomes paramount.
* Resist the Urge to Peek: Every time you open the lid, you lose precious heat and smoke, adding significant time to your cook.
* Maintain Temperature: Continuously monitor your smoker’s temperature and adjust airflow/fuel as needed.
* Spritzing (Optional): Some pitmasters like to spritz their meat every hour or two with apple cider vinegar, apple juice, or water. This helps keep the surface moist, which can enhance bark formation and prevent drying.
* The Texas Crutch (Wrapping): Around the 6-8 hour mark, or when the internal temperature hits 150-165°F (for larger cuts), you might encounter “The Stall.” Many choose to wrap their meat tightly in butcher paper or foil. This pushes the meat through the stall faster, helps retain moisture, and tenderizes. It will soften the bark slightly, but it’s often worth the trade-off for tender results.
5. Understanding The Stall
Around the middle of your cook, the meat’s internal temperature will suddenly stop rising, sometimes for hours. This is The Stall, caused by evaporative cooling as moisture evaporates from the surface of the meat. Be patient! This is normal. If you didn’t wrap, just let it ride through.
6. Knowing When It’s Done
Forget cook times – they are merely estimates. The only reliable indicator of doneness for smoked meat is internal temperature and “probe tenderness.”
* Brisket & Pork Shoulder: These are done when a probe (or skewer) slides into the thickest part of the meat with very little resistance, like it’s going into warm butter. This usually occurs between 195°F and 205°F internal temperature. Some go higher, depending on the cut and desired tenderness.
* Ribs: For fall-off-the-bone, aim for 195-205°F. For a bit more bite, target 185-195°F.
* Chicken/Turkey: Generally cooked to 165°F in the thickest part of the thigh, though it may rise slightly higher with carryover cooking during resting.
7. The Essential Rest
DO NOT SKIP THIS STEP! This is as important as the smoking itself.
* Why Rest? As meat cooks, its muscle fibers tighten, squeezing out juices. Resting allows these fibers to relax and redistribute juices throughout the meat.
* How to Rest: Once your meat reaches its target temperature and tenderness, remove it from the smoker. If wrapped, leave it wrapped. If not, wrap it loosely in foil, then in a towel, and place it in an empty cooler for at least 1-2 hours (for ribs/poultry) or 2-4 hours (for brisket/pork shoulder). This keeps it warm and allows it to reabsorb moisture, resulting in incredibly tender, juicy meat.
Advanced Tips for Pitmaster Perfection
- Mastering the Bark: For a truly crispy, flavorful crust, ensure your dry rub is applied evenly and sufficient airflow surrounds the meat. Avoid excessive spritzing late in the cook if you want maximum bark.
- Unlocking the Smoke Ring: That coveted pink ring just under the bark is a visual testament to proper smoking. It’s a chemical reaction between nitrogen dioxide in the smoke and the myoglobin in the meat. It’s not an indicator of doneness, but a beautiful byproduct of the low & slow process.
- Patience is Your Best Friend: Smoking meat takes time. You can’t rush perfection. Embrace the journey. Patience, patience, patience.
- Keep It Clean: Regularly cleaning your smoker, especially grease traps and grates, prevents rancid fat from building up and imparting off-flavors to your future cooks. A clean smoker equals clean-tasting smoke.
Common Mistakes to Avoid
Even seasoned pitmasters make mistakes. Learning from them is part of the art.
- 1. Too High Heat: Smoking isn’t grilling. High heat will cook the outside too quickly, dry out the meat, and won’t allow collagen to break down properly, resulting in dry, tough meat.
- 2. Opening the Lid Too Often: Each peek means a significant drop in temperature and smoke loss, extending your cook time dramatically. Trust your process and your thermometers.
- 3. Under-Resting the Meat: Cutting into meat too soon will cause all the precious juices to gush out onto your cutting board, leaving you with dry, less flavorful results.
- 4. Over-Smoking: While smoke is good, too much (especially thick, white smoke) can lead to a bitter, acrid flavor often referred to as “creosote.” Aim for thin, blue smoke.
- 5. Ignoring Internal Temperature: Don’t rely on “feel” or cook times alone. A reliable meat thermometer is your best friend and the most accurate way to determine doneness.
- 6. Rushing the Process: “Low and slow” is a marathon, not a sprint. Trying to speed things up by cranking the heat or skipping steps will compromise the final product.
Your Smoked Meat Masterpiece Awaits!
The art of smoking meat is a rewarding journey, combining science, patience, and passion. Each cook is a learning experience, and with every delicious bite, you’ll feel the satisfaction of having created something truly special. So fire up your smoker, trust the process, and get ready to enjoy the incredible, tender, flavorful perfection that only low & slow smoking can deliver. Happy smoking!
- EAST OAK 30″ Electric Smoker for Outdoors | Built-in Meat Probe & Up to 6× Longer Smokes on a Single Load | Side Chip Loader for Uninterrupted Smoking | Bigger Batches with 725 sq in Cooking Area
- Masterbuilt® 30-inch Digital Electric Vertical BBQ Smoker with Leg Kit, Side Wood Chip Loader and 710 Cooking Square Inches in Black, Model MB20070421
- Pellet Grill Cover for Traeger Pro 22/575 Series with Waterproof Zipper, 600D Fade Resistant & Rip-Proof Smoker Fabric, Full-Length Grill Accessories for Century 22 and More (Cover Only)
FAQ
Q. What’s the most crucial element for achieving ‘Low & Slow Perfection’ when smoking meat?
A. The most crucial element is maintaining a consistent, low temperature throughout the entire smoking process. For most cuts, this typically means keeping your smoker in the range of 225-275°F (107-135°C). Precise temperature control prevents the meat from drying out, allows connective tissues to slowly break down into gelatin, and ensures the smoke flavor permeates the meat evenly without overpowering it or making it bitter.
Q. How do I choose the right wood for smoking, and does it really make a difference?
A. Yes, the type of wood you use makes a significant difference in the final flavor profile. Different woods impart distinct flavors, from mild and fruity to strong and pungent. For instance, fruitwoods like apple and cherry offer a sweet, mild flavor, great for poultry and pork. Oak provides a medium, earthy flavor suitable for beef, pork, and lamb. Hickory gives a strong, bacon-like flavor, excellent for ribs and brisket. Mesquite offers the most intense, bold flavor, best used sparingly, often with beef. Always use hardwoods designed for smoking, not treated lumber or softwoods.
Q. What is the “stall” and how should I handle it to ensure tender, juicy meat?
A. The “stall” is a phenomenon where the internal temperature of the meat, typically large cuts like brisket or pork butt, plateaus for several hours, usually in the 150-170°F (65-77°C) range. This occurs due to evaporative cooling, where moisture evaporating from the surface cools the meat. The best way to handle the stall is to be patient and let the process continue naturally. Alternatively, you can “wrap” the meat in butcher paper or foil (the “Texas Crutch”) once it hits the stall to push through it faster by preventing further evaporation, though this can sometimes soften the bark.
Q. Is it necessary to use a rub or marinade, and when should I apply it?
A. While not strictly “necessary” in the sense that meat can be smoked with just salt and pepper, a rub or marinade significantly enhances flavor and can contribute to a desirable bark. A dry rub, a blend of spices and salt, should be applied liberally to the meat hours, or even up to 24 hours, before smoking to allow the flavors to penetrate and for the salt to begin its tenderizing process. Marinades, which are liquid-based, often include acids that help tenderize and infuse flavor; apply these similarly in advance, but be mindful that excessive moisture can sometimes inhibit bark formation.
Q. How do I know when my smoked meat is perfectly done, and what internal temperature should I aim for?
A. Doneness is best determined by internal temperature and feel. While there are general target temperatures, the “probe tender” test is often the ultimate indicator for low and slow cuts. For pulled pork, aim for 200-205°F (93-96°C). For sliced brisket, target 203-205°F (95-96°C). Ribs are done when the meat pulls back from the bone easily. Always use a reliable, instant-read thermometer. The meat should feel incredibly tender when probed, like inserting a hot knife into butter.
Q. Why is “resting” the meat after smoking so important, and how long should I do it?
A. Resting the meat after smoking is crucial for maximizing juiciness and flavor. During cooking, muscle fibers contract and push juices to the center of the cut. If you slice into the meat immediately, these juices will rush out, leaving the meat dry. Resting allows the muscle fibers to relax and reabsorb those delicious juices, resulting in a more tender and moist product. The rest period varies by cut size, but typically ranges from 30 minutes for smaller cuts like ribs, up to 1-2 hours for larger cuts like brisket or pork butt, often wrapped in foil and insulated in a cooler.
Q. What cuts of meat are best suited for the low and slow smoking method?
A. The low and slow method is ideal for tougher cuts of meat that are rich in connective tissue, which requires a long, slow cook to break down into gelatin, resulting in incredibly tender and succulent meat. Prime examples include beef brisket (especially the packer cut), pork shoulder (also known as pork butt or Boston butt), pork ribs (spare ribs or baby back ribs), beef short ribs, and even whole chickens or turkeys benefit from a low and slow approach for enhanced flavor and moisture.