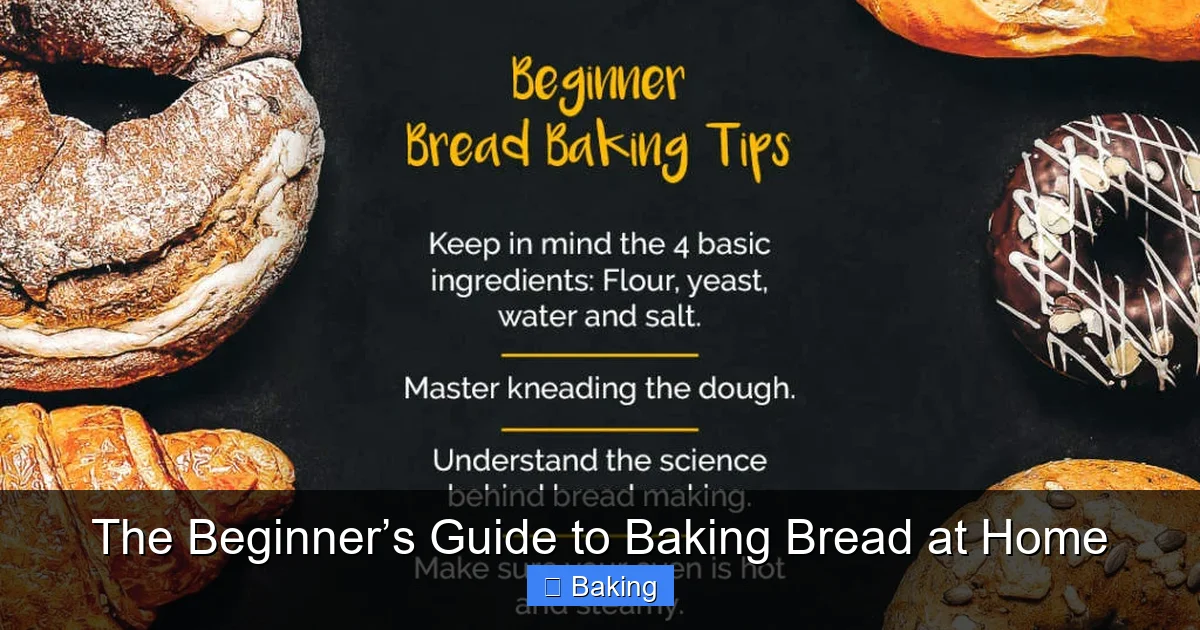
Featured image for this comprehensive guide about beginner bread baking guide
Image source: themayakitchen.com
Welcome, aspiring baker! Have you ever dreamt of the glorious aroma of freshly baked bread wafting through your home? Perhaps you’ve been intimidated by the complex-sounding techniques or the sheer number of ingredients. You’re not alone. Many people believe that baking bread is an art reserved for experienced chefs, but we’re here to tell you that’s simply not true! Embarking on your journey as a beginner bread baking guide doesn’t have to be daunting; in fact, it can be incredibly rewarding, therapeutic, and surprisingly simple.
Imagine slicing into a warm, crusty loaf, knowing you made it with your own two hands. The satisfaction is immense, and the taste is unparalleled compared to anything you can buy in a store. This comprehensive guide is designed specifically for you – the novice baker – to demystify the process and equip you with the knowledge and confidence to bake your very first perfect loaf. Forget the fear, embrace the flour, and get ready to transform simple ingredients into edible magic. We’ll walk you through everything you need to know about baking bread at home, from essential tools to troubleshooting common issues.
So, tie on your apron, gather your enthusiasm, and let’s dive into the wonderful world of homemade bread. By the end of this guide, you’ll not only understand the fundamentals but also have a clear path to creating delicious, wholesome bread that will impress your family and friends. Get ready to experience the pure joy of homemade bread – it's easier than you think!
Quick Answers to Common Questions
What essential tools do I need to start with this beginner bread baking guide?
You don't need much to begin your journey! This beginner bread baking guide will show you how to get started with just flour, water, yeast, salt, a mixing bowl, and measuring tools. A kitchen scale is a fantastic addition later on!
Is following a beginner bread baking guide really achievable for someone new to baking?
Absolutely! It might seem daunting, but this beginner bread baking guide breaks it down into simple, manageable steps, focusing more on patience and observation than complex skills. You've got this!
What's the best first bread recipe to try from a beginner bread baking guide?
A simple no-knead artisan loaf or a basic white sandwich bread is perfect for starters, as recommended in many a beginner bread baking guide. They build confidence without complex kneading techniques or equipment.
What kind of flour should I grab from the store for this beginner bread baking guide?
For most recipes in a beginner bread baking guide, all-purpose or bread flour works wonderfully. Bread flour has a higher protein content, which is great for a chewier crumb and helps with gluten development.
How can I tell if my dough has proofed correctly, as a beginner bread baking guide suggests?
Your dough should roughly double in size and pass the "poke test" – gently indent it with a floured finger; if it springs back slowly but leaves a slight dimple, it's ready, as any good beginner bread baking guide will explain.
📋 Table of Contents
- Why Bake Your Own Bread? The Unbeatable Benefits
- Essential Tools & Ingredients for Your First Loaf
- Demystifying the Bread Making Process: Step-by-Step
- Your First Recipe: Easy Beginner No-Knead Bread
- Common Beginner Pitfalls & How to Avoid Them
- Advanced Tips & Next Steps for the Aspiring Baker
- Conclusion: Your Journey to Delicious Homemade Bread Begins Now
Why Bake Your Own Bread? The Unbeatable Benefits
Before we dive into the 'how-to,' let's talk about the 'why.' What makes baking bread at home such a worthwhile endeavor? The benefits extend far beyond just a tasty treat.

Learn more about beginner bread baking guide - The Beginner’s Guide to Baking Bread at Home
Image source: tastingtable.com
| Bread Type | Key Characteristic | Skill Level | Estimated Time (Active/Total) |
|---|---|---|---|
| Classic White Loaf | Soft, versatile, traditional texture. Good for sandwiches. | Easy | 30 min / 3-4 hrs |
| No-Knead Bread | Minimal effort, rustic crust, chewy interior. Long fermentation. | Very Easy | 15 min / 12-18 hrs |
| Focaccia | Flat, olive oil rich, dimpled surface. Very forgiving. | Easy | 25 min / 2-3 hrs |
| Basic Whole Wheat | Heartier texture, nutty flavor, more nutritious. | Moderate | 40 min / 4-5 hrs |
| Simple Pizza Dough | Versatile for pizzas, calzones, or breadsticks. Quick rise option. | Easy | 20 min / 1.5-2 hrs |
- Unbeatable Taste and Aroma: This is arguably the most compelling reason. Nothing compares to the flavor and texture of a loaf that's just come out of your own oven. Plus, that warm, yeasty aroma filling your kitchen? Pure bliss!
- Control Over Ingredients: When you bake your own bread, you know exactly what goes into it. No hidden preservatives, artificial flavors, or excessive sugars. You choose the quality of your flour, salt, and yeast, leading to healthier and more delicious results. This is a huge advantage for anyone looking for a healthier lifestyle or catering to specific dietary needs.
- Cost-Effectiveness: While initial tool investment might be minimal, the long-term savings are significant. A bag of flour, yeast, salt, and water are incredibly inexpensive ingredients, especially when compared to artisan loaves from a bakery. Over time, homemade bread can save you a substantial amount of money.
- A Sense of Accomplishment: There's a profound satisfaction in creating something from scratch, especially something as fundamental and nourishing as bread. The process is meditative, and the result is a tangible reward for your effort. It’s a wonderful skill to develop, boosting confidence in the kitchen and beyond.
- Therapeutic Process: Many bakers find the rhythm of kneading, the waiting during proofing, and the sensory experience of baking to be incredibly relaxing and stress-relieving. It's a fantastic way to disconnect from daily pressures and engage in a mindful activity.
Essential Tools & Ingredients for Your First Loaf
You don't need a professional bakery setup to start your beginner bread baking guide journey. Most likely, you already have many of the necessary items in your kitchen. Let's cover the absolute essentials.
Learn more about beginner bread baking guide - The Beginner’s Guide to Baking Bread at Home
Image source: images.rawpixel.com
Basic Baking Tools
- Large Mixing Bowls: At least two, one for mixing and one for proofing. Glass or stainless steel are great options.
- Measuring Cups and Spoons: For precise liquid and dry ingredient measurements.
- Kitchen Scale (Highly Recommended!): While cups work, a digital kitchen scale provides far more accuracy, especially for flour and water, leading to more consistent results. This is a game-changer for easy bread recipes.
- Dough Scraper: Inexpensive and incredibly useful for handling sticky dough, cleaning bowls, and dividing portions.
- Baking Sheet or Dutch Oven: For baking your loaf. A Dutch oven is fantastic for creating a crispy crust similar to professional bakeries.
- Cooling Rack: Essential for allowing air to circulate around the baked bread, preventing a soggy bottom.
- Oven Mitts: For safe handling of hot bakeware.
- Plastic Wrap or Damp Kitchen Towel: For covering dough during proofing.
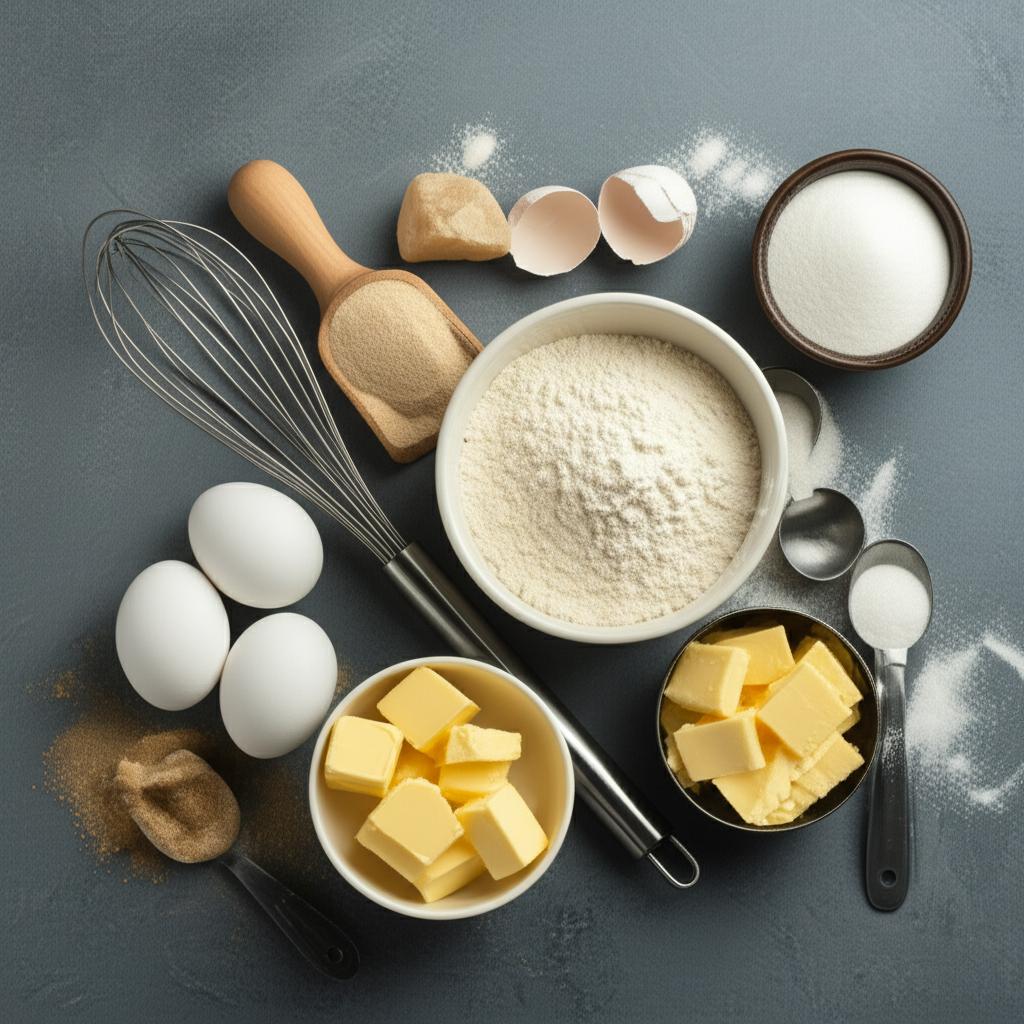
Understanding Your Core Ingredients
The beauty of bread lies in its simplicity. Just a few basic ingredients combine to create something truly magical.
- Flour: The backbone of your bread.
- All-Purpose Flour: A great starting point. It has a moderate protein content, making it versatile for many breads.
- Bread Flour: Higher in protein than all-purpose, which means more gluten development. This results in a chewier texture and better structure for many traditional loaves. For your first loaf, either works, but bread flour often gives superior results.
- Yeast: The living organism that makes your bread rise.
- Active Dry Yeast: Needs to be "woken up" or proofed in warm water (around 105-115°F / 40-46°C) for 5-10 minutes until foamy.
- Instant Yeast: Can be mixed directly with dry ingredients, as it doesn't require prior proofing. It's often preferred for easy bread recipes due to its convenience.
- Fresh Yeast: Less common for home bakers, but delivers a rich flavor. Requires different handling.
- Water: More than just a liquid.
- Temperature is Key: Luke-warm water (around 95-105°F / 35-40°C) is ideal for activating yeast without killing it. Water that's too hot will kill the yeast; too cold, and it won't activate properly.
- Hydration: The ratio of water to flour affects the dough's consistency and the final bread's texture.
- Salt: Don't skip it! Salt enhances flavor, strengthens the gluten structure, and controls yeast activity. Without it, bread tastes bland and can rise too quickly.
- Sugar (Optional, but often beneficial): A small amount of sugar can feed the yeast, aiding in activation and providing a subtle sweetness, contributing to browning.
Demystifying the Bread Making Process: Step-by-Step
Understanding the stages of bread making is crucial for success. This isn't just about following a recipe; it's about understanding what's happening at each step. This beginner bread baking guide breaks down the core elements of the bread making process.
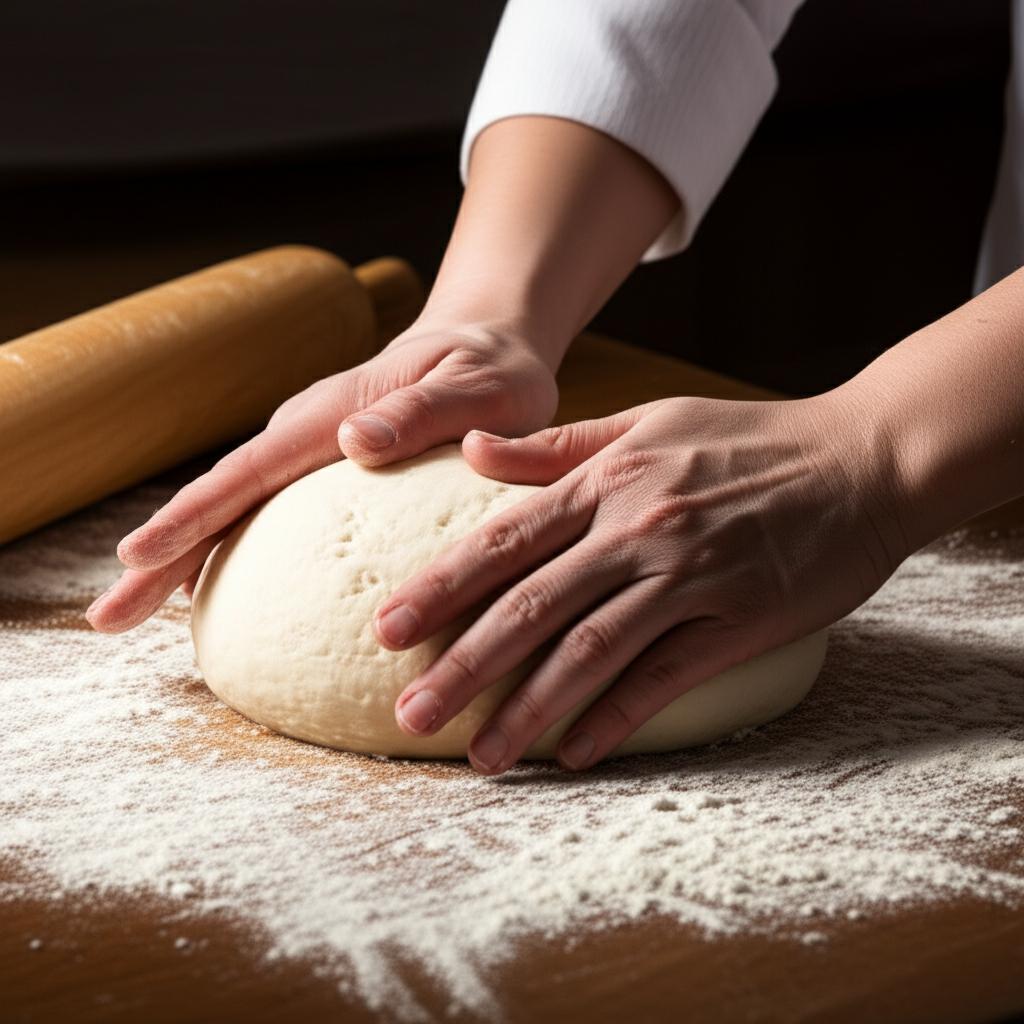
Step 1: Mixing & Kneading
This is where your ingredients come together. First, you'll combine your dry ingredients (flour, salt, yeast if instant, sugar if using) and then add the warm water. Mix until a shaggy dough forms. Then comes the kneading.
- Kneading's Purpose: Kneading develops the gluten in the flour. Gluten is a protein network that gives bread its structure and elasticity, allowing it to trap the gasses produced by yeast and rise.
- How to Knead:
- Turn the dough out onto a lightly floured surface.
- Press down and away with the heels of your hands, then fold the dough back towards you.
- Rotate the dough a quarter turn and repeat.
- Continue for 8-10 minutes until the dough is smooth, elastic, and passes the "windowpane test" (you can stretch a small piece thin enough to see light through it without tearing).
- Stand Mixer Option: If you have a stand mixer with a dough hook, this step is much easier. Knead on low speed for 6-8 minutes.
Step 2: First Rise (Bulk Fermentation)
Also known as the bulk ferment or proofing, this is when the yeast gets to work. Place your kneaded dough in a lightly oiled bowl, turning it once to coat. Cover with plastic wrap or a damp towel to prevent drying out.
- What's Happening: The yeast consumes sugars in the flour, producing carbon dioxide gas (which makes the dough rise) and alcohol (which contributes to flavor).
- Ideal Conditions: A warm, draft-free spot is best (around 75-80°F / 24-27°C). The dough should roughly double in size, which can take anywhere from 1 to 2 hours, depending on the recipe, yeast activity, and room temperature.
- The "Poke Test": Gently poke your finger into the risen dough. If the indentation remains, it's ready. If it springs back immediately, it needs more time.
Step 3: Shaping Your Loaf
Once risen, gently "punch down" the dough to release the trapped gases. Turn it out onto a lightly floured surface. For a beginner bread baking guide, simple shapes are best.
- Round Loaf (Boule): Gently pull the edges of the dough into the center, forming a smooth ball. Flip it over and cup your hands around the base, rotating it to create surface tension.
- Loaf Pan Loaf: Gently flatten the dough into a rectangle, then roll it up tightly like a scroll. Pinch the seam closed and tuck the ends under before placing it seam-side down in a greased loaf pan.
Step 4: Second Rise (Proofing)
After shaping, the dough needs another rise, called the proof or final proof. Cover your shaped dough and let it rise again in a warm, draft-free spot.
- Purpose: This shorter rise allows the dough to build up more gas before baking, resulting in a lighter, airier texture.
- Duration: Typically 30-60 minutes, or until the dough looks visibly puffy and springs back slowly when gently poked. Be careful not to over-proof, which can lead to a collapsed loaf.
Step 5: Baking to Perfection
Preheat your oven with your baking vessel inside (baking sheet or Dutch oven) to the specified temperature, usually quite hot (400-475°F / 200-245°C). A hot oven provides "oven spring," a final burst of rising.
- Steam (Optional but Recommended): For a crispy crust, steam is essential. If using a Dutch oven, the lid traps moisture. If using a baking sheet, you can place a tray of hot water in the bottom of your oven for the first 10-15 minutes of baking.
- Scoring (Optional): Before baking, use a sharp knife or razor blade to make a few shallow cuts on the top of your loaf. This helps control where the bread expands and creates a beautiful pattern.
- Doneness Test: Bread is usually done when the crust is golden brown and sounds hollow when tapped on the bottom. An internal temperature of 200-210°F (93-99°C) is ideal for most yeast bread.
Step 6: Cooling is Crucial
As tempting as it is, resist the urge to cut into your bread immediately!
- Why Cool: As bread cools, residual heat continues to cook the interior, and moisture distributes evenly. Cutting too early can result in a gummy texture.
- How to Cool: Transfer the loaf to a wire cooling rack and let it cool completely for at least 1-2 hours before slicing.
Your First Recipe: Easy Beginner No-Knead Bread
To put everything you've learned into practice, let's try a truly simple and rewarding recipe for your first loaf: No-Knead Bread. This is one of the best easy bread recipes for beginners.
No-Knead Artisan Bread Recipe
This method requires minimal effort and delivers an incredibly crusty exterior with a chewy, open crumb. It takes patience (mostly waiting time), but very little active work.
Ingredients:
- 3 cups (360g) All-Purpose or Bread Flour
- 1 teaspoon (5g) Instant Yeast (or 1.25 tsp Active Dry Yeast, proofed)
- 1 ¼ teaspoons (7g) Salt
- 1 ½ cups (360ml) Warm Water (around 100°F / 38°C)
Instructions:
- Mix Ingredients: In a large mixing bowl, combine the flour, instant yeast, and salt. If using active dry yeast, proof it in the warm water for 5-10 minutes until foamy, then add the mixture to the dry ingredients. Stir with a wooden spoon or spatula until a shaggy, wet dough forms. There's no need to knead!
- First Rise (Long Fermentation): Cover the bowl tightly with plastic wrap. Let it sit at room temperature (ideally 68-72°F / 20-22°C) for 12-18 hours. The longer the ferment, the more flavor develops. The dough should be bubbly and more than doubled in size.
- Shape the Dough: Lightly flour your work surface and gently scrape the dough out of the bowl. It will be very sticky! Sprinkle a little flour on top and, using a dough scraper or floured hands, gently fold the edges of the dough towards the center a few times to create a rough ball shape. Do not knead aggressively.
- Second Rise (Proofing): Place a piece of parchment paper (about 12x12 inches) on your work surface. Gently transfer the dough ball onto the center of the parchment paper. Loosely cover with plastic wrap or a damp towel and let it proof for another 30-60 minutes, or until puffy.
- Preheat Oven & Dutch Oven: About 30 minutes before the second rise is complete, place a 5-6 quart Dutch oven (with its lid) in your oven and preheat to 450°F (230°C).
- Bake: Carefully remove the scorching hot Dutch oven from the oven. Using the parchment paper as a sling, carefully lift and transfer the dough into the Dutch oven. Cover with the lid and bake for 30 minutes.
- Finish Baking: Remove the lid and continue baking for another 15-20 minutes, or until the crust is deep golden brown and sounds hollow when tapped on the bottom.
- Cool: Carefully remove the bread from the Dutch oven and transfer it to a wire rack to cool completely for at least 1-2 hours before slicing and enjoying. This is vital for texture!
Common Beginner Pitfalls & How to Avoid Them
Every baker encounters challenges, especially when starting out. Don't get discouraged! This section of our beginner bread baking guide will help you troubleshoot common issues with your yeast bread.
Here's a quick guide to some common problems and their solutions:
| Problem | Possible Causes | Solutions & Bread Baking Tips |
|---|---|---|
| Dense, Brick-Like Bread | Old or inactive yeast, insufficient kneading/gluten development, not enough water, under-proofing. | Always check yeast expiration dates. Ensure water temperature is correct (100-115°F for active dry). Knead thoroughly until dough is elastic. Allow full proofing time. |
| Sticky Dough | Too much water (high hydration), not enough flour during initial kneading, insufficient gluten development. | Use a kitchen scale for accurate measurements. Gradually add small amounts of flour during kneading until the dough is manageable but still soft. Keep hands lightly floured. |
| Flat Loaf / Doesn't Rise | Dead yeast, over-proofing (dough rises then collapses), under-kneading, dough too cold during proofing. | Verify yeast activity. Avoid over-proofing by checking the poke test regularly. Ensure adequate kneading. Proof in a warm, draft-free spot. |
| Pale Crust | Oven not hot enough, insufficient baking time, lack of sugar in recipe. | Preheat oven fully. Bake longer if needed. Ensure enough sugar (if desired) to aid browning. Use an oven thermometer to verify true oven temperature. |
| Gummy Interior | Underbaked, sliced too early before cooling completely. | Bake until internal temperature reaches 200-210°F (93-99°C). Always cool bread completely on a wire rack for at least 1-2 hours. |
Advanced Tips & Next Steps for the Aspiring Baker
Once you've mastered your first loaf and feel confident with the basics, there's a whole world of bread baking to explore! Here are some ideas to continue your journey beyond a simple beginner bread baking guide:
- Experiment with Different Flours:
- Whole Wheat Flour: Adds nutty flavor and more fiber. Start by substituting 25-50% of your white flour with whole wheat, as it requires more hydration.
- Rye Flour: Creates dense, flavorful loaves, often with a distinct tang.
- Artisan Flours: Explore specialty flours like spelt, einkorn, or stone-ground varieties for unique flavors and textures.
- Add Inclusions: Elevate your bread with additions like:
- Nuts (walnuts, pecans)
- Seeds (sesame, poppy, flax, sunflower)
- Dried Fruits (raisins, cranberries)
- Cheese and Herbs (rosemary, thyme, garlic)
- Olives or sun-dried tomatoes
- Explore Sourdough: This is a rewarding, albeit more involved, next step. Sourdough bread uses a natural yeast starter instead of commercial yeast, producing incredibly complex flavors and textures. It's a true labor of love and a fascinating area of bread making process to delve into.
- Invest in Specific Equipment:
- Banneton (Proofing Basket): Helps shaped dough maintain its form during the second rise, often imparting beautiful flour patterns.
- Lame (Scoring Tool): A specialized razor blade on a handle for precise scoring, allowing for better oven spring and aesthetic appeal.
- Baking Stone: Provides intense, even heat for a crispier crust, especially good for pizzas and rustic loaves.
- Keep a Baking Journal: Document your recipes, ingredient brands, water temperatures, proofing times, and results. This will help you understand what works best in your specific kitchen environment and improve with every bake.
Remember, baking is as much about feel and intuition as it is about exact measurements. The more you bake, the more you'll learn to "read" your dough. Don't be afraid to try new things and make adjustments based on your experiences.
Conclusion: Your Journey to Delicious Homemade Bread Begins Now
Congratulations! You've navigated this comprehensive beginner bread baking guide and are now equipped with the knowledge and confidence to start your own delicious journey. We’ve covered why baking bread at home is so rewarding, the essential tools and ingredients, a step-by-step breakdown of the bread making process, and even a simple recipe to get you started on your first loaf. You also have valuable insights into troubleshooting common issues and ideas for expanding your baking repertoire.
The world of homemade bread is incredibly vast and satisfying. Each loaf you bake will teach you something new, and with practice, your skills will flourish. Don't be afraid of imperfections – every "failed" loaf is a learning opportunity. The joy of pulling a warm, fragrant loaf out of your oven, sharing it with loved ones, and knowing you created it from scratch is an experience that truly nourishes the soul.
So, take a deep breath, embrace the process, and let the magic begin. Your kitchen is about to become a sanctuary of incredible aromas and delicious creations. Happy baking, and enjoy the wonderful journey of making your own incredible yeast bread!
🎥 Related Video: How to make homemade bread. #bread #homemadebread
📺 Jose.elcook
Frequently Asked Questions
What essential tools do I need to start baking bread?
You don’t need much fancy equipment to begin baking bread! Basic necessities include a large mixing bowl, measuring cups and spoons, a kitchen scale (highly recommended for accuracy), and a baking sheet or loaf pan. A cooling rack is also very useful for the finished loaf.
What are the fundamental ingredients for beginner bread baking?
The core ingredients for most basic bread recipes are flour, water, yeast, and salt. While there are many variations, mastering these four will set a strong foundation for your bread baking journey. Using good quality ingredients will also make a noticeable difference in your final product.
My bread isn’t rising; what could be the problem?
Several factors can affect your bread’s rise. The most common issues are inactive yeast (check its expiration date or proof it first), water that’s too hot or too cold, or an environment that’s too cold for proper proofing. Ensure your yeast is fresh and your water temperature is around 105-115°F (40-46°C) for optimal activation.
How do I know when my homemade bread is fully baked?
A good indicator is the internal temperature, which should reach around 200-210°F (93-99°C) for most lean bread. Visually, the crust should be deeply golden brown, and when tapped on the bottom, it should sound hollow. Don’t be afraid to take it out of the pan and tap it to check.
What type of flour is best for beginners in bread baking?
All-purpose flour is a great starting point for many simple bread baking recipes due to its availability and versatility. However, bread flour, with its higher protein content, develops gluten more effectively, often resulting in a chewier texture and better structure. You can experiment with both to see which you prefer for different types of bread.
How should I store my freshly baked bread to keep it fresh?
Once your bread has cooled completely, store it at room temperature in an airtight container, a bread box, or a sealed plastic bag. Avoid refrigerating bread, as this can make it stale faster. For longer storage, slices or whole loaves can be frozen for several months.