The Perfect Steak: From Sear to Serve – Your Ultimate Guide
- Alpha Grillers Meat Thermometer Digital – Instant Read Food Thermometer for Cooking Grilling Air Fryer Griddle Probe Kitchen Gadgets Essentials BBQ Accessories Grill Gifts for Men Him Dad Birthday
- ThermoPro TP19H Digital Meat Thermometer for Cooking with Ambidextrous Backlit and Motion Sensing Kitchen Cooking Food Thermometer for BBQ Grill Smoker Oil Fry Candy Instant Read Thermometer
- AMMZO Meat Thermometer Digital, Instant Read Food Thermometer – Waterproof for Cooking Deep Fry Oven Smoker Roast, Camping & Kitchen Essentials BBQ Accessories Grill Gifts for Men Him Dad Birthday
Dreaming of that restaurant-quality steak right in your own kitchen? That beautifully seared crust, the juicy, tender interior, and the rich, savory flavor? It’s not just a chef’s secret – it’s absolutely achievable for every home cook! With a few key techniques and a little patience, you can master the perfect steak every time.
This comprehensive guide will walk you through everything, from choosing the right cut to the crucial resting period, ensuring your next steak night is a resounding success. Let’s get searing!
Step 1: The Foundation – Choosing Your Steak Wisely
The journey to a perfect steak begins long before it hits the pan. Quality matters most!
- Cut: Popular choices include Ribeye (rich marbling, great flavor), New York Strip (good balance of tenderness and chew), Sirloin (leaner, beefy flavor), and Filet Mignon (incredibly tender, less fat). Choose what you enjoy most!
- Marbling: Look for beautiful streaks of white fat running through the red meat. This is marbling, and it’s what melts during cooking, infusing the steak with incredible flavor and keeping it moist.
- Thickness: Aim for a steak that’s at least 1 to 1.5 inches thick. Thicker steaks are much easier to cook to your desired doneness without overcooking the exterior.
Step 2: Preparation – Setting the Stage for Perfection
This pre-cooking stage is often overlooked but is absolutely critical for that mouth-watering crust and even cooking.
- Bring it to Room Temperature: Take your steak out of the refrigerator 30-60 minutes before cooking. A cold steak hitting a hot pan will cook unevenly, resulting in a gray band on the outside. Letting it warm up slightly ensures more even cooking throughout.
- Pat it Bone Dry: This is perhaps the most important step for achieving a fantastic sear. Moisture on the surface prevents the Maillard reaction (the browning that creates delicious flavor). Use paper towels to aggressively pat every surface of your steak dry. The drier, the better!
- Season Generously: Don’t be shy with the seasoning! For a truly great steak, all you really need is kosher salt and freshly cracked black pepper. Sprinkle evenly on all sides, pressing the seasoning gently into the meat. Some prefer to season well in advance (up to an hour) to allow the salt to draw out moisture and then reabsorb, creating a brine-like effect.
Step 3: The Cooking – Sear, Sizzle, and Science!
There are two primary methods for cooking a perfect steak at home, depending on the thickness of your cut and your desired outcome.
Method A: The Classic Pan-Sear (for 1″ to 1.5″ thick steaks)
This method creates an incredible crust and is perfect for most cuts.
- Equipment: A heavy-bottomed skillet, preferably cast iron, is your best friend here. It retains heat exceptionally well.
- Heat it Up: Place your pan over medium-high to high heat. You want it screaming hot! Add a high smoke-point oil (like avocado, grapeseed, or canola oil) just before adding the steak. The oil should shimmer, almost smoking.
- Sear the First Side: Gently place the dry, seasoned steak into the hot pan. Do not move it! Let it sear undisturbed for 2-4 minutes, depending on thickness and heat, until a deep golden-brown crust forms.
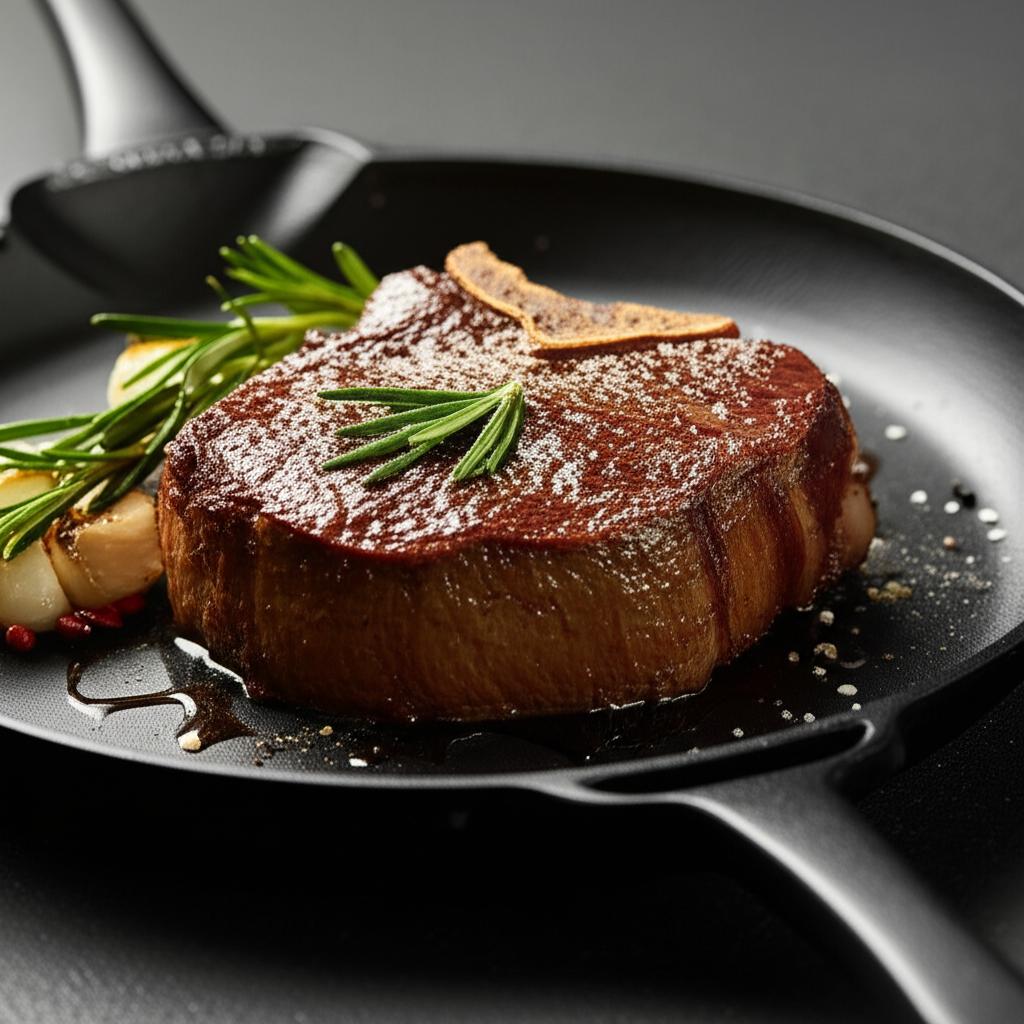
- Flip and Finish: Flip the steak. If you desire, you can now add a knob of butter, a few cloves of smashed garlic, and a sprig of fresh rosemary or thyme to the pan. Tilt the pan and use a spoon to baste the melted butter and aromatics over the steak for the remaining cook time.
- Cook to Doneness: Continue cooking, flipping occasionally if needed, until it reaches your desired internal temperature (see Doneness Guide below).
- Sear the Edges: For thicker cuts, use tongs to hold the steak on its sides to sear the edges for about 30-60 seconds each.
Method B: The Reverse Sear (for 1.5″ thick steaks or thicker)
This method ensures edge-to-edge evenness and is fantastic for very thick cuts, preventing overcooked exteriors and raw centers.
- Preheat Oven (Low & Slow): Preheat your oven to a low temperature, typically 225-275°F (107-135°C).
- Slow Roast: Place your seasoned, room-temp steak on a wire rack set over a baking sheet. Cook in the preheated oven until the internal temperature is about 15-20°F (8-11°C) below your target doneness. This can take anywhere from 20-45 minutes, depending on thickness. Use an oven-safe probe thermometer for accuracy.
- High Heat Sear: Once the steak reaches the target internal temperature, remove it from the oven. Heat your cast iron skillet over high heat on the stovetop until it’s smoking hot. Add a small amount of high smoke-point oil.
- Sear for Crust: Carefully transfer the pre-cooked steak to the screaming hot pan. Sear each side for 60-90 seconds, or until a beautiful, deep brown crust forms. Add butter and aromatics for basting during the last 30 seconds if desired.
Step 4: Doneness – Knowing When It’s Ready
This is where an instant-read meat thermometer becomes your absolute best friend. Touch tests are unreliable.
Internal Temperature Guide (Remove from heat 5°F/3°C before target for carryover cooking):
- Rare: 120-125°F (49-52°C) – Cool red center.
- Medium-Rare: 130-135°F (54-57°C) – Warm red center. (Often considered the “perfect” doneness)
- Medium: 135-140°F (57-60°C) – Warm pink center.
- Medium-Well: 140-145°F (60-63°C) – Slightly pink center.
- Well-Done: 150°F+ (66°C+) – Little to no pink. (Be careful, can become dry!)
Always insert the thermometer into the thickest part of the steak, avoiding bone or fat.
Step 5: The Crucial Rest – DO NOT Skip This!
This step is non-negotiable for a juicy, tender steak.
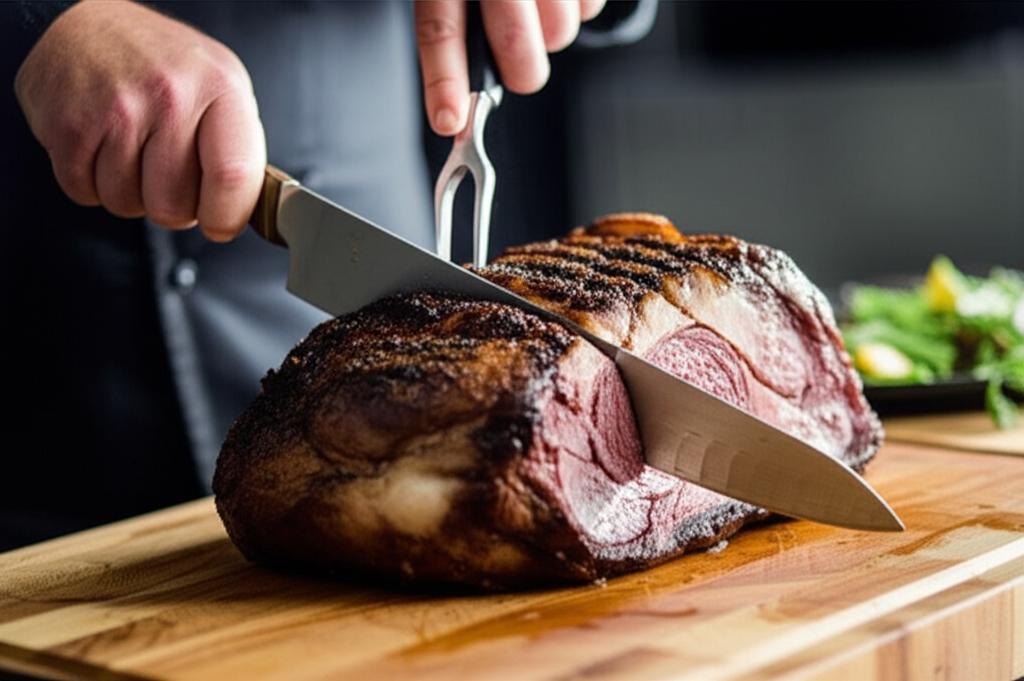
- Why it’s important: When you cook meat, the muscle fibers contract, pushing the juices to the center. If you cut into it immediately, all those delicious juices will spill out onto your cutting board, leaving you with a dry steak. Resting allows the fibers to relax and the juices to redistribute evenly throughout the meat.
- How long: Transfer your cooked steak to a cutting board and rest it loosely tented with foil for at least 5-10 minutes (longer for thicker cuts).
- Carryover Cooking: Remember, your steak’s internal temperature will continue to rise by a few degrees during this resting period (known as carryover cooking). Account for this when pulling it from the heat.
Step 6: Serve and Enjoy!
Almost there! The final touches.
- Slice Against the Grain: When you’re ready to serve, always slice your steak against the grain (perpendicular to the visible lines of muscle fiber). This shortens the muscle fibers, making each bite incredibly tender.
- Simple is Best: A perfect steak needs little else. A sprinkle of flaky sea salt, a knob of compound butter, or a simple pan sauce made from the fond (brown bits) in the pan are all fantastic additions.
Common Mistakes to Avoid
Even seasoned cooks can slip up. Here are the most common pitfalls and how to steer clear:
- Not Drying the Steak: This is the #1 culprit for a lack of crust. Pat, pat, pat!
- Not Seasoning Enough: A thick steak needs a generous amount of salt and pepper to be flavorful all the way through.
- Not Using High Enough Heat: For a good sear, your pan needs to be smoking hot. Don’t be afraid of the heat!
- Flipping Too Often: Resist the urge! Let that crust form undisturbed. Flip once or twice, not constantly.
- Overcooking: This is the ultimate tragedy. Invest in and use an instant-read thermometer. Remove the steak before it hits your target temperature to account for carryover cooking.
- Not Resting the Steak: Impatience will lead to dry, less flavorful meat. Resting is non-negotiable.
- Cutting With the Grain: This will make even the most perfectly cooked steak tough and chewy. Always slice against the grain.
Conclusion
Congratulations! You now have all the knowledge to conquer the perfect steak. Remember, practice makes perfect. Don’t be discouraged if your first attempt isn’t flawless. Each steak you cook will teach you more about your equipment, your specific cuts of meat, and your preferences.
So grab a beautiful steak, follow these steps, and prepare to impress yourself and your loved ones with a truly magnificent meal. Happy searing!
- Alpha Grillers Meat Thermometer Digital – Instant Read Food Thermometer for Cooking Grilling Air Fryer Griddle Probe Kitchen Gadgets Essentials BBQ Accessories Grill Gifts for Men Him Dad Birthday
- ThermoPro TP19H Digital Meat Thermometer for Cooking with Ambidextrous Backlit and Motion Sensing Kitchen Cooking Food Thermometer for BBQ Grill Smoker Oil Fry Candy Instant Read Thermometer
- AMMZO Meat Thermometer Digital, Instant Read Food Thermometer – Waterproof for Cooking Deep Fry Oven Smoker Roast, Camping & Kitchen Essentials BBQ Accessories Grill Gifts for Men Him Dad Birthday
FAQ
Q. What is the most crucial step to achieve that perfect crust on my steak?
A. The most crucial step for a perfect crust is ensuring your pan is screaming hot before the steak touches it, and that the steak’s surface is as dry as possible. High heat combined with a dry surface allows for the Maillard reaction to occur rapidly and evenly, creating that desirable deep brown, flavorful crust.
Q. How important is it to bring my steak to room temperature before cooking, and why?
A. It is very important to bring your steak to near room temperature, typically 30-60 minutes before cooking. This allows for more even cooking from edge to edge. A cold steak hitting a hot pan will cook much slower in the center, potentially leading to an overcooked exterior by the time the inside reaches your desired doneness.
Q. What’s the best way to determine when my steak is cooked to my desired doneness?
A. The most accurate way to determine doneness is by using an instant-read meat thermometer. For rare, aim for 120-125°F; medium-rare 125-130°F; medium 130-135°F; medium-well 140-145°F. Remember, the temperature will rise a few degrees while resting.
Q. Why is resting the steak after cooking so critical, and for how long should I rest it?
A. Resting the steak is absolutely critical. While cooking, the muscle fibers contract, pushing juices to the center. Resting allows these fibers to relax and the juices to redistribute throughout the meat, resulting in a significantly more tender and juicy steak. For most steaks, rest for 5-10 minutes, or about half the cooking time.
Q. Should I use oil or butter for searing, and what kind is best?
A. For the initial high-heat sear, it’s best to use an oil with a high smoke point, such as grapeseed, avocado, or canola oil. Butter has a low smoke point and will burn quickly, imparting a bitter flavor. However, you can add butter (and aromatics like garlic and herbs) towards the end of the cooking process to baste the steak, adding incredible flavor without burning.
Q. Can I use a regular non-stick pan, or do I need specific cookware for a perfect sear?
A. While you can cook a steak in a non-stick pan, it’s not ideal for achieving that perfect, deep crust. Non-stick pans typically don’t retain heat as well or get as hot as effectively as cast iron or stainless steel pans. A heavy-bottomed cast iron skillet or a good quality stainless steel pan is highly recommended for superior searing and heat retention.
Q. What’s the difference between a traditional sear and reverse searing, and which method is better?
A. Traditional searing involves cooking the steak entirely on a hot pan, getting the sear first, then finishing to desired doneness. Reverse searing involves cooking the steak slowly in a low oven first until it’s just below your target temperature, then finishing with a quick, high-heat sear on both sides. Reverse searing is often considered “better” for thicker steaks (1.5 inches or more) as it allows for extremely even cooking edge-to-edge, with a perfectly developed crust, and less risk of an overcooked gray band.