In the vast landscape of kitchen cookware, few pieces command as much respect and admiration as the trusty cast iron skillet. It’s an icon, a workhorse, a piece of culinary history passed down through generations. But while the classic single-handle skillet reigns supreme in many minds, there’s a particular variant that’s quietly revolutionizing the way home cooks approach heavy-duty cooking: the cast iron skillet with dual handles.
This isn’t just a minor design tweak; it’s a game-changer that significantly enhances safety, stability, and versatility, especially when dealing with larger, heavier cuts of meat, baking projects, or even just transporting a fully loaded pan from stovetop to oven to table. If you’ve ever struggled to lift a searing-hot, heavily laden traditional cast iron pan with one hand, or worried about tipping it, then the dual-handle design is about to become your new best friend in the kitchen.
This comprehensive guide will dive deep into everything you need to know about these robust pieces of cookware. We’ll explore why they’re becoming a must-have, what makes them so special, how to choose the right one, and crucially, how to care for them so they last a lifetime and beyond. Get ready to unlock new levels of culinary possibility and stability with this exceptional kitchen tool.
What Exactly is a Cast Iron Skillet with Dual Handles?
Before we get into the nitty-gritty, let’s clarify what we’re talking about. A traditional cast iron skillet typically features one long handle and, sometimes, a small “helper handle” on the opposite side. While the helper handle is useful, it’s often small, making it more of an assist than a primary grip.
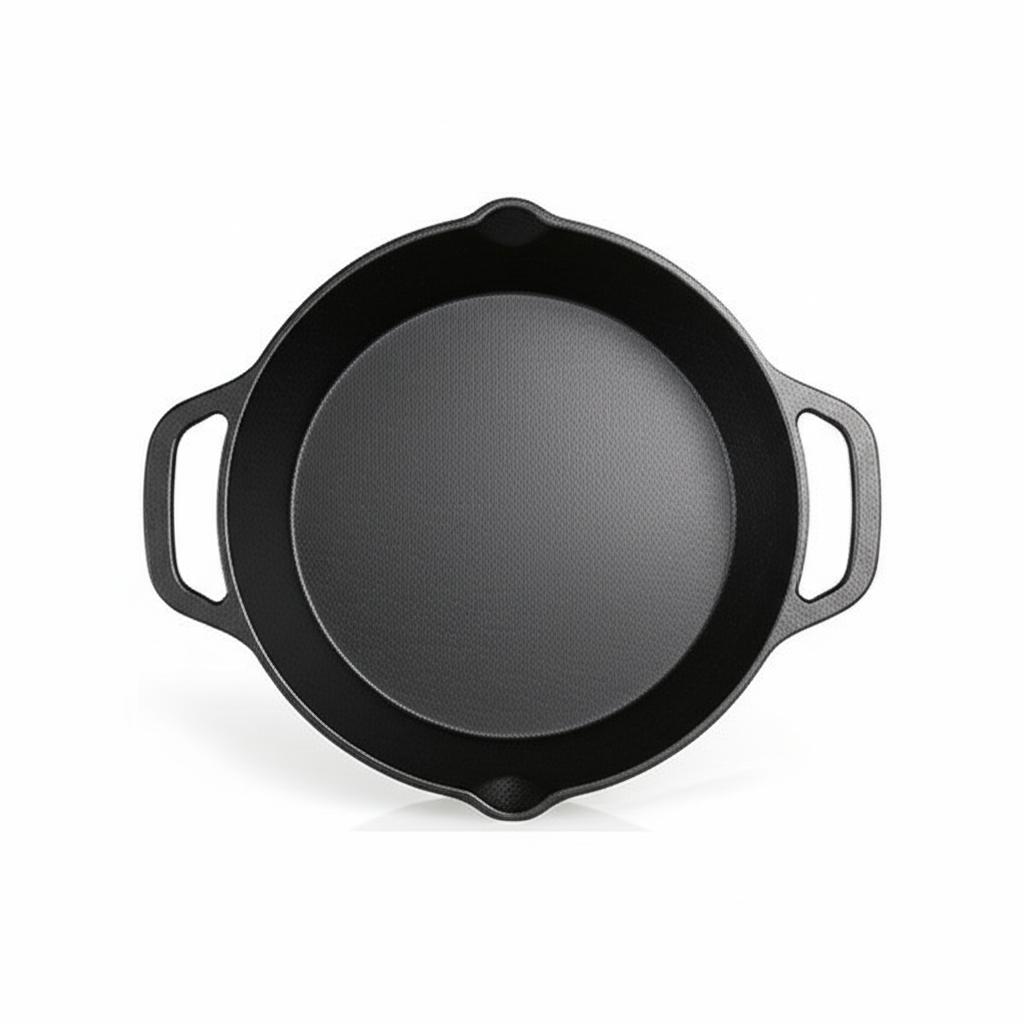
A true cast iron skillet with dual handles, on the other hand, eschews the long single handle entirely. Instead, it features two substantial, integrated loop handles on opposite sides of the pan. These handles are designed to be gripped with both hands, providing maximum stability and control. Think of it less like a traditional frying pan and more like a shallow, wide Dutch oven or a braiser, but with the open-top versatility of a skillet.
This design makes an immediate impact on how you interact with the pan, especially given the inherent weight of cast iron. It transforms what could be an awkward, heavy lift into a balanced, manageable task, whether you’re searing a whole chicken, baking a deep-dish pizza, or bringing a family-sized paella straight to the dinner table.
Why Choose a Dual-Handle Cast Iron Skillet? The Unbeatable Advantages
You might be thinking, “It’s just two handles, how much difference can it make?” The answer is, a surprising amount! The benefits extend far beyond mere convenience.
1. Superior Safety and Stability
This is perhaps the most compelling reason to opt for a dual-handle design. Cast iron is heavy – inherently so. When you’re dealing with a large 12-inch or 15-inch skillet, especially when it’s full of food, trying to maneuver it with a single handle can be precarious.
- Reduced Risk of Tipping: With two hands gripping firmly, the pan is far less likely to tip or spill its contents, protecting both your food and your skin from hot oil or liquid.
- Better Weight Distribution: Your hands are positioned to distribute the pan’s weight evenly, reducing strain on your wrists and arms. This is a huge boon, particularly for those with limited grip strength or anyone cooking larger quantities.
- Secure Transport: Moving the skillet from stovetop to oven, or from oven to a cooling rack, becomes a much more secure and confident operation.
2. Unmatched Oven Versatility
Many traditional cast iron skillets are oven-safe, but the long handle can sometimes be an issue in smaller ovens, sticking out or making it difficult to position other dishes. The compact, loop-handle design of a cast iron skillet with dual handles makes it an absolute champion for oven use.
- Space Efficiency: Without a long handle protruding, these pans fit more easily into ovens of all sizes, allowing for better airflow and the possibility of cooking multiple dishes at once.
- Seamless Stovetop-to-Oven Transitions: This design is ideal for recipes that start on the stovetop (e.g., searing a steak) and finish in the oven (e.g., roasting to temperature). The transition is smooth and stable.
- Baking Powerhouse: From cornbread and frittatas to deep-dish pizzas and even cakes, these skillets are perfect for baking. The dual handles make placing and retrieving them from a hot oven safer and simpler.
3. Easier Storage
That long handle, while classic, can be a pain to store. It often requires specific cupboard space or hangs awkwardly. Dual-handle skillets, with their compact footprint, stack beautifully and fit into smaller spaces more efficiently. They’re less likely to snag on other items or fall out of a crowded cabinet.
4. Elegant Serving Solution
Imagine searing a beautiful whole roasted chicken or baking a golden-brown apple crisp. With dual handles, you can confidently bring the entire skillet straight to the table. It acts as an impressive serving dish, and the excellent heat retention of cast iron means your food stays warmer for longer. Just remember to use a trivet!
5. Even Heating (A Cast Iron Staple)
While not exclusive to the dual-handle design, it’s worth reiterating that cast iron’s inherent property of excellent heat retention and even heat distribution is amplified here. Its ability to hold and radiate consistent heat means your food cooks uniformly, whether you’re searing a steak or baking a casserole.
Versatility in the Kitchen: What Can You Cook?
The question isn’t what can you cook in a dual-handle cast iron skillet, but rather what can’t you? Its robust nature and design make it suitable for an astonishing array of culinary tasks.
Searing and Frying Mastery
This is where cast iron truly shines. The ability to achieve and maintain high temperatures allows for a perfect crust on meats and vegetables.
- Steaks and Chops: Get that restaurant-quality sear and crust every time.
- Chicken Thighs/Breasts: Achieve crispy skin and juicy interiors.
- Burgers: Flat-top diner style right on your stovetop.
- Fried Chicken: Deep, even heat for a beautifully golden, crunchy crust.
- Hash Browns and Potatoes: Perfect crispy texture.
Baking and Roasting Excellence
This is where the dual-handle design truly distinguishes itself from its single-handled brethren.
- Cornbread and Biscuits: Crispy edges, fluffy interiors – a classic.
- Deep-Dish Pizza: The high sides and even heat are ideal for a thick, bubbly crust.
- Frittatas and Quiches: Easy to transition from stovetop to oven for a fluffy finish.
- Roasted Vegetables: Brussels sprouts, potatoes, carrots – beautiful caramelization.
- Whole Roasts: A small chicken, a pork loin, or even a smaller turkey can be roasted beautifully.
Braising and Stewing (Shallow Style)
While not as deep as a full Dutch oven, the dual-handle skillet can serve as an excellent shallow braiser.
- One-Pan Chicken and Veggies: Sear, then add liquid and finish in the oven.
- Sausage and Peppers: A rustic, flavorful dish that cooks evenly.
- Skillet Lasagna: Layer and bake for a comforting meal.
Grilling and Campfire Cooking
Many dual-handle skillets, especially larger ones, are fantastic for outdoor cooking. Their robust construction handles direct flame and coals like a champ. Just ensure the handles are still manageable when hot, perhaps with thick gloves.
Choosing Your Perfect Dual-Handle Skillet
With growing popularity, more brands are offering dual-handle cast iron skillets. Here’s what to consider when making your selection:
1. Size Matters
Dual-handle skillets typically range from 10 inches up to 15 inches or more.
- 10-12 inches: Ideal for 2-4 servings, everyday cooking, and fitting into most ovens.
- 13-15+ inches: Great for larger families, entertaining, whole chickens, or large baking projects. Remember, the bigger it is, the heavier it will be!
2. Weight
Cast iron is heavy, and two handles don’t make it lighter, just easier to manage. Factor in your own strength and comfort level. A 15-inch skillet can weigh 12-15 pounds empty, and significantly more when full of food.
3. Pre-seasoned vs. Bare
- Pre-seasoned: Most new cast iron comes pre-seasoned, meaning it has a factory-applied layer of oil baked onto it. This allows you to start cooking almost immediately after a quick rinse. While convenient, it’s a “starter” layer, and you’ll still need to build up your own seasoning over time.
- Bare (Unseasoned): Less common now, but some artisanal or vintage pieces might be bare. These require a thorough initial seasoning process before use. If you’re new to cast iron, pre-seasoned is generally the way to go.
4. Brand Reputation
Stick with reputable brands known for quality cast iron. Lodge, Le Creuset (enamelled), Staub (enamelled), Finex, Smithey, and Field Company are a few examples, though many excellent smaller brands exist. Read reviews and consider the thickness and finish of the iron.
5. Lids and Accessories
- Lids: Some dual-handle skillets come with matching cast iron or glass lids. A lid is incredibly useful for braising, simmering, or keeping food warm.
- Handle Holders: While the loop handles are easier to grip, they still get incredibly hot. Silicone handle holders or thick oven mitts are essential accessories.
The Art of Seasoning Your Cast Iron
Seasoning is the foundation of cast iron cooking. It’s not just about a non-stick surface; it’s about protecting your pan from rust and building a beautiful, slick cooking surface that improves with every use. Even if your skillet is pre-seasoned, regular seasoning is vital.
What is Seasoning?
It’s a layer of polymerized oil that bonds to the iron. When oil is heated past its smoke point, it breaks down and forms a hard, non-stick, protective layer. This layer darkens over time, turning your pan into a beautiful, glossy black.
How to Season (Quick Guide):
- Clean: Wash your new or freshly cleaned pan with hot water and a brush (no soap for established seasoning, but fine for new pre-seasoned). Dry thoroughly over low heat on the stovetop until completely dry.
- Oil: Apply a very thin, even layer of high smoke point oil (like flaxseed, grapeseed, or vegetable oil) over the entire pan – inside, outside, and handles. Thin is key; too much oil will lead to sticky residue.
- Wipe: Use a clean paper towel to wipe off as much oil as possible, leaving just a microscopic film. You should feel like you’ve wiped off all the oil, but a tiny layer remains.
- Bake: Place the pan upside down in a cold oven. Heat the oven to 450-500°F (230-260°C). Once it reaches temperature, “bake” for one hour.
- Cool: Turn off the oven and let the pan cool completely inside the oven.
- Repeat: For a truly robust initial seasoning, repeat steps 2-5 at least 3-4 times. The more layers, the better the non-stick properties and rust resistance.
After this initial seasoning, simply cooking with oil and maintaining your pan properly will continue to build up the seasoning.
Cleaning and Maintenance Essentials for Longevity
Proper care is paramount for a cast iron skillet with dual handles. It’s what transforms it from a piece of cookware into a cherished family heirloom.
After Each Use (The Daily Ritual)
- Cool Slightly: Let the pan cool down enough to handle, but while it’s still warm. Drastic temperature changes can warp or crack cast iron.
- Scrape/Wipe: Use a pan scraper (plastic or metal chainmail scrubber) or a stiff brush under hot running water to remove food bits. For stubborn bits, you can add a little coarse salt as an abrasive.
- Soap Debate: A small amount of mild dish soap is fine on a well-seasoned pan. It won’t strip established seasoning. What strips seasoning is harsh abrasives and prolonged soaking. If you’re concerned, stick to hot water only.
- Rinse Thoroughly: Ensure no food particles or soap residue remain.
- Dry Immediately and Completely: This is the most crucial step! Place the pan on the stovetop over low heat for a few minutes until all moisture evaporates. You can even see steam rising.
- Light Oil Wipe: While still warm, apply a tiny amount (a few drops) of cooking oil (vegetable, grapeseed, etc.) to the inside of the pan and wipe it around with a paper towel until the surface looks lightly glistening, not wet. This protects the seasoning and prevents rust.
Deep Cleaning (When Needed)
Sometimes, you might get sticky residue, rust spots, or truly baked-on gunk.
- Sticky Residue: This is usually from too much oil during seasoning or not wiping enough after cooking. Scrub with hot water, salt, and a chainmail scrubber. Then re-season that spot.
- Rust Spots: If you see orange spots, it means your pan got wet and didn’t dry properly. Scrub the rust off with steel wool or a scrub brush until the bare metal is exposed. Then immediately re-season the affected area (or the whole pan if it’s widespread) several times.
- Stripping and Re-seasoning: For a truly neglected or heavily rusted pan, you might need to strip it down to bare metal (using oven cleaner, electrolysis, or a lye bath – proceed with extreme caution and research for these methods) and then completely re-season it from scratch multiple times.
Storage Tips
- Dry Location: Store your pan in a dry cupboard or hung up.
- Prevent Moisture Trapping: If stacking, place a paper towel between stacked cast iron pieces to absorb any residual moisture and prevent scratching.
- Airflow: Avoid storing in damp areas or in enclosed spaces without airflow.
Common Mistakes to Avoid with Your Dual-Handle Cast Iron Skillet
Even with the best intentions, it’s easy to make mistakes that can hinder your cast iron’s performance.
- Not Drying It Completely: This is the #1 cause of rust. Water is cast iron’s enemy. Always dry on the stovetop.
- Soaking It: Never leave cast iron soaking in water. This will lead to rust faster than you can say “patina.”
- Washing with Harsh Detergents/Dishwashers: While mild soap is fine, abrasive cleaners and dishwashers will strip the seasoning, leaving your pan vulnerable to rust and sticking. Hand wash only.
- Extreme Temperature Changes: Don’t put a piping hot pan directly into cold water or vice-versa. This can cause thermal shock, leading to warping or even cracking the iron. Let it cool gradually.
- Using Metal Utensils Too Aggressively (Initially): While cast iron is durable, vigorous scraping with sharp metal utensils on a newly seasoned pan can scratch off the seasoning. As the seasoning builds up, it becomes more resilient.
- Not Preheating Properly: Cast iron needs time to heat up slowly and evenly to distribute heat across the entire cooking surface. Don’t crank the heat to high immediately.
- Using Too Little Oil (Especially Early On): While seasoning builds, use a good amount of cooking oil/fat when cooking to prevent sticking and further build up your seasoning.
- Forgetting About the Handles: Just because they’re designed for two hands doesn’t mean they don’t get searing hot! Always use oven mitts or thick handle covers.
Tips and Best Practices for Maximizing Your Dual-Handle Skillet
You’ve got your beautiful dual-handle skillet, you know how to care for it, now let’s master cooking with it!
- Preheat Patiently: Cast iron loves slow, steady preheating. Place it on medium-low heat for 5-10 minutes before adding oil or food. This ensures even heat across the entire surface and prevents hot spots.
- Use Enough Fat: Especially when your seasoning is still developing, don’t be shy with oil, butter, or other fats. This helps prevent sticking and contributes to the seasoning.
- Scrape While Warm: After cooking, while the pan is still warm (but not scalding hot), use a metal or plastic scraper to remove any stuck-on bits. It’s much easier than waiting for it to cool.
- Master Temperature Control: Cast iron retains heat exceptionally well. Often, you’ll find you need lower heat settings than with other cookware once the pan is up to temperature.
- Embrace the “Non-Stick” Journey: Don’t expect your cast iron to perform like Teflon from day one. It’s a journey. Every meal cooked with care, every light oil wipe, contributes to a more naturally non-stick surface. Eggs sliding around effortlessly is the ultimate reward!
- Use for Searing and Roasting: This is where the dual-handle design truly shines. Get that incredible crust on meats on the stovetop, then transfer directly to the oven for a perfect finish.
- Consider a Lid: A matching cast iron lid (or even a universal one) can transform your skillet into a powerful braiser or a slow-cooker, trapping moisture and heat.
- Don’t Fear Rust: It happens! It’s a sign your pan needs a little TLC, not a death sentence. Address it promptly, and your pan will be good as new.
- It’s an Heirloom: With proper care, a cast iron skillet with dual handles will outlast you. Teach your children or grandchildren how to care for it, and it can truly become a multi-generational tool.
Frequently Asked Questions (FAQ) About Cast Iron Skillets with Dual Handles
Q1: What’s the main advantage of a dual-handle cast iron skillet over a traditional single-handle one?
A1: The primary advantage is superior safety and stability due to even weight distribution when lifting. It’s much easier and safer to move a heavy, food-laden pan with two hands, especially from stovetop to oven or to the table. This also makes it more compact for oven use and storage.
Q2: Are dual-handle cast iron skillets oven-safe?
A2: Absolutely! Most cast iron skillets are oven-safe. The dual-handle design, lacking a long handle, makes them even more ideal for oven use as they fit into smaller ovens more easily and allow for better airflow around other dishes.
Q3: How do I clean a dual-handle cast iron skillet?
A3: Clean it while still warm with hot water and a stiff brush or chainmail scrubber. Avoid abrasive soaps for heavily seasoned pans, but mild dish soap is fine for new or well-established seasoning. Crucially, dry it immediately and completely on the stovetop over low heat, then apply a thin layer of cooking oil before storing.
Q4: My dual-handle skillet is sticking. What should I do?
A4: Sticking usually means your seasoning isn’t fully developed, or you’re not using enough fat while cooking. Ensure you preheat the pan properly, use sufficient cooking oil/fat, and continue to build up your seasoning through regular cooking and light re-oiling after each wash.
Q5: Can I wash my cast iron skillet with soap?
A5: Yes, you can! The old myth about never using soap on cast iron is largely outdated. Modern mild dish soaps won’t strip established, polymerized seasoning. What does strip seasoning are harsh detergents, steel wool (unless trying to remove rust), and prolonged soaking.
Q6: How often should I re-season my cast iron skillet?
A6: After the initial multiple seasoning layers, you don’t need to do a full oven re-seasoning often. Simply cooking with oil and doing the light oil wipe after each cleaning typically maintains and improves the seasoning. If you notice dull spots, food sticking more, or rust, then it’s time for a targeted re-seasoning of that area or the whole pan.
Q7: What kind of oil is best for seasoning cast iron?
A7: High smoke point oils are best, as they polymerize well. Grapeseed oil, flaxseed oil (though sometimes prone to flaking), vegetable oil, canola oil, and shortening are all excellent choices.
Q8: My cast iron has rust on it. Is it ruined?
A8: Not at all! Rust is common and easily fixable. Scrub the rust off with a scouring pad or steel wool until the bare metal shows. Rinse, dry thoroughly on the stovetop, and then immediately apply several layers of seasoning (following the baking method) to the affected area or the entire pan.
Q9: Can I cook acidic foods like tomato sauce in my cast iron skillet?
A9: It’s generally advised to avoid cooking highly acidic foods for prolonged periods, especially in a new or poorly seasoned cast iron pan. Acid can strip the seasoning and impart a metallic taste to food. Once your pan has a very well-established, thick seasoning, occasional short-term cooking of acidic dishes is usually fine.
Q10: Are dual-handle skillets good for outdoor cooking, like over a campfire?
A10: Absolutely! Their robust construction makes them perfect for campfire cooking or on a grill. Just remember that the entire pan, including the handles, will get extremely hot, so always use heavy-duty oven mitts or campfire gloves.
Conclusion
The cast iron skillet with dual handles isn’t just a niche product; it’s a thoughtful evolution of a kitchen staple. It takes all the legendary qualities of cast iron – its incredible heat retention, durability, and versatility – and enhances them with a design that prioritizes safety, stability, and ease of use.
Whether you’re a seasoned chef looking for a more manageable way to handle heavy cuts of meat, a baking enthusiast craving that perfect golden crust, or simply someone who appreciates robust, multi-functional cookware, this dual-handled marvel is an indispensable addition to your kitchen arsenal. Invest in one, learn to care for it properly, and you’ll not only enjoy countless delicious meals but also acquire a piece of cookware that will confidently serve your family for generations. Happy cooking!