Unleash Your Inner Baker: Mastering Advanced Techniques for Stunning Results
- KitchenAid Classic Series 4.5 Quart Tilt-Head Stand Mixer K45SS, Onyx Black
- Kitchen in the box Stand Mixer,3.2Qt Small Electric Food Mixer,6 Speeds Portable Lightweight Kitchen Mixer for Daily Use with Egg Whisk,Dough Hook,Flat Beater (Black)
- 5QT Food Grade Stainless Steel Mixer Bowl, Compatible with KitchenAid Series 4.5-5QT Tilt-Head Mixers, Suitable for K45SS, KSM75, KSM90, KSM100, KSM150, Dishwasher Safe, Heavy Duty, No Residue
Are you ready to move beyond the basic cookie and cake recipes? Do you dream of crafting flaky croissants, artisanal sourdough loaves, or delicate, colorful macarons? If your baking journey has led you to crave new challenges and astonishing results, you’re in the right place!
This guide will dive deep into advanced baking techniques, transforming your kitchen into a true patisserie. We’ll explore complex processes, share expert tips, and pinpoint common pitfalls, all delivered with a friendly, encouraging tone. Get ready to elevate your baking skills and impress everyone with your newfound mastery!
The Foundation of Advanced Baking: Precision and Patience
Before we embark on specific techniques, understand that advanced baking hinges on two critical pillars:
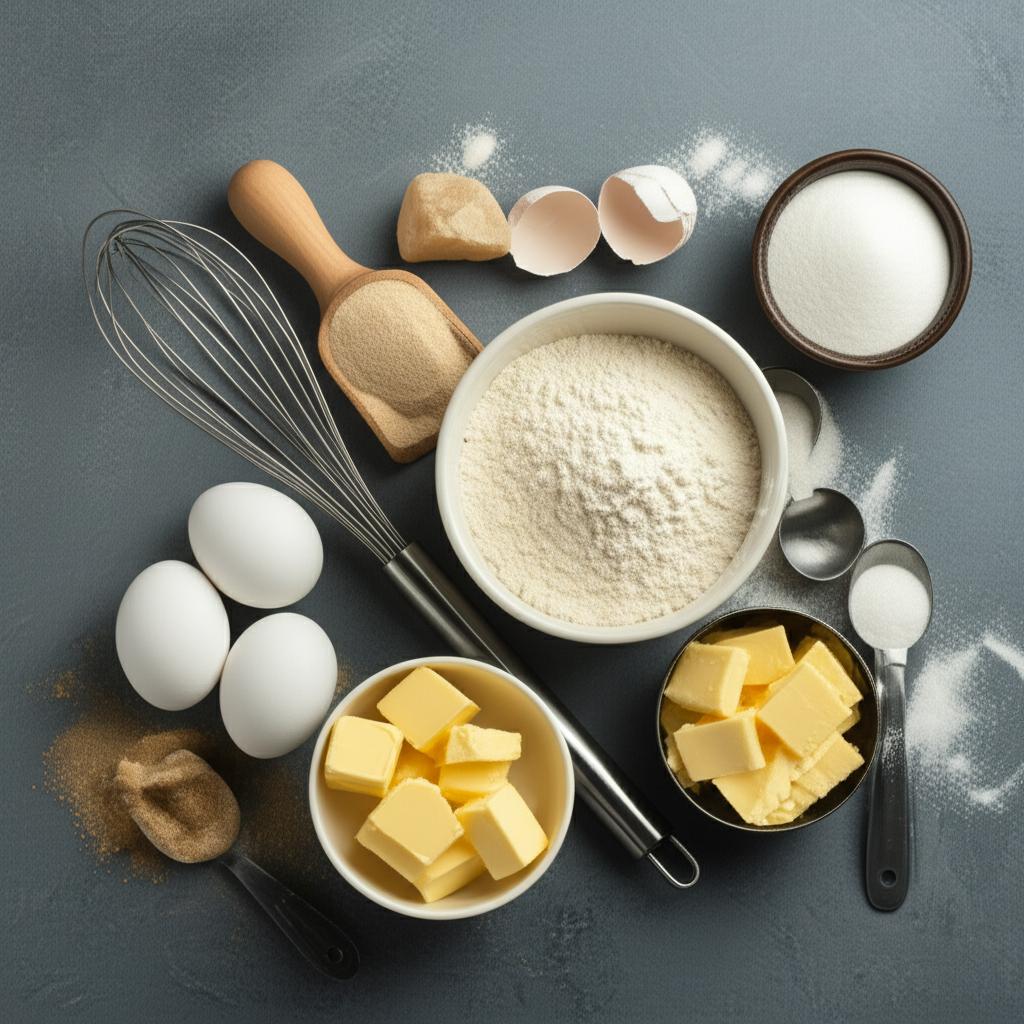
- Precision is paramount: Unlike some cooking where a pinch more or less is fine, baking is chemistry. Accurate measurements, often by weight (using a kitchen scale), are non-negotiable. Temperature control (ingredients, dough, oven) is also vital.
- Patience is your secret ingredient: Many advanced techniques involve extended chilling, proofing, or resting times. Rushing these steps will almost always lead to failure. Embrace the process!
Now, let’s roll up our sleeves and explore some truly rewarding advanced baking techniques.
1. The Art of Lamination: Flaky Croissants and Puff Pastry
Laminated doughs, like those used for croissants and puff pastry, are a hallmark of advanced baking. They involve incorporating a block of butter into a dough, then repeatedly folding and rolling (lamination) to create hundreds of paper-thin layers of butter and dough. When baked, the water in the butter turns to steam, pushing the layers apart and creating that characteristic airy, crisp texture.
Why It’s Advanced:
- Temperature control: The butter must be pliable but not soft.
- Evenness: Each fold must be precise and even for consistent layers.
- Chilling: Adequate chilling between folds is crucial to prevent the butter from melting into the dough.
Step-by-Step: The Croissant Journey (Simplified)
This is a general overview; specific recipes vary.
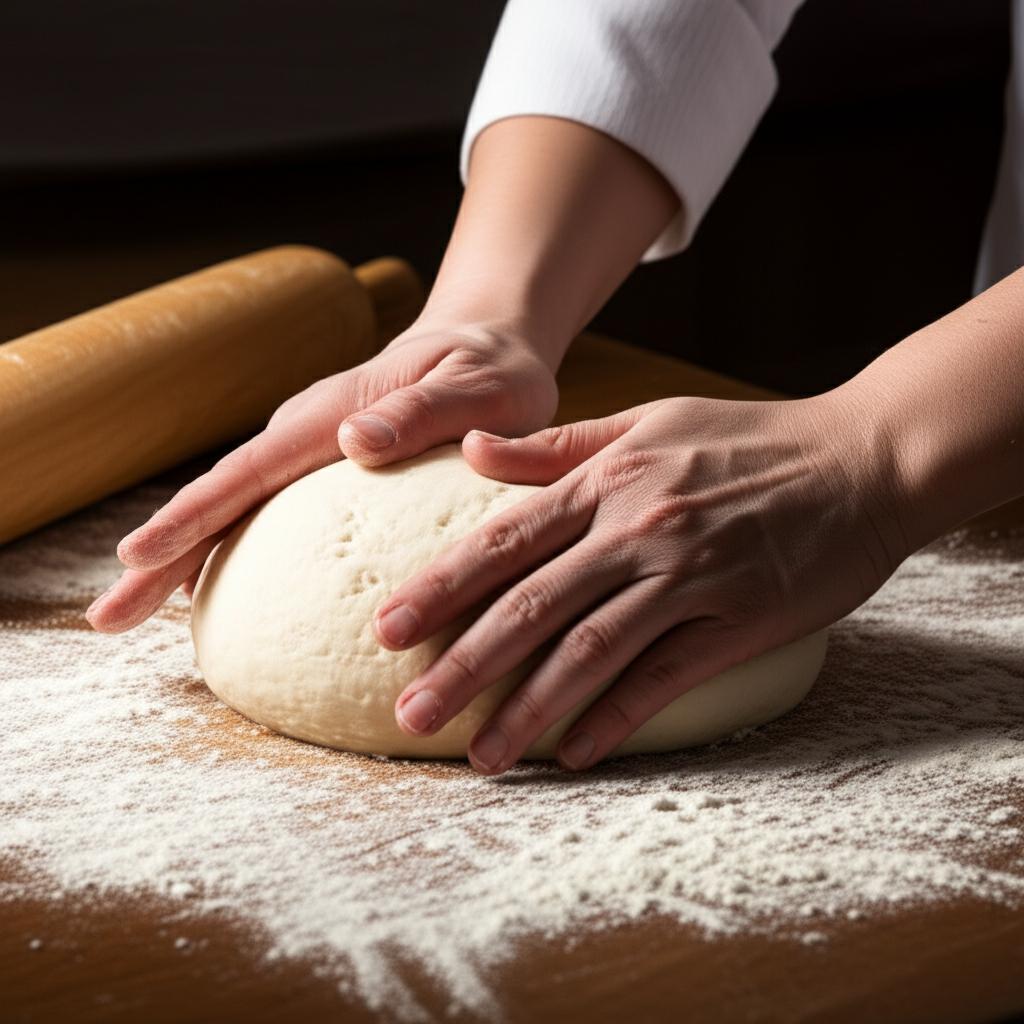
- Prepare the Dough: Make a lean yeasted dough (flour, water, yeast, salt, a little sugar). Knead it until smooth and elastic.
- Prepare the Butter Block: Shape cold, high-quality butter (preferably European-style with higher fat content) into a flat, even rectangle. This is crucial for even lamination.
- Encasing the Butter: Roll out your chilled dough into a rectangle, roughly twice the size of your butter block. Place the butter block squarely in the center of one half of the dough. Fold the other half of the dough over the butter, sealing the edges completely. The butter must be fully enclosed.
- The First Turn (Fold):
- Gently roll the dough into a long rectangle.
- Perform a “book fold” or “letter fold”: Fold one end to the center, then fold the other end over it, like closing a book (creating 4 layers). Or a “single fold”: Fold one end 1/3 of the way, then fold the other end over that (creating 3 layers).
- Wrap tightly and chill thoroughly (30-60 minutes).
- Subsequent Turns: Repeat step 4 two to three more times, always chilling adequately between each turn. Always rotate the dough 90 degrees before each new roll so you are rolling perpendicular to the last fold. This ensures even layers.
- Final Shaping: After the last chill, roll the dough to its final thickness. Cut into desired shapes (triangles for croissants, squares for puff pastry).
- Proofing (for Croissants): Place shaped croissants on a baking sheet. Proof in a warm, humid environment until visibly puffy and jiggly (they should jiggle like jelly when gently shaken). This can take 2-4 hours. Proper proofing is vital for an open, airy crumb.
- Baking: Bake in a hot oven (often 375-400°F / 190-200°C) until deep golden brown and flaky.
Expert Tips:
- Use the best butter you can find. Its quality directly impacts flavor and flakiness.
- Keep everything cold! If the butter starts to melt, stop and chill the dough immediately.
- Be gentle when rolling. Don’t tear the dough or squeeze out the butter.
- Flour your surface lightly to prevent sticking, but brush off excess.
- Master your folds. Practice makes perfect for even lamination.
Common Mistakes to Avoid:
- Butter too hard or too soft: Too hard will tear the dough; too soft will incorporate into the dough.
- Insufficient chilling: Leads to butter melting and no distinct layers.
- Uneven rolling or folding: Results in lopsided layers or areas with no flakiness.
- Under-proofing croissants: Yields a dense, bready interior instead of an open, airy one.
- Oven not hot enough: Prevents the butter from steaming effectively, leading to flat results.
2. The Living Loaf: Sourdough Bread Baking
Sourdough bread, with its characteristic tangy flavor, chewy crust, and open crumb, relies on a natural leavening agent (sourdough starter) instead of commercial yeast. This live culture of wild yeasts and bacteria requires care, understanding, and patience.
Why It’s Advanced:
- Starter maintenance: Keeping your starter active and healthy is foundational.
- Dough hydration: Sourdough often uses high-hydration doughs, which are stickier and harder to handle.
- Reading the dough: Understanding bulk fermentation progress and proofing stages relies on feel and observation, not just a timer.
- Shaping and scoring: Critical for structure and aesthetics.
Step-by-Step: From Starter to Slice
- Active Starter: Ensure your sourdough starter is active and bubbly. Feed it 4-12 hours before mixing your dough. It should float in water when a small piece is dropped in.
- Autolyse (Optional but Recommended): Mix flour and water and let it rest for 30-60 minutes. This hydrates the flour and begins gluten development, making mixing easier.
- Mixing the Dough: Add your active starter and salt. Gently mix until just combined.
- Bulk Fermentation & Folds: This is the heart of sourdough. Over several hours (typically 4-8, depending on temperature), the dough will ferment and develop strength.
- Perform “stretch and folds” or “coil folds” every 30-60 minutes for the first few hours. This builds gluten structure without aggressive kneading.
- Monitor the dough, not just the clock. It should become airy, bubbly, and increase significantly in volume.
- Pre-Shaping: Gently turn the dough out onto a lightly floured surface. Gently shape it into a loose round or rectangle and let it rest for 20-30 minutes (bench rest).
- Final Shaping: Develop surface tension by shaping the dough into its final boule (round) or batard (oval) shape. This creates a tight skin that holds its form during baking.
- Cold Proof (Retardation): Place the shaped dough in a floured banneton (proofing basket) seam-side up. Refrigerate for 12-24 hours. This slows fermentation, develops flavor, and makes the dough easier to score.
- Baking:
- Preheat your oven with a Dutch oven (or baking stone/steel) inside to a very high temperature (450-500°F / 230-260°C).
- Carefully transfer the dough to the hot Dutch oven.
- Score the top of the dough with a sharp lame or razor blade to allow for oven spring.
- Bake covered for 20-30 minutes (creates steam for a crisp crust).
- Bake uncovered for another 20-30 minutes until deep golden brown.
- Cooling: Crucially, let the bread cool completely on a wire rack for at least 2-3 hours before slicing. This allows the crumb to set and moisture to redistribute.
Expert Tips:
- Know your starter: Learn its quirks – how often it needs feeding, how it behaves in different temperatures.
- Hydration matters: Higher hydration equals more open crumb but stickier dough. Start lower and increase as you gain confidence.
- Temperature is key: Warmer environments speed up fermentation; colder ones slow it down.
- Learn to “read” the dough: Look for bubbles, jiggliness, and a slight doming during bulk ferment.
- Invest in a good Dutch oven. It creates the perfect steamy environment for a beautiful crust and oven spring.
Common Mistakes to Avoid:
- Weak or inactive starter: Leads to dense, flat bread.
- Under-proofing: Results in a dense crumb, often with large, irregular tunnels.
- Over-proofing: Leads to a dough that collapses in the oven, with a tight, gummy crumb.
- Insufficient shaping: Causes the bread to spread out instead of holding its shape.
- Not using a hot enough oven or enough steam: Results in a pale, soft crust.
- Cutting too early: Leads to a gummy, unpleasant texture.
3. The Delicate Dance: Macarons (French Method)
Macarons are perhaps the most notoriously challenging of advanced pastries, but also one of the most rewarding. These delicate, meringue-based sandwich cookies, with their signature “feet” and chewy interior, demand precision, patience, and a keen eye for detail. We’ll focus on the more stable French method here.
Why It’s Advanced:
- Meringue consistency: Getting the stiff-peak meringue just right is vital.
- Macaronage: The precise folding technique that creates the perfect batter consistency.
- Drying (“Cresting”): Essential for forming the “foot.”
- Oven control: Macarons are incredibly sensitive to temperature fluctuations and hot spots.
Step-by-Step: The Macaron Magic
- Prepare Ingredients & Dry Mix:
- Aged egg whites (optional but helpful): Separate egg whites a day or two in advance and let them sit at room temperature, covered loosely.
- Sift your almond flour and powdered sugar together thoroughly, twice. Discard any large bits. This is crucial for smooth shells.
- Measure all ingredients precisely by weight.
- Make the Meringue:
- In a very clean, grease-free bowl, whip your egg whites on medium speed until foamy.
- Gradually add granulated sugar (a little at a time) while whipping, increasing speed.
- Continue whipping until you achieve stiff, glossy peaks that hold their shape. The meringue should be thick and stable.
- Macaronage (The Folding):
- Add about a third of your dry almond flour/powdered sugar mix to the meringue. Fold gently with a spatula.
- Add the remaining dry ingredients in two more additions.
- The goal is to deflate the meringue just enough to achieve the “lava” or “ribbon” stage: when you lift the spatula, the batter should fall off in a continuous ribbon, slowly reabsorbing into the main mixture in about 15-20 seconds. This is the most critical step!
- Piping: Transfer the batter to a piping bag fitted with a round tip. Pipe uniform circles onto parchment paper or a silicone mat.
- Tapping & Air Bubbles: Firmly tap the baking sheets on your counter several times. This releases air bubbles. Pop any remaining bubbles with a toothpick.
- Drying (Cresting): Let the piped macarons air dry at room temperature for 30-60 minutes (or longer, depending on humidity) until a skin forms on top. When you gently touch a shell, it should not stick to your finger. This skin is essential for the “feet” to form.
- Baking:
- Preheat your oven accurately (typically 290-325°F / 145-160°C).
- Bake one tray at a time. The “feet” should appear within the first 5-8 minutes.
- Bake until the shells are firm and don’t wobble when gently touched.
- Cooling & Filling: Let the macarons cool completely on the baking sheet before carefully peeling them off. Fill with your favorite ganache, buttercream, or jam.
Expert Tips:
- Cleanliness is next to godliness: Any grease in your bowl or on your whisk will prevent the meringue from forming.
- Weigh everything precisely. Eyeballing ingredients is a recipe for disaster with macarons.
- Don’t over-mix or under-mix the macaronage. This is the hardest part to master. Practice!
- Control humidity: Macarons struggle in high humidity. Use a dehumidifier if needed, or bake on a dry day.
- Invest in an oven thermometer. Your oven’s dial might not be accurate.
Common Mistakes to Avoid:
- Oily almond flour: Freshly ground or improperly stored almond flour can release oil, ruining the batter.
- Weak meringue: Won’t hold its shape, leading to flat macarons.
- Over-macaronage: Leads to runny batter, no feet, and flat, brittle shells.
- Under-macaronage: Results in lumpy batter, pointed tops, and hollow shells.
- Not drying enough: Prevents the feet from forming, or causes cracked shells.
- Oven too hot/cold: Too hot causes rapid browning and cracked tops; too cold prevents feet from forming and can lead to chewy texture.
- Prying off too early: The shells will stick and break. Always cool completely.
Beyond the Recipe: General Advanced Baking Wisdom
Mastering specific techniques is just part of the journey. Here are some overarching principles for the advanced baker:
- Understand the “Why”: Don’t just follow recipes; learn why certain steps are taken. Why does yeast prefer warmth? Why does gluten need rest? This understanding empowers you to troubleshoot and adapt.
- Embrace Your Environment: Humidity, altitude, and even the season can impact baking. Learn how to adjust your recipes accordingly.
- Quality Ingredients Matter: This is particularly true for advanced baking. High-quality butter, fresh flours, and good chocolate make a noticeable difference in the final product.
- Keep a Baking Journal: Note down every detail: ingredient brands, precise timings, oven temperatures, and most importantly, results. This helps you identify what works and what doesn’t.
- Learn from Mistakes: Every “failed” bake is a learning opportunity. Analyze what went wrong, research, and adjust for next time. Don’t get discouraged!
- Cleanliness and Organization (Mise en Place): Having all your ingredients measured and tools ready before you start can significantly reduce stress and errors.
- Invest in Good Tools: A reliable kitchen scale, a good stand mixer, oven thermometer, quality baking sheets, and parchment paper are invaluable. (Remember, no product reviews, but highlighting useful types of tools is fine.)
Your Baking Adventure Continues!
Stepping into advanced baking is a rewarding journey that builds not just skills, but also patience, precision, and a deeper appreciation for the culinary arts. While the initial attempts might not be perfect, every effort refines your technique and understanding.
So, preheat your oven, embrace the challenge, and unleash the incredible baker within you! The world of exquisite pastries and artisan breads awaits your skilled hands. Happy baking!
- KitchenAid Classic Series 4.5 Quart Tilt-Head Stand Mixer K45SS, Onyx Black
- Kitchen in the box Stand Mixer,3.2Qt Small Electric Food Mixer,6 Speeds Portable Lightweight Kitchen Mixer for Daily Use with Egg Whisk,Dough Hook,Flat Beater (Black)
- 5QT Food Grade Stainless Steel Mixer Bowl, Compatible with KitchenAid Series 4.5-5QT Tilt-Head Mixers, Suitable for K45SS, KSM75, KSM90, KSM100, KSM150, Dishwasher Safe, Heavy Duty, No Residue
FAQ
Q. What exactly does “Unleash Your Inner Baker: Advanced Techniques” cover?
A. This resource delves deep into sophisticated baking methods, beyond basic recipes. It covers topics such as mastering sourdough bread from building and maintaining your starter to complex shaping and scoring, perfecting laminated doughs like croissants and puff pastry, advanced cake construction including entremets and mirror glazes, precise tempering of chocolate, and the scientific principles behind ingredient interactions for optimal results.
Q. Do I need to have a lot of baking experience before diving into these advanced techniques?
A. While not strictly for absolute beginners, “Unleash Your Inner Baker: Advanced Techniques” is designed to guide passionate home bakers from an intermediate level to a professional standard. A basic understanding of baking principles and comfort with standard recipes will be beneficial, as the content focuses on elevating existing skills and introducing complex methodologies.
Q. Will I learn how to make delicate laminated doughs such as croissants and pain au chocolat?
A. Absolutely. A significant portion of “Unleash Your Inner Baker: Advanced Techniques” is dedicated to demystifying laminated doughs. You’ll learn the precise art of creating perfect detrempe, incorporating butter blocks, and executing various folding techniques (turns) to achieve flaky, airy layers characteristic of professional-quality croissants, pain au chocolat, and puff pastry.
Q. Is sourdough bread baking, including starter maintenance, extensively covered?
A. Yes, sourdough is a core component. The resource provides comprehensive guidance on establishing and maintaining a vibrant sourdough starter, understanding flour hydration, advanced mixing techniques (like autolyse and stretch and folds), intricate shaping for open crumbs, effective scoring methods, and achieving beautiful crusts in various home oven setups.
Q. Beyond recipes, does this resource help me understand the science behind advanced baking?
A. Definitely. “Unleash Your Inner Baker: Advanced Techniques” emphasizes the “why” behind the “how.” It explores the chemistry of ingredients—such as gluten development, yeast activity, emulsification, sugar crystallization, and the role of fats—to empower you to troubleshoot issues, adapt recipes, and innovate with confidence, turning you into a true baking scientist.
Q. Are advanced cake decorating or finishing skills, like mirror glazes and sugar work, included?
A. Yes, the resource extends to the artistic side of baking. You’ll learn advanced finishing techniques, including how to create stunning mirror glazes (glaçage miroir) for entremets, construct multi-layered cakes, achieve sharp edges with ganache, and understand basic principles of chocolate tempering for decorative elements, elevating your desserts visually.