Ever stared at a beautiful cut of meat, sizzling on the grill or slowly roasting in the oven, and wondered, “Is it done yet?” The age-old dilemma of perfectly cooked meat – juicy and tender, never dry or, worse, dangerously undercooked – is one that every home cook, pitmaster, and grilling enthusiast faces. Guesswork, relying on visual cues, or the dreaded “cut-and-peek” method often leads to inconsistent results and, frankly, disappointment.
But what if there was a simple, scientific way to take all the guesswork out of it? Enter the digital meat thermometer for grilling and roasting. This isn’t just another kitchen gadget; it’s your secret weapon for culinary precision, ensuring food safety, and guaranteeing that every steak, chicken, roast, or brisket comes out exactly how it should: perfect, every single time. Forget the days of dry, tough meat or worrying about serving something unsafe. With the right thermometer and a little know-how, you’re about to elevate your cooking game to a whole new level.
Why Every Griller and Roaster Needs a Digital Meat Thermometer
Think of a digital meat thermometer as your culinary co-pilot. It provides real-time, accurate temperature readings, which are absolutely critical for several reasons:
Ensuring Food Safety: No More Guesswork!
This is arguably the most important reason. Undercooked meat, especially poultry and pork, can harbor harmful bacteria like Salmonella and E. coli. Relying on color or texture alone simply isn’t enough to confirm that internal temperatures have reached safe levels. A digital thermometer gives you an objective, scientific reading, ensuring your food is cooked thoroughly and safely, protecting your family and guests from foodborne illnesses. The USDA provides specific safe minimum internal temperature guidelines, and your thermometer is the key to hitting those marks every time.
Achieving Perfect Doneness: Consistency is King
Do you prefer your steak medium-rare, or your chicken juicy but fully cooked through? A digital thermometer allows you to hit your desired doneness level with pinpoint accuracy. This means no more guessing games, no more cutting into your beautiful roast only to find it overcooked and dry. You can consistently achieve the perfect texture and flavor profile, turning you into a kitchen hero.
Preventing Overcooking: Save Those Juices!
Just as dangerous as undercooking is the tragedy of overcooking. An extra few minutes on the grill or in the oven can transform a succulent cut of meat into a tough, dry, and unappetizing mess. Overcooking also leaches out valuable juices and flavor. By monitoring the internal temperature closely, you can pull your meat off the heat at precisely the right moment, preserving its natural moisture, tenderness, and deliciousness. This is where a good digital meat thermometer for grilling and roasting truly shines, safeguarding your expensive cuts of meat.
Saving Money and Reducing Waste
Let’s be honest, quality cuts of meat aren’t cheap. Ruining a prime rib or a whole turkey because of inaccurate cooking is a waste of both food and money. Investing in a reliable digital thermometer pays for itself by ensuring that every piece of meat you cook is done right, reducing waste and maximizing your culinary success.
Types of Digital Meat Thermometers: Finding Your Perfect Match
Not all digital meat thermometers are created equal. They come in various styles, each designed for specific cooking scenarios. Understanding the differences will help you choose the best tool for your grilling and roasting adventures.
Instant-Read Thermometers
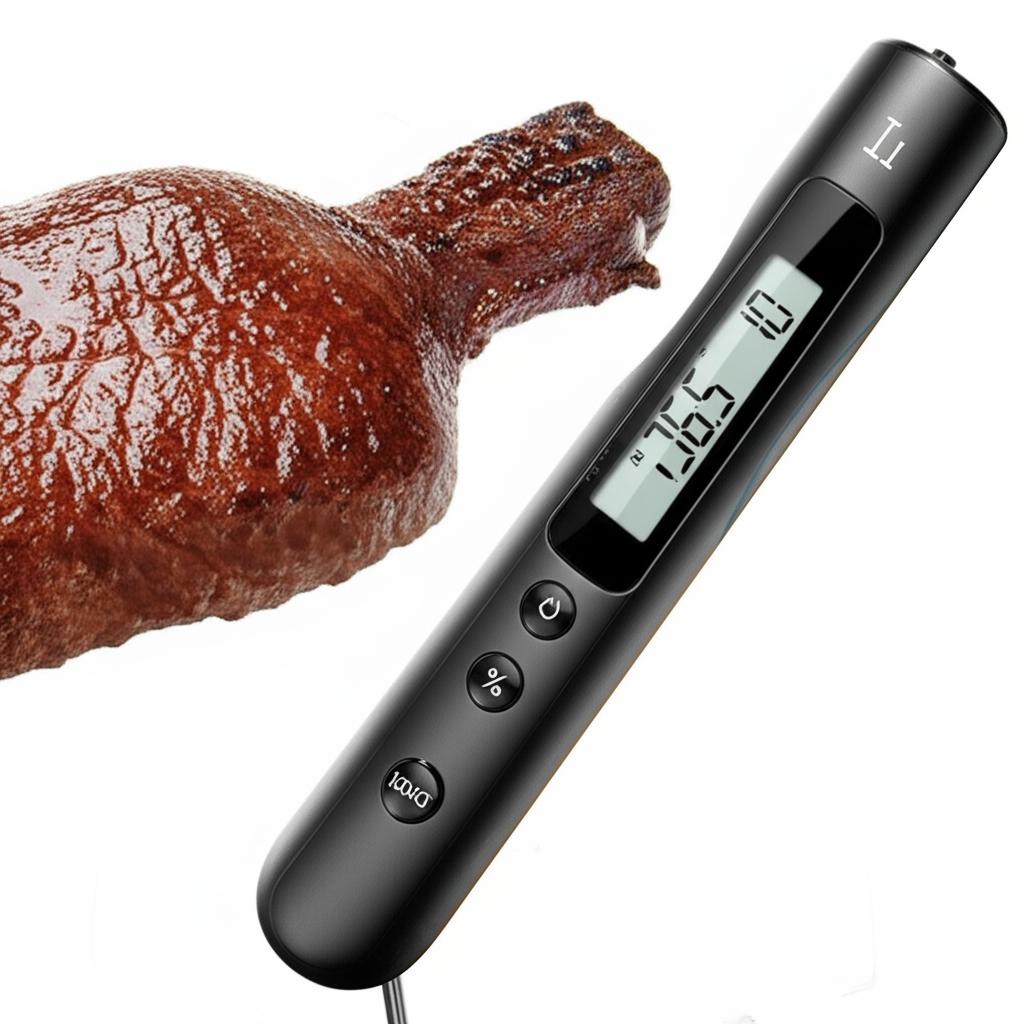
These are perhaps the most common and versatile type. As the name suggests, they provide a temperature reading almost instantly (usually within 2-5 seconds) when you insert the probe into the meat.
- Pros: Extremely fast readings, highly accurate, portable, great for quick checks on thinner cuts like steaks, chicken breasts, or fish fillets. They are ideal for checking multiple items quickly.
- Cons: Not designed to be left in the meat during cooking, as most models cannot withstand high oven or grill temperatures for extended periods. You have to open the oven or grill lid to take a reading, which can cause temperature fluctuations.
- Best for: Grilling burgers, chicken, pork chops, pan-searing, and quickly checking the doneness of various items.
Leave-In Probe Thermometers (Wired)
These thermometers consist of a base unit (which stays outside the oven or grill) connected by a heat-resistant wire to a metal probe that gets inserted into the meat.
- Pros: Allows for continuous temperature monitoring without opening the oven or grill door, minimizing heat loss. Many come with alarms that alert you when your target temperature is reached. Great for large roasts, briskets, whole chickens, and smoking.
- Cons: The wire can sometimes be a bit cumbersome, and you need to ensure the wire is protected from direct flame.
- Best for: Roasting in the oven, slow-cooking on a smoker, or grilling large cuts that require longer cooking times where constant monitoring is beneficial.
Wireless/Bluetooth/WiFi Thermometers
Taking the concept of the leave-in probe thermometer a step further, these high-tech models communicate wirelessly with a receiver unit or, more commonly, with a smartphone app via Bluetooth or Wi-Fi.
- Pros: Offers unparalleled convenience, allowing you to monitor your meat’s temperature from a distance – even from another room or, with Wi-Fi models, anywhere with an internet connection. Many apps offer graphing of temperature progression, customizable alarms, pre-set temperatures for different meats, and even estimated cooking times.
- Cons: Typically the most expensive option. Can sometimes suffer from connectivity issues depending on distance and obstacles. Relies on batteries, which need to be charged or replaced.
- Best for: Long smoking sessions, large roasts that take hours, entertaining guests (so you don’t have to hover over the grill), or for serious barbecue enthusiasts who want detailed data.
Hybrid Thermometers
Some innovative designs combine features, offering an instant-read probe along with a port for a separate leave-in probe, giving you the best of both worlds. This versatility makes them excellent all-around tools for diverse cooking needs.
Key Features to Look For in a Digital Meat Thermometer
When you’re ready to buy a digital meat thermometer for grilling and roasting, consider these essential features to ensure you pick the right one for your culinary adventures.
Accuracy and Calibration
Accuracy is paramount. Look for thermometers that boast an accuracy of +/- 1°F (or 0.5°C). While many come pre-calibrated, some allow for manual calibration, which is a great feature for long-term reliability. A thermometer that can be recalibrated ensures consistent precision over time.
Temperature Range
Ensure the thermometer can handle the temperatures you’ll be cooking at. Most meat thermometers have a range from freezing to well over 500°F (260°C), which is suitable for most grilling and roasting. If you’re into high-heat searing, check for higher maximum temperatures.
Response Time
For instant-read thermometers, speed matters. Look for models that provide readings in 2-5 seconds. Slower thermometers mean more heat loss from your oven or grill, and more time standing around.
Probe Design and Material
Stainless steel probes are standard due to their durability and heat resistance. Look for thin, sharp tips that minimize the hole in your meat, preventing juice loss. For leave-in probes, ensure the wire is heat-resistant enough for your intended use (e.g., grill grates or oven doors). Some probes are specifically designed for thicker cuts.
Display and Readability
A large, clear, backlit LCD display is a huge plus, especially when cooking outdoors in varying light conditions or late at night. Easy-to-read numbers are essential for quick checks.
Durability and Water Resistance
Grilling and roasting can be messy. Look for thermometers that are splash-proof or even waterproof, making them easier to clean and more durable in a busy kitchen or outdoor environment. A robust construction can withstand accidental drops.
Additional Features
- Alarms: Crucial for leave-in models, alerting you when your target temperature is reached.
- Timers: Some models combine a countdown timer with temperature monitoring.
- Pre-set Temperatures: Handy for beginners, offering USDA-recommended temperatures for different types of meat. However, always double-check these against official guidelines or your preference.
- Magnetic Back/Stand: Allows for convenient storage or propping up on a counter.
Mastering the Art: How to Use Your Digital Meat Thermometer for Grilling and Roasting
Possessing a great thermometer is only half the battle; knowing how to use it correctly is the other. Here’s your guide to temperature mastery:
Before You Start
- Read the Manual: Seriously, every thermometer is a bit different. Understand its specific features, temperature range, and cleaning instructions.
- Check Batteries: Always ensure your thermometer has fresh batteries before a big cook.
- Calibration Check (if applicable): If your thermometer can be calibrated, or if you want to check its accuracy, use the ice bath method (a mix of crushed ice and water should read 32°F / 0°C) or boiling water method (should read 212°F / 100°C at sea level).
Probe Placement is Key
This is critical for accurate readings. Always insert the probe into the thickest part of the meat, avoiding bones, gristle, or large pockets of fat. Bones conduct heat differently and can give an artificially high reading, while fat pockets can give an artificially low reading.
- Whole Chicken/Turkey: Insert into the thickest part of the thigh, avoiding the bone.
- Roasts (Beef, Pork, Lamb): Insert into the center of the thickest part, ensuring the tip is not touching any bones.
- Steaks/Chops: Insert horizontally into the side of the cut, ensuring the tip reaches the center.
- Burgers/Patties: Insert into the side or top, ensuring the tip is in the very center.
For large cuts, it’s a good idea to take readings in a couple of different spots to ensure even cooking.
Monitoring During Grilling/Roasting
- Instant-Read: Use these for quick checks. Open the grill or oven as little as possible to maintain consistent temperature. Insert, wait for the stable reading, remove, and close.
- Leave-In/Wireless: Place the probe in the meat before cooking begins. Set your desired target temperature on the base unit or app. Monitor from a distance. The alarm will tell you when it’s time!
Understanding Doneness Temperatures
While personal preference plays a role, these USDA-recommended safe minimum internal temperatures are essential for food safety:
| Meat Type | Minimum Internal Temperature | Doneness/Notes |
| :——————– | :————————— | :————————————————— |
| Beef, Pork, Lamb (roasts, steaks, chops) | 145°F (63°C) | Medium-Rare (pull at 130-135°F for carryover) |
| | 160°F (71°C) | Medium |
| | 170°F (77°C) | Well-Done |
| Ground Meats (Beef, Pork, Veal, Lamb) | 160°F (71°C) | Safe for all ground meats |
| Poultry (whole, parts, ground) | 165°F (74°C) | Safe for all poultry |
| Fish | 145°F (63°C) | Flaky and opaque |
| Fresh Ham (Raw) | 145°F (63°C) | |
| Leftovers/Casseroles | 165°F (74°C) | Reheating temperature |
Always allow for a 3-minute rest time after removing meat from the heat for safety.
The Importance of Resting Meat
Once your meat reaches its target temperature, remove it from the heat. This is where “carryover cooking” comes into play. The internal temperature will continue to rise by a few degrees (typically 5-10°F or 3-6°C) as the meat rests due to residual heat. Rest your meat, loosely tented with foil, for 5-20 minutes depending on its size. This crucial step allows the juices to redistribute throughout the meat, resulting in a more tender and flavorful product.
Tips and Best Practices for Using Your Digital Meat Thermometer
To get the most out of your digital meat thermometer for grilling and roasting, keep these tips in mind:
- Check Multiple Spots (for large cuts): Even with proper placement, large roasts or whole poultry can cook unevenly. Take a reading in a second or third spot to confirm consistent doneness.
- Clean Your Thermometer Properly: After every use, wipe down the probe with hot, soapy water or an antibacterial wipe. Never submerge the entire unit unless it’s specifically rated as fully waterproof.
- Store It Safely: Protect the probe and screen from damage. Many come with protective sleeves or cases.
- Keep Spare Batteries: Nothing’s worse than being halfway through a cook and your thermometer dying. Have a fresh set of batteries on hand.
- Don’t Trust Color Alone: The color of meat (especially poultry) is not a reliable indicator of doneness. Always trust your thermometer.
- Account for Carryover Cooking: If you’re aiming for 145°F, pull your meat off the heat when it hits 140-142°F, letting it rise the rest of the way during resting.
- Calibrate Regularly: If your thermometer allows for calibration, make it a habit to check its accuracy every few months or if you suspect it’s off.
- Know Your Thermometer’s Limitations: Don’t leave an instant-read thermometer in the oven, and don’t expose probes to temperatures beyond their stated maximums.
Common Mistakes to Avoid When Using a Digital Meat Thermometer
Even with the best intentions, it’s easy to make mistakes. Here are some pitfalls to steer clear of:
- Probing Too Shallowly or Hitting Bone/Fat: As discussed, improper probe placement leads to inaccurate readings. Always aim for the very center of the thickest part of the muscle, avoiding bone or large fat pockets.
- Not Accounting for Carryover Cooking: Pulling meat at the exact target temperature means it will likely be overcooked after resting. Always pull it a few degrees below your desired final temperature.
- Ignoring Cleaning: A dirty probe can transfer bacteria between foods and give inaccurate readings due to residue buildup. Cleanliness is key for both safety and accuracy.
- Assuming Pre-set Temperatures Are Always Right: While convenient, pre-set temperature buttons are often generic. Always cross-reference with USDA guidelines or your personal preference, and adjust if necessary.
- Not Knowing Your Thermometer’s Range: Trying to measure boiling sugar with a meat thermometer not designed for such high temperatures can damage it. Similarly, using an oven-safe probe in a super-hot fryer might not be advisable unless specified.
- Using an Uncalibrated Thermometer: An inaccurate thermometer is worse than no thermometer because it gives you a false sense of security. Periodically check its calibration.
- Not Using It At All! The biggest mistake is not leveraging this invaluable tool. Stop guessing and start cooking with confidence!
Beyond the Basics: Advanced Tips for Temperature Mastery
Once you’re comfortable with the fundamentals, here are a few advanced tips to truly master your cooks:
- Monitoring Ambient Grill/Oven Temperature: Some probe thermometers come with a second probe designed to measure the ambient air temperature inside your grill or smoker. This is crucial for long, slow cooks like brisket or pork shoulder, where maintaining a consistent cooking environment is just as important as the meat’s internal temperature.
- Using Multiple Probes for Large Cuts: For very large roasts or whole turkeys, using a thermometer with multiple probes allows you to monitor different sections simultaneously, ensuring even cooking throughout. One probe might go in the breast, another in the thigh, for instance.
- Troubleshooting Common Issues: If your readings seem off, first check the battery, then perform a calibration test. Ensure the probe is fully inserted into the meat and not touching anything else. If using a wireless model, check for signal interference or distance issues.
FAQ Section
How often should I calibrate my digital meat thermometer?
Ideally, you should check the calibration of your thermometer every few months, especially if you use it frequently, or if you suspect it’s giving inaccurate readings. The ice bath test (32°F / 0°C) is a quick and easy way to do this.
Can I leave my instant-read thermometer in the oven/grill?
No, absolutely not. Instant-read thermometers are designed for quick spot checks and are not built to withstand the continuous high temperatures of an oven, grill, or smoker. Leaving one in will likely damage it, void its warranty, and could even be a safety hazard. Use a leave-in probe thermometer for continuous monitoring.
What’s the main difference between a probe thermometer and an instant-read?
An instant-read thermometer gives you a quick reading when inserted, but cannot be left in the food during cooking. A probe thermometer (wired or wireless) is designed to stay in the food throughout the cooking process, allowing for continuous monitoring and often featuring alarms.
How do I clean my meat thermometer?
For most digital thermometers, simply wipe the probe with hot, soapy water after each use. You can use an antibacterial wipe for extra sanitization. Be careful not to submerge the main display unit unless the product is specifically rated as fully waterproof. Dry thoroughly before storing.
My thermometer reads “LO” or “HI” – what does that mean?
“LO” usually means the temperature is below the thermometer’s minimum measurable range (e.g., in a very cold freezer). “HI” means the temperature is above its maximum measurable range (e.g., inserted into a too-hot oven or boiling oil that exceeds its limit). It’s also a common error message if the probe isn’t properly connected to the base unit or if the battery is very low.
Is an expensive thermometer always better?
Not necessarily, but there’s often a correlation between price and features like accuracy, speed, durability, and additional functionalities (e.g., Bluetooth, multiple probes). You can find excellent value in mid-range models. The “best” thermometer depends on your specific cooking needs and budget.
Can I use a meat thermometer for liquids or bread?
Yes, many digital meat thermometers are versatile enough for other uses. They can accurately measure the temperature of oil for frying, water for brewing, or even the internal temperature of bread to ensure it’s fully baked. Just ensure the temperature range is appropriate for the task.
Why is my meat still tough even at the right temperature?
Several factors can contribute to tough meat even if it’s cooked to the correct internal temperature. These include not allowing the meat to rest after cooking (leading to dry, tough meat as juices escape), using a tough cut of meat that requires low-and-slow cooking methods (like brisket or chuck roast), or cooking at too high a temperature too quickly.
What is carryover cooking and why is it important?
Carryover cooking is the phenomenon where meat continues to cook and its internal temperature rises by several degrees (typically 5-10°F or 3-6°C) even after it’s removed from the heat source. This is due to the residual heat in the meat. It’s crucial because it means you should pull your meat off the heat a few degrees before its target temperature, allowing it to reach the desired doneness during the resting period without overcooking.
How accurate are digital meat thermometers?
Most high-quality digital meat thermometers are very accurate, typically within +/- 1°F (or 0.5°C). This level of precision is more than sufficient for home cooking and ensures reliable results. Always check the manufacturer’s specifications for accuracy.
Conclusion
Gone are the days of uncertainty and culinary disappointment. A digital meat thermometer for grilling and roasting is more than just a tool; it’s an investment in consistently delicious, perfectly cooked, and safely prepared meals. Whether you’re a seasoned pitmaster or just starting your journey into the world of grilling and roasting, embracing the power of accurate temperature monitoring will transform your cooking. So go ahead, pick out the perfect thermometer, learn its ins and outs, and get ready to impress your taste buds and your guests with flawlessly cooked meat, every single time. Happy cooking!